Category Archives: Images & Videos

Colorizing Historic Illustrations from Still’s Underground Railroad (1872)

By Forbes

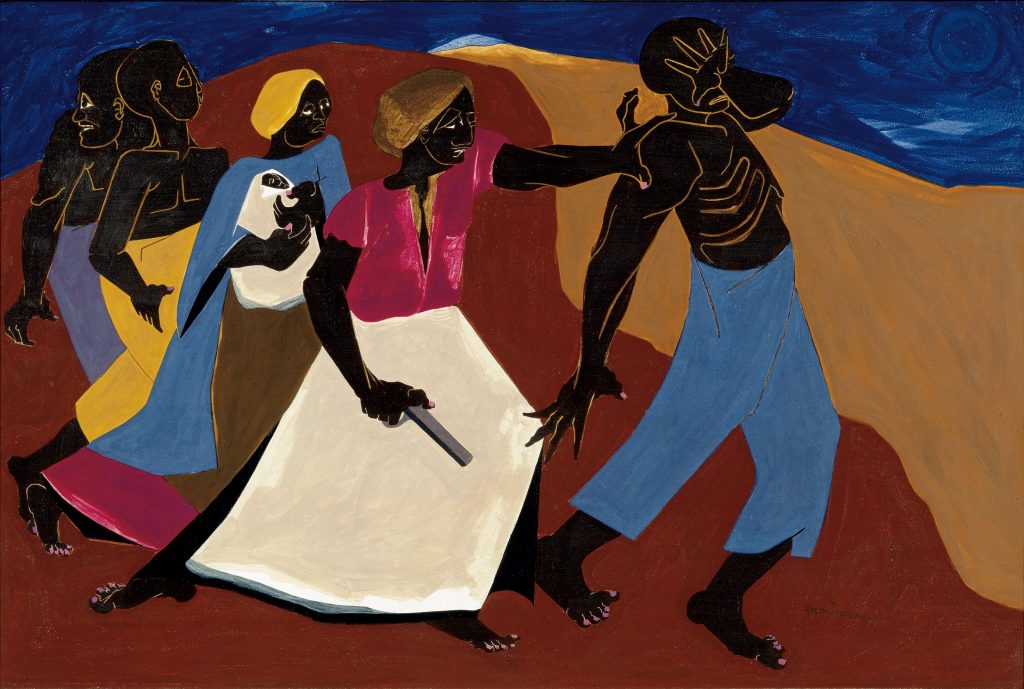
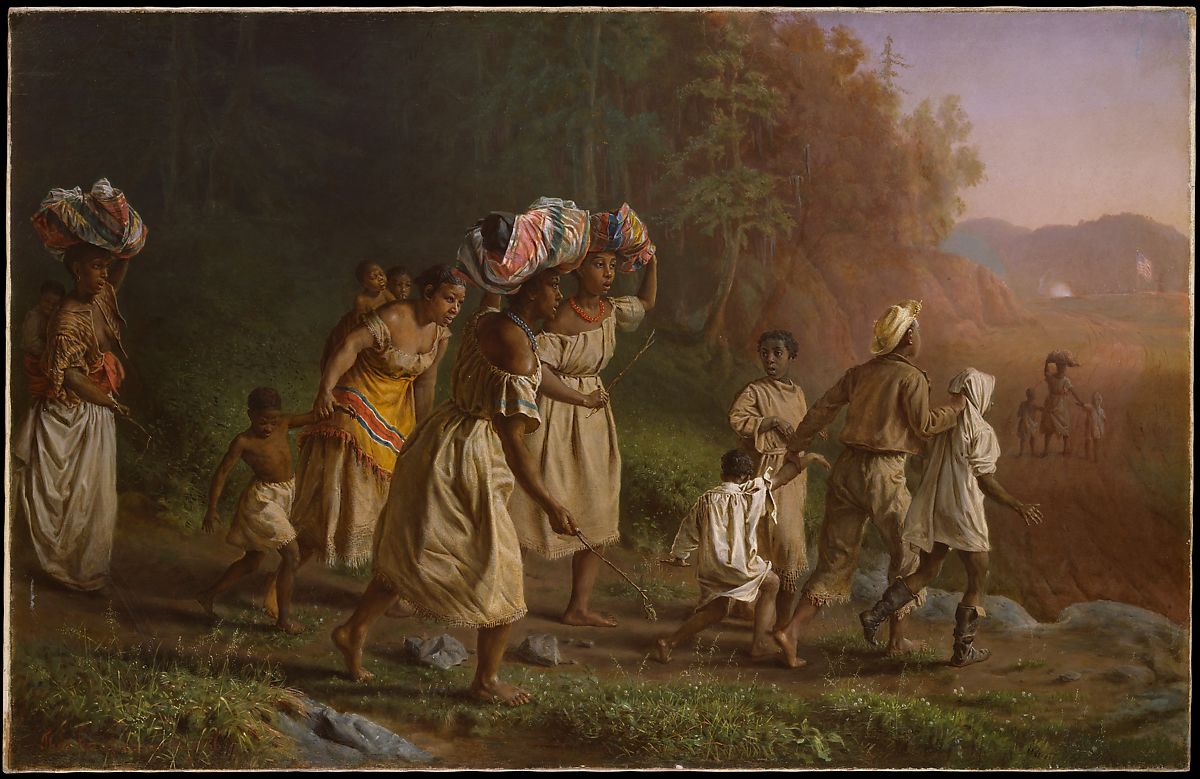
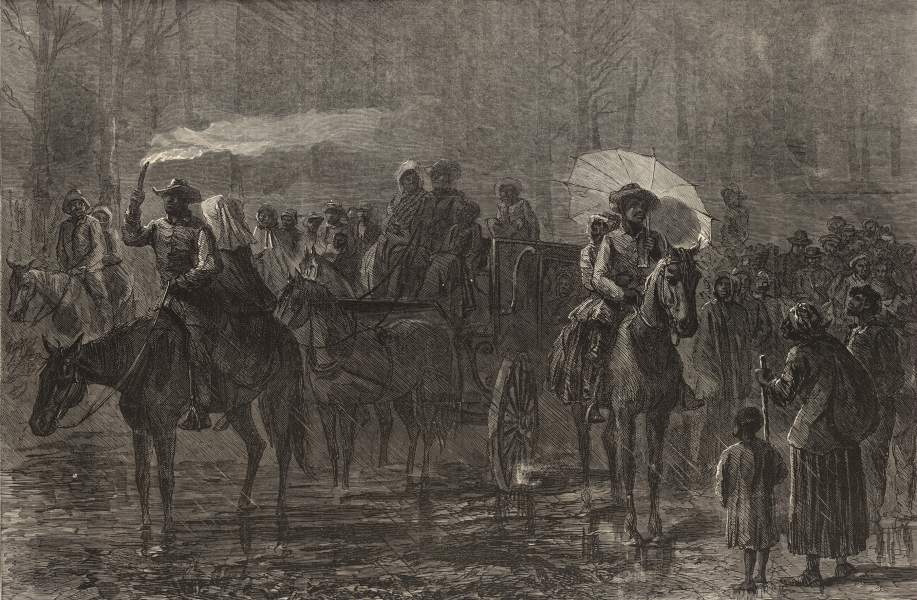
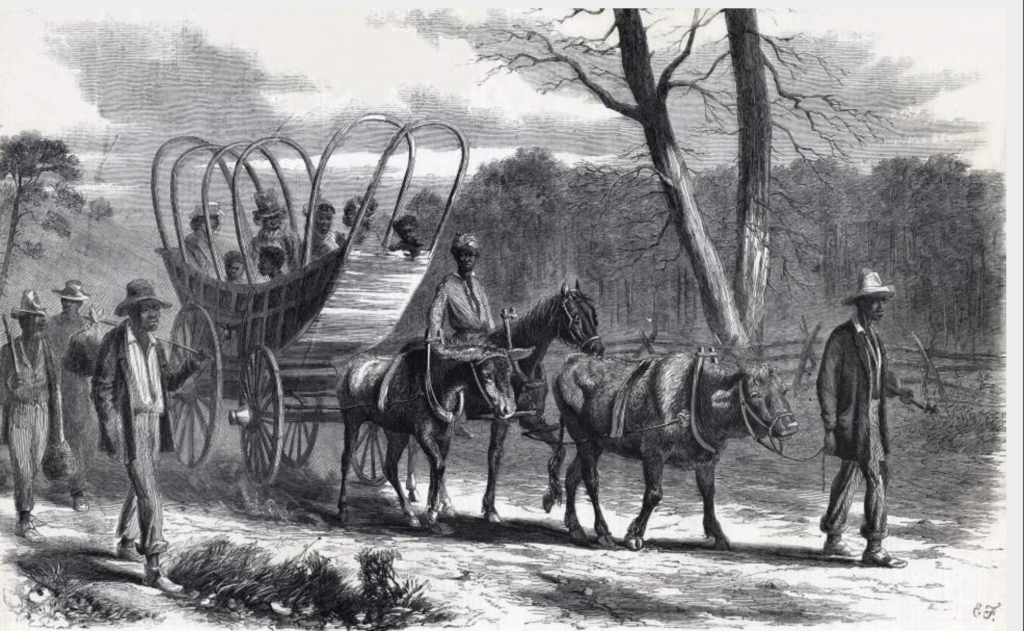
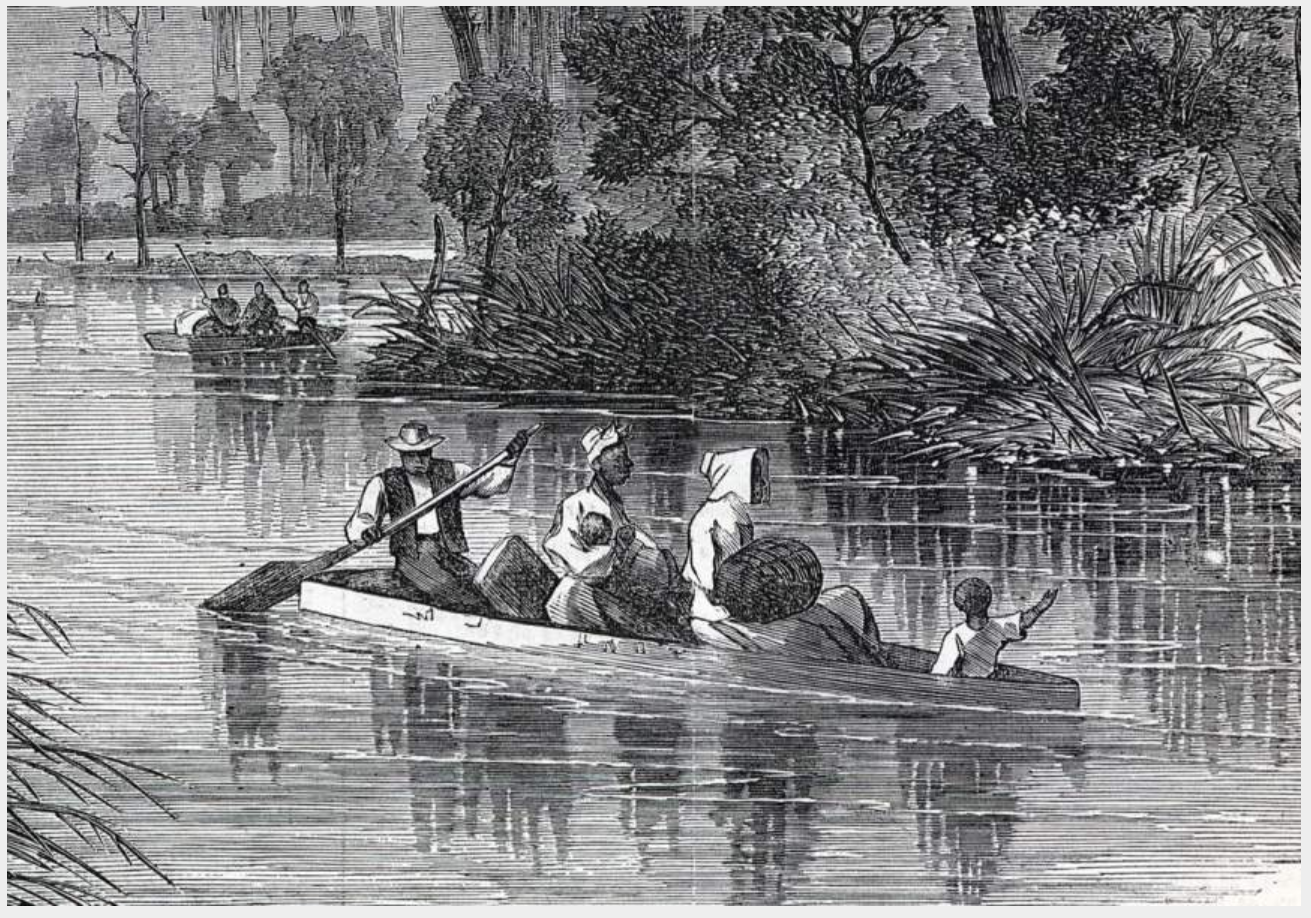
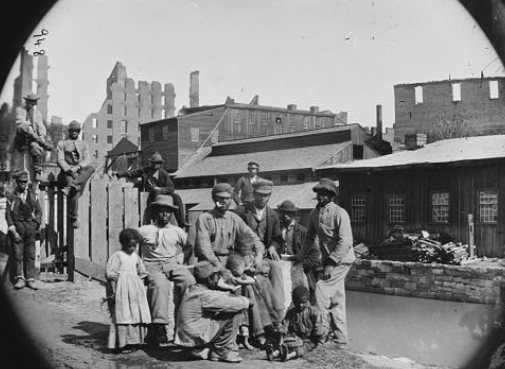
At the House Divided Project , we are starting to colorize the dozens of richly engraved illustrations by John Osler and other artists which first appeared in William Still’s Underground Road (1872).  Most of these scenes depict dramatic Underground Railroad escapes documented in the antebellum records of the Philadelphia Vigilance Committee.  Over the years, we’ve experimented with several other colorizing projects, including most notably for the Dickinson & Slavery initiative.  This current effort with Still’s famous illustrations is designed to support our work with the National Park Service Network to Freedom.

Brown

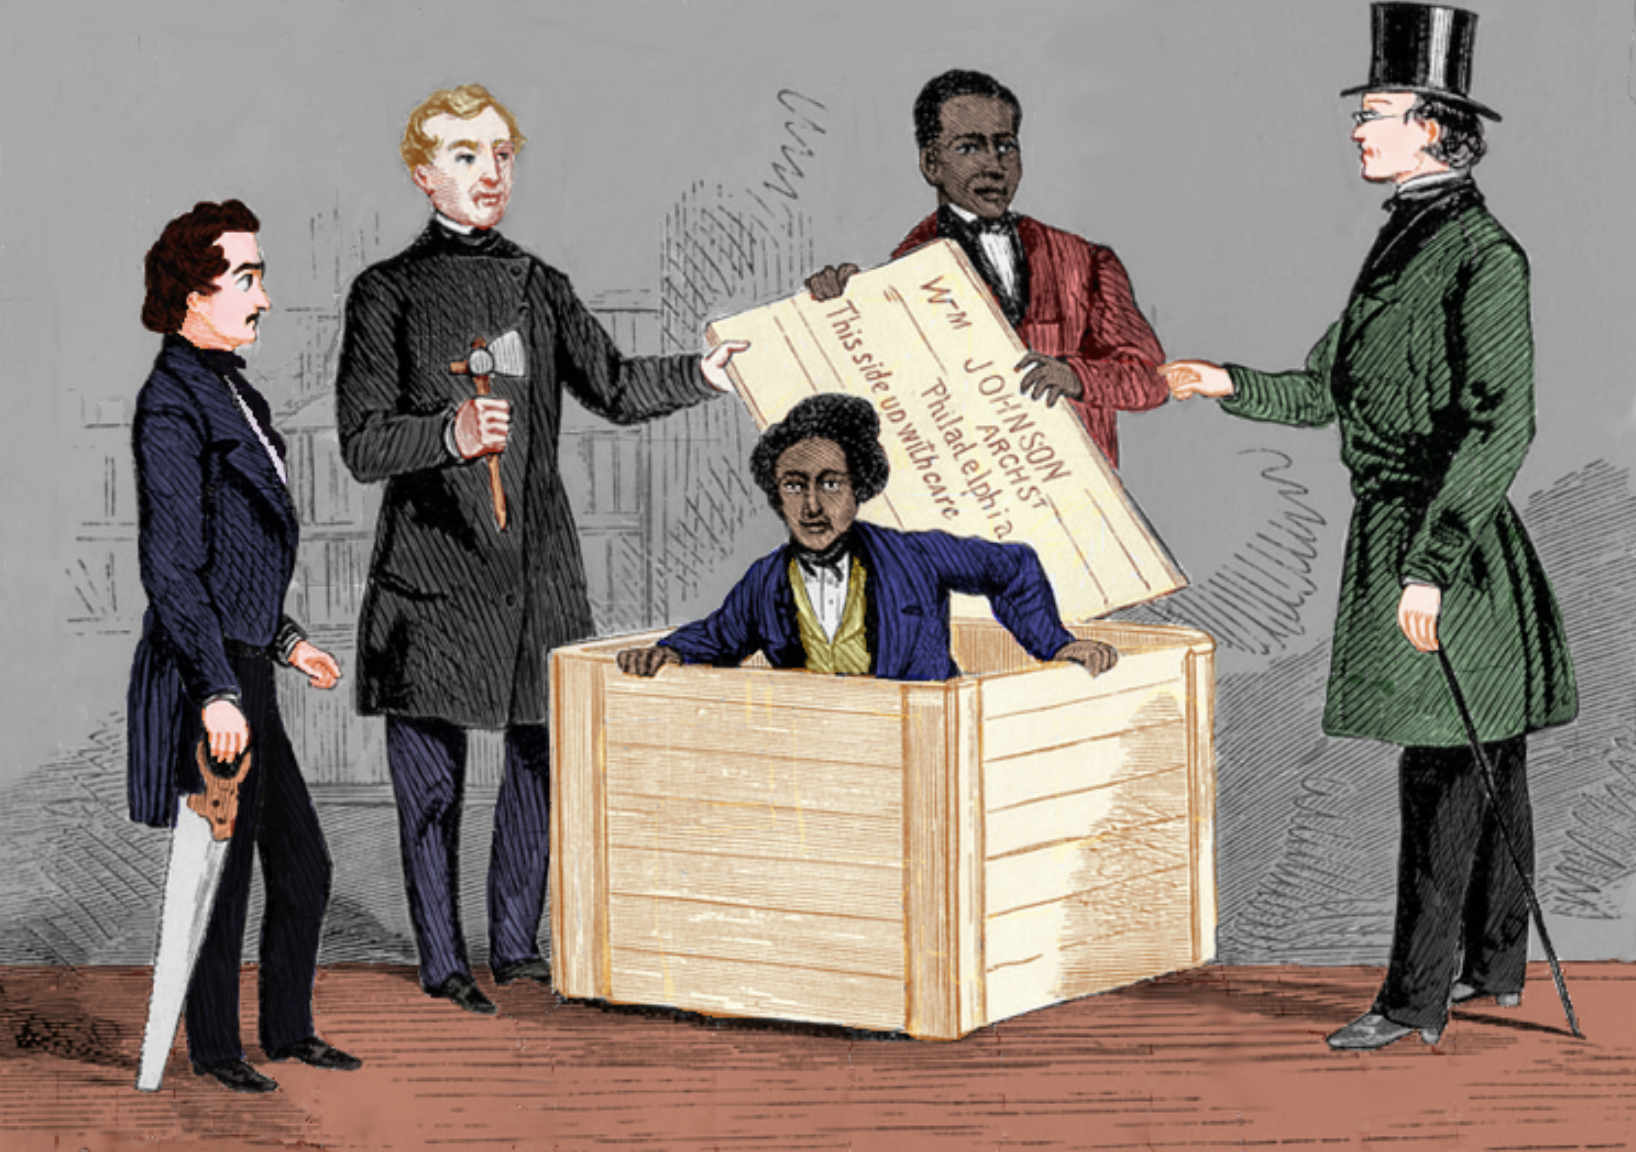
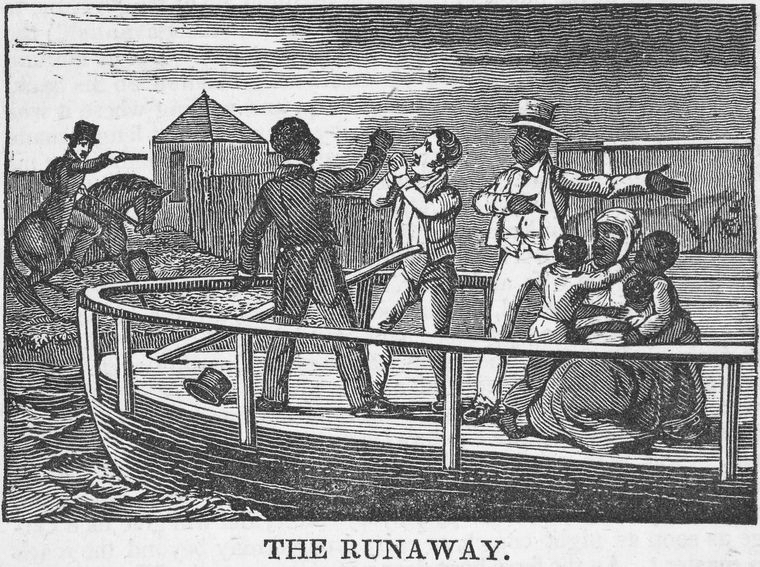
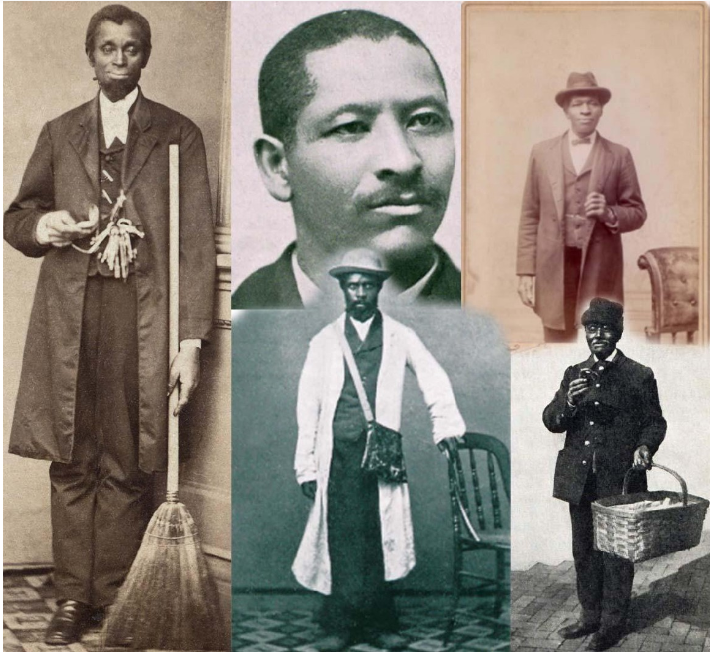
Henry “Box” Brown (1849), colorized by Forbes (House Divided Project)

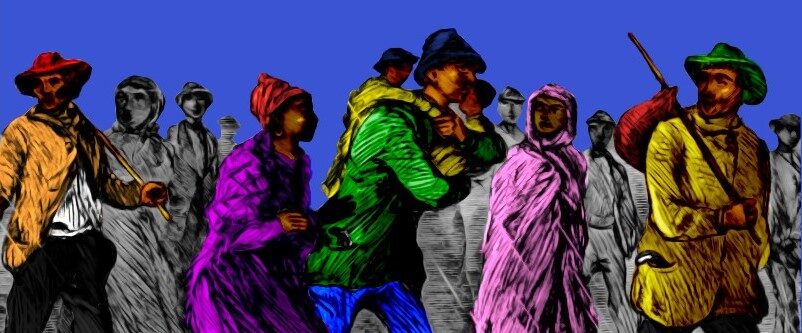
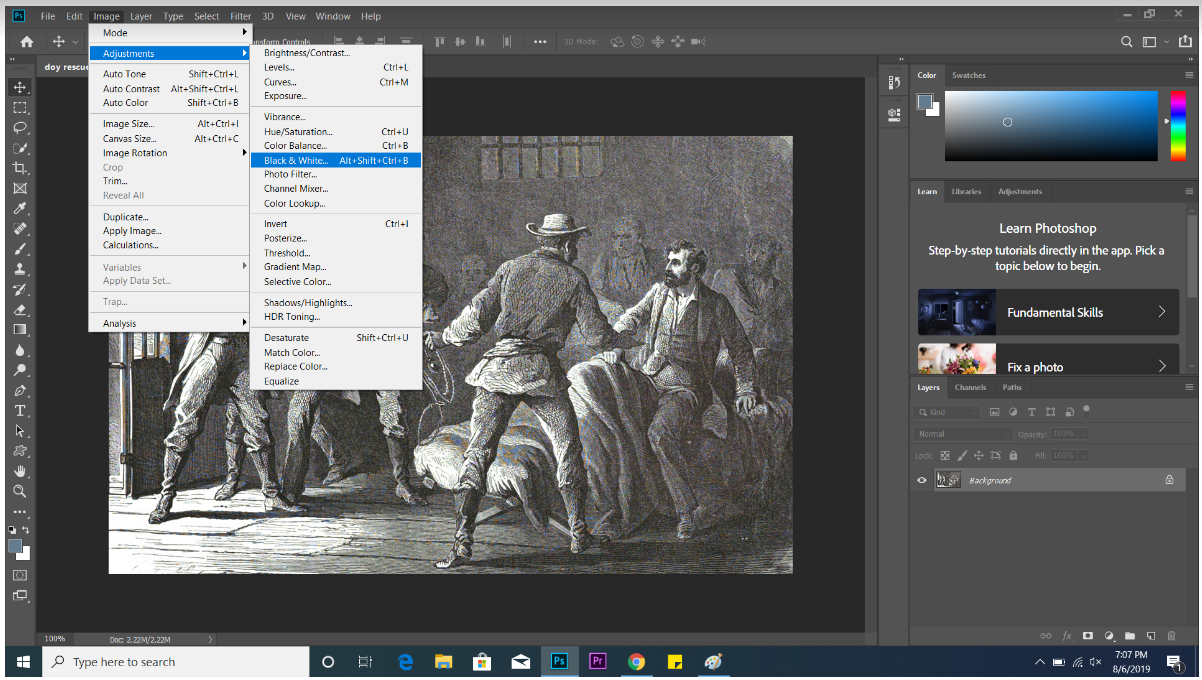
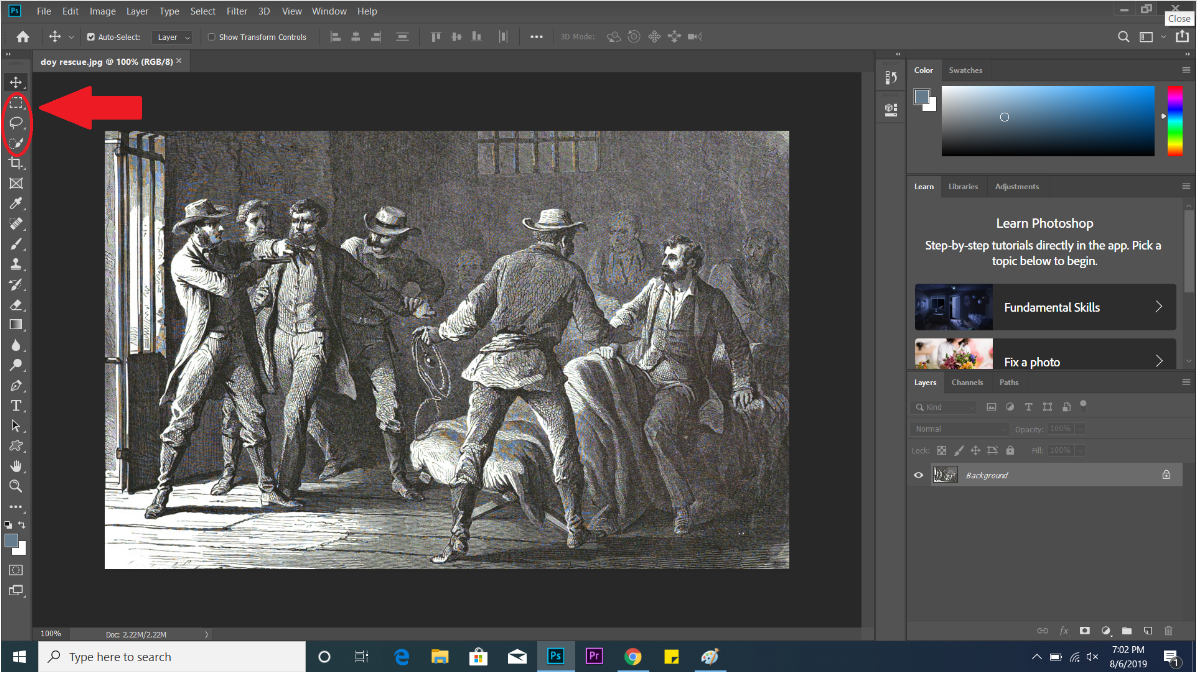
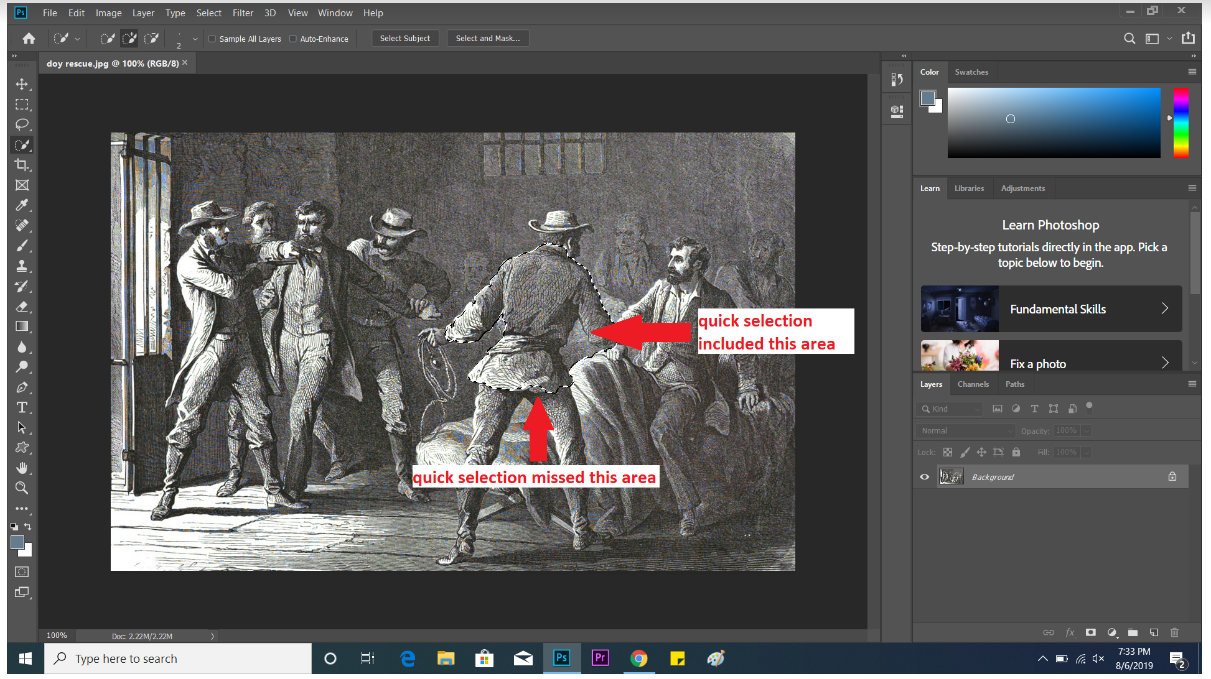
When in the process of colorizing, sometimes you will encounter historic illustrations which were not created to look fully realistic and which require a different approach to colorizing than with historic photographs.  One way to colorize such images is to use brighter colors and less subtle tint differences; more like a cartoon or graphic novel than an attempt at realism.  This post contains directions concerning how best to complete this process.

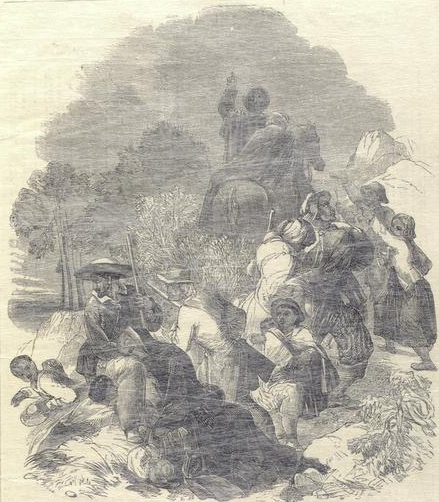
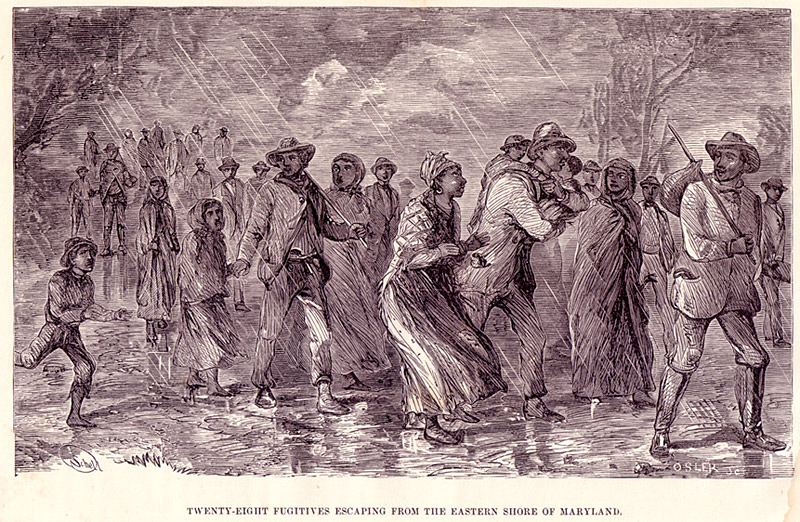
Cambridge MD (1857), colorized by Gabe Pinsker (House Divided Project)

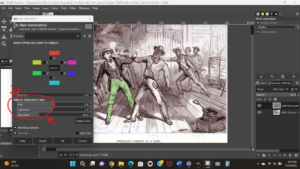
How to Colorize Using the Editing Software ‘GIMP’

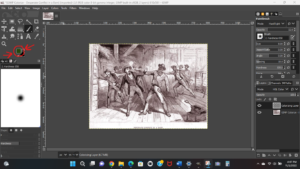
  1. Open GIMP on your computer, then click the word “File” in that window’s upper left corner.  Select “Open”, and then select the file you wish to colorize.
  2. In the same line of options from which you selected “File”, look for “Layer”.  Click on that word, and then select “New Layer…” from the drop-down menu.
  3. When you click “New Layer…”, a window should open, and the lowest option on the window should be labeled “Fill with”.  Select “Transparency”.  Make sure that the “Opacity” option is at 100, and then click “OK”.
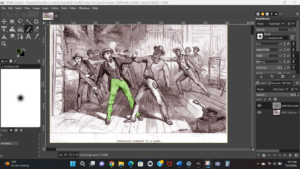
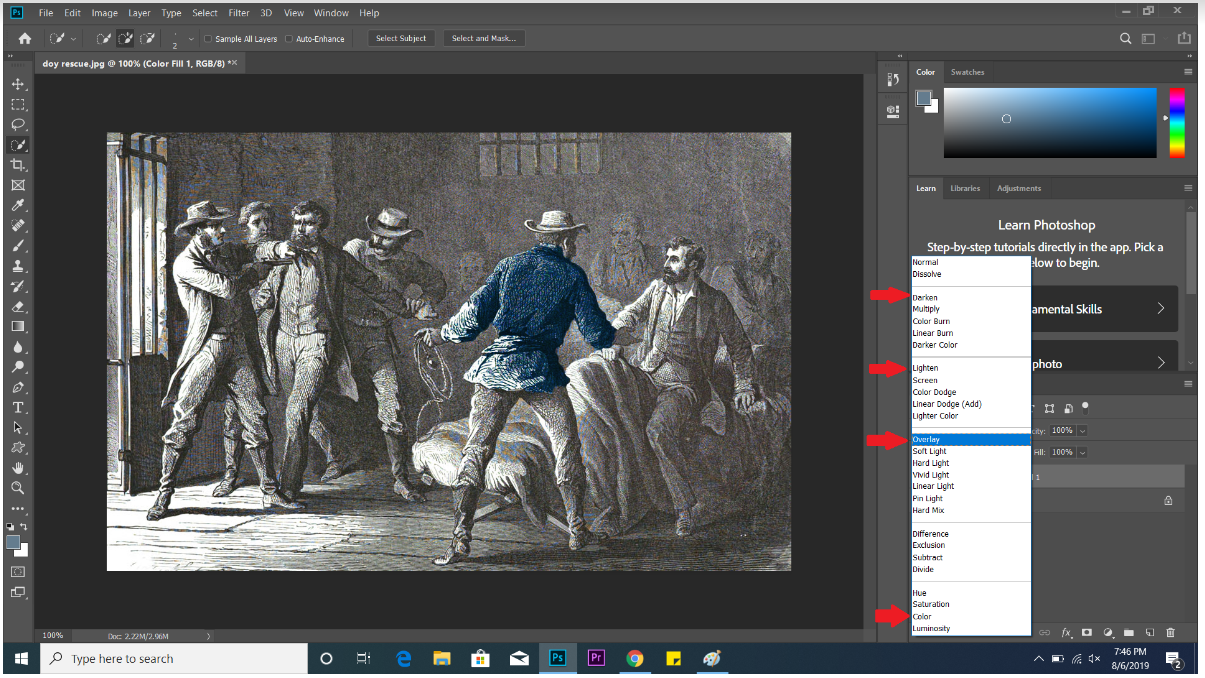
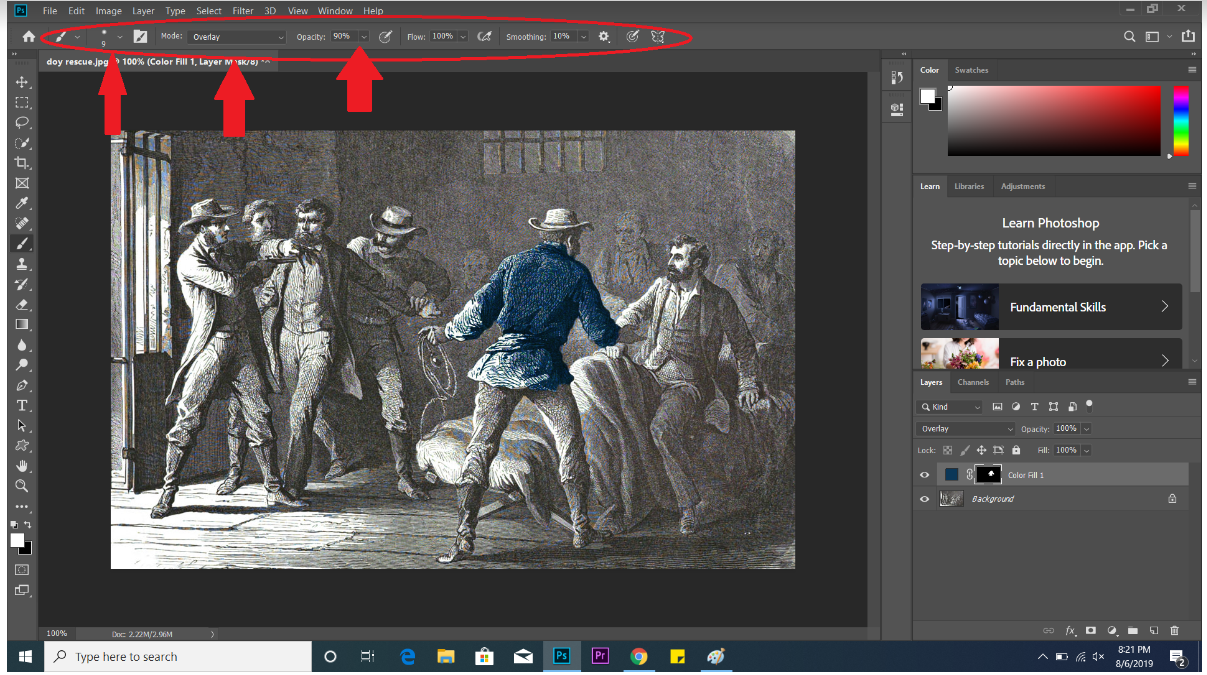
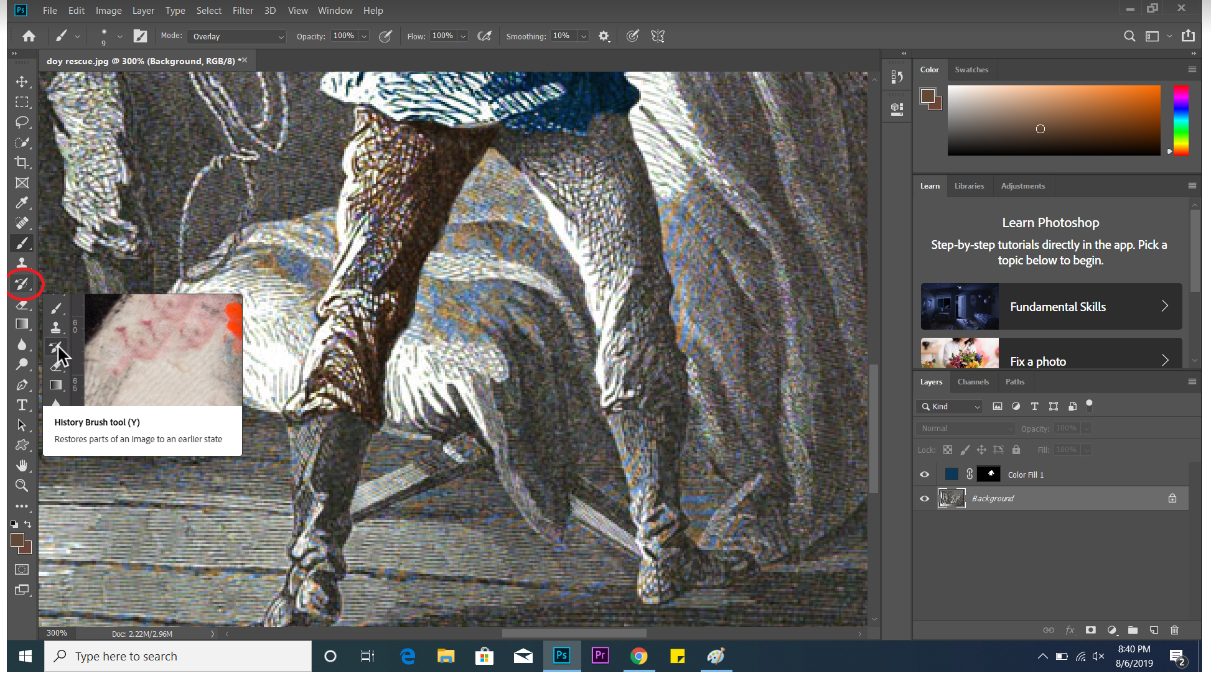
  4. Select the Paintbrush tool out of the grid of possible tools in the upper left corner of the screen.  A small window should pop up, titled “Tool Options”.  (If this window does not show up, see step 4a.)  In that window, there will be a section titled “Mode” which should be clickable.  Open its drop-down menu, scroll to “Hard light”, and select that option.(4a. To access “Tool Options” (if it does not pop up automatically when you begin to use the Paintbrush), click on “Windows” in the menu bar at the top of the page.  Hover your mouse over “Dockable Dialogues”, and you should see “Tool Options” at the top of the drop-down menu that appears.  Click “Tool Options”.  A window in which you can adjust opacity levels, brush size, and other metrics as you please should open.)
  5. Now you can begin colorization!  Below the paintbrush icon in the corner of the screen, there will be two squares: one black and one white.  Click on the square to the left and on top of the other.  This allows you to select a specific color using various scales, and then use that color on your illustration.
  6. After you pick a color, click and drag on top of the illustration, and color should appear and follow underneath your mouse.  It should not remove the picture’s details from view; it will just color over them.  If the brushstrokes are too opaque or unable to be seen, that can be fixed in the “Tool Options” window.
  7. If a color you have chosen does not show up optimally, it is possible to edit.  In the same line of options as “File” and “Layer” is a “Color” option.  Click on that to open a drop-down menu, and then select “Hue Saturation”.  Once you click that option, a window with several scales inside of it should show up.  “Hue”, “Lightness”, and “Saturation” can be changed to modify the color of your selection.

Illustrations of Enslaved Resistance

We have collected here a variety of contemporary and modern images depicting resistance by enslaved African Americans as the resisted slavery or recapture.  Publication dates are in parentheses on the right.

1831 || Nat Turner’s Revolt in Virginia (1831)

Depiction of Nat Turner Rebellion published in 1831; artist unknown (Library of Congress)

1850 || Broadside Against Fugitive Slave Law (1850)

Popular illustration attacking cruelty of Fugitive Slave Law in 1850;  Created by Theodor Kaufmann // Library of Congress

1851  ||  Christiana (PA) Riot (1872)

Engraving published in William Still, The Underground Railroad in 1872 that shows the events of the Christiana riots where a shootout occurred between hunters and a dozen black men who were protecting the runaways.

1853 || Freedom Seekers Cornered in Maryland Barn (1872)

Runaways heading toward Gettysburg, PA get into a shootout with white men in a Maryland barn, Illustration and details in William Still’s The Underground Rail Road (1872) // House Divided Project

1855  ||  Resistance in Maryland (1872)

Five out of six Virginia runaways successfully escaped after resisting attempts at recapture in 1855;  from William Still’s The Underground Rail Road (1872).  Engraving by Charles Reed. (House Divided Project)

1859 || Doy Party Capture in Kansas Territory (1862)

Missouri slave catchers ambushed a group of runaways escorted by Dr. John Doy (an ally of John Brown’s) in 1859. (Illustration from Le Tour du Monde (1862) HathiTrust)

1860  || A Battle on the Chesapeake Bay (1872)

Runaways fight off recapture on the Chespeake Bay in1860; Engraving by John Osler in William Still’s The Underground Railroad (1872) // House Divided Project

1861  ||  Battling the Hunters (1861)

“The Hunted Slaves,” an 1861 painting by British artist Richard Ansdell (Google Arts and Culture)

Illustrations of Group Escapes

1836 ||   Family Attempts to Escape by Boat (1836)

boat escape

A family of freedom seekers attempts to escape via boat // Schomburg Center, New York Public Library

1853 ||   Freedom Seekers Set Out for Canada (1853)

flight north star

A group of freedom seekers follow the North Star towards Canada, as depicted in the Uncle Tom’s Almanac published in 1853 // Schomburg Center, New York Public Library

1856 ||   Six Freedom Seekers Escape on Two Horses (1872)

six on two horses

The escape of six freedom seekers from Maryland in 1856, depicted in William Still’s The Underground Railroad (1872); illustration by John Osler // Schomburg Center, New York Public Library

1857 ||   Cambridge Stampede Liberates 28 African Americans (1872)

A group of an enslaved families escape from Cambridge, MD following advice from Harriet Tubman; depicted in William Still’s The Underground Railroad (1872); illustration by John Osler //  House Divided)

c. 1858 || Jacob Lawrence Depicts Harriet Tubman (1967)

“Forward” by African American artist Jacob Lawrence depicts Harriet Tubman carrying a revolver while leading a  group of runaways to freedom  // North Carolina Museum of Art

1861 || Frank Leslie’s Depicts Contrabands at Fort Monroe (1861)

“Stampede Among the Negroes in Virginia,”  Frank Leslie’s Illustrated Newspaper, June 8, 1861 // Library of Congress

1861  || Harpers Depicts Contrabands Fleeing to Fort Monroe (1861)

“Stampede of Slaves from Hampton to Fortress Monroe,” Harper’s Weekly, August 17, 1861  // Library of Congress

1862 ||  Eastman Johnson Depicts Virginia Contrabands (1862)

Johnson Painting

“A Ride for Liberty” by Eastman Johnson, 1862 // Brooklyn Museum of Art

c. 1862 ||  “On To Liberty” by Theodor Kaufmann (1867)

“On To Liberty” by Theodor Kaufmann depicts a group of wartime runaways or contrabands // The Metropolitan Museum of Art

1863 || Contrabands Coming Into Camp (1863)

Harpers 1863

Sketch by Alfred Waud, Harpers Weekly, January 31, 1863

1863 || Enslaved from Davis Plantation in Mississippi (1863)

Freed slaves from the Jefferson Davis plantation arrive behind Union lines at Chickasaw Bayou in 1863. By Fred B. Schell // House Divided Project

1864 ||  Sailing to Safety (1864)

escape nighttime flatboat

Enslaved people escape aboard a flatboat, from Harper’s Weekly in 1864 // House Divided Project

1864 ||  Fleeing to Freedom (1864)

Contrabands escaping to Union lines by Aflred R. Waud. Harper’s Weekly 1864  // House Divided Project

1864 || Contrabands Entering Union Lines (1864)

Leslies 1864

“The War in Virginia – Contrabands coming to the Union camp,” Sketch by Edwin Forbes, Frank Leslie’s Illustrated Newspaper, August 20, 1864

1865 ||  Escaping to Freedom in North Carolina (1865)

Escaping by boat to Union lines in Wilmington, North Carolina, By Joseph Becker, from Frank Leslie’s Illustrated Newspaper in 1865. (House Divided Project)

Photographs of Wartime Contrabands

c. 1862, Contrabands at Camp Brightwood

Group of Contrabands at Camp Brightwood, Washington, D.C.

Young liberated men behind Union lines near Washington, D.C., c. 1862 (Library of Congress) Photographer unknown.

1862 || Working at General Lafayette’s Headquarters in Virginia

runaway bond people Union soldiers

A group of freed people behind Union lines, near Yorktown, Virginia, May 1862. (Library of Congress) Photograph taken by John F. Gibson.

1862  || Gathering Outside at Cumberland Landing, Virginia

A group of liberated people outside Foller’s house in Cumberland Landing, Virginia in 1862. (Library of Congress) Photograph taken by James F. Gibson.

1862 || Contrabands in Virginia

Two freed men sitting in front of a tent in Culpeper, Virginia in 1862. (Library of Congress) Photograph taken by Timothy H. O’Sullivan.

1863 || Photograph of Gordon, Formerly Enslaved Man

The scourged back of Gordon, a runaway slave, whose photograph was taken at a Union camp in 1863. (The Metropolitan  Museum of Art) 

c. 1864 || Contrabands in army uniforms

A group of freed African American men gathered and dressed in Union army uniforms, c. 1864. (Library of Congress) Photographer unknown.

1865, Gathering in Richmond, Virginia

A group of freedmen gathered near a canal at Haxall’s Mill in Richmond Virginia in 1865. (Library of Congress) Photograph taken by Alexander Gardner.

Our Classroom-Friendly Videos

Students interns on our project have been producing a series of short video documentaries, each 2 to 4 minutes in length, describing important slave stampedes from Missouri in ways designed to help support secondary and college-level history classrooms.  Take a look below or visit the House Divided Project YouTube channel.

1849 CANTON STAMPEDE

One of the very first mass escape attempts from Missouri identified as a “slave stampede” by the national press.  This video describes the story of that failed attempt in 1849 and provides background on the origins of the term.

1852 STE. GENEVIEVE STAMPEDE

This video explores how eight enslaved young men, described in vivid detail by their runaway ads, lost their chance for freedom when they were tricked and betrayed by residents of Illinois.

;

1853 PALMYRA STAMPEDE

A long-overlooked diary entry from an Illinois Underground Railroad operative provides the key for understanding this successful 1853 group escape of eleven enslaved people from Palmyra, Missouri.

1854 ST. LOUIS STAMPEDES

This video details the mounting frustration among pro-slavery forces in Missouri when two separate large groups of enslaved African American families managed to escape from their bondage successfully in November 1854.

1855 MEACHUM / ST. LOUIS STAMPEDE

This documentary short profiles the role of Underground Railroad operative Mary Meachum in an attempt to free several enslaved people from St. Louis in the spring of 1855.  Meachum was arrested but prosecutors dropped the charges against her.  Today, people in the city annually commemorate her efforts (and the sacrifices of the captured enslaved families) at the Freedom Crossing site by the Mississippi River.

1859 DOY / KANSAS STAMPEDE

Have you ever heard of Dr. John Doy?  He was an ally of John Brown who also attempted to liberate enslaved families in 1859.  Like Brown, Doy was captured, but his family and friends succeeded in rescuing him from a Missouri prison.

1859 LAGRANGE STAMPEDE

This video highlights a successful stampede of more than ten freedom seekers from LaGrange, Missouri who eventually joined up in Chicago with about another twenty more runaways from three states, before they presumably escaped to Canada.  Yet all of this happened in November 1859, just weeks after John Brown’s failed raid at Harpers Ferry, Virginia.

1861 HARRIS FAMILY / CHICAGO STAMPEDE

This video tells the forgotten story behind the last attempt to enforce the Fugitive Slave Law in Chicago.  The result of the rendition of the Harris family in April 1861 was a so-called “stampede” of free black residents and former runaways in the city toward Canada.

1862 LOUTRE ISLAND STAMPEDE

In November 1862, a group of enslaved Missourians slipped behind Union lines to secure their freedom.  Their slaveholders tried to recapture them but ultimately, local German American immigrants and Union army officials rallied to protect their freedom.  This video provides helpful context in understanding wartime contraband, confiscation and emancipation policies as they evolved on the ground.

How to Colorize Images in Photoshop

Images are a powerful way to connect to the past. Illustrations and photographs can put
faces and places to names, or give the minute but extremely significant human detail to
historical narratives that may otherwise be bland or irrelevant to people today.

Cons of Colorizing
Some argue that colorization of photos is historical blasphemy. Without knowing exactly what color a city bus was in 1950 or the precise shade of a person’s skin color, adding color to black and white photographs is “misleading” and ruins the integrity of the image. Proponents of photo colorization argue that colorized photographs are not supposed to replace the original or tell a new historical narrative, but that they are meant to provide an interpretation of the image that can make historical photographs—and their stories—more fresh and accessible for people who would otherwise be uninterested in a distant, black and white past.
Not to mention, colorizing historical photos doesn’t have to be completely without historical integrity. Large colorizing projects like the Smithsonian’s America in Color series involved hours of research to identify the accurate colors for buildings, people, clothing, and other objects that appeared in their historical photographs and film.

How to Colorize Using Adobe Photoshop
Doing anything in Photoshop can seem a daunting task to any beginner to the program, but colorizing can be a simple, albeit long process given a working understanding of a few of the program’s tools and functions.

Before you begin, you must select and prepare your image. It is important to select good quality image with high resolution (referring to the number of pixels in the image) and as little grain (spots in the image) or color/fading as possible. The better the quality of the image, the better the finished product will be.

  • Some steps can be taken to improve the image’s quality using Photoshop: From the menu bar at the top, select Image, then Adjustments. If there is any color in the image, like in the example below, select Black and White to remove any extra color that would interfere with the colorization. Altering the brightness, contrast, and exposure can also fix blurriness or too much brightness in an image.

screenshot of Photoshop for colorizing tutorial


Colorize using layers:

Colorizing an image with layers is best for large areas with little variation in color, or as a first step to adding color to your image.

1. First, select the area of the image that you want to color. There are three tools that you can use to make a selection: the regular marquee tool, the lasso tool, and the quick selection tool. The quick selection tool is the optimal choice for creating a layer to colorize; all you need to do is click and drag the mouse in the area you want to color. The quick selection tool will follow the mouse and select all the similar-colored parts of the image. If the area you are colorizing has significant variation in color/shade, the quick selection tool might not select areas that you want, or include areas that you don’t. To erase parts of your selection, press the ALT key on your keyboard, and click and drag the mouse over the area.

screenshot of Photoshop for colorizing tutorial


screenshot of Photoshop for colorizing tutorial
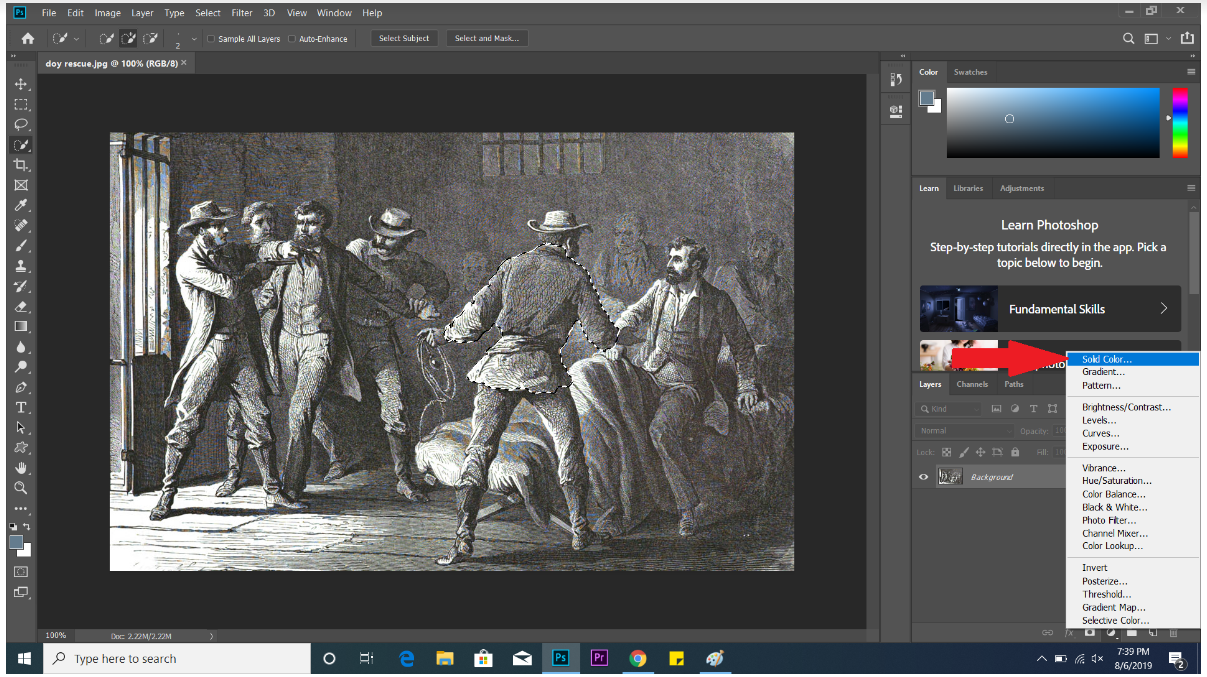
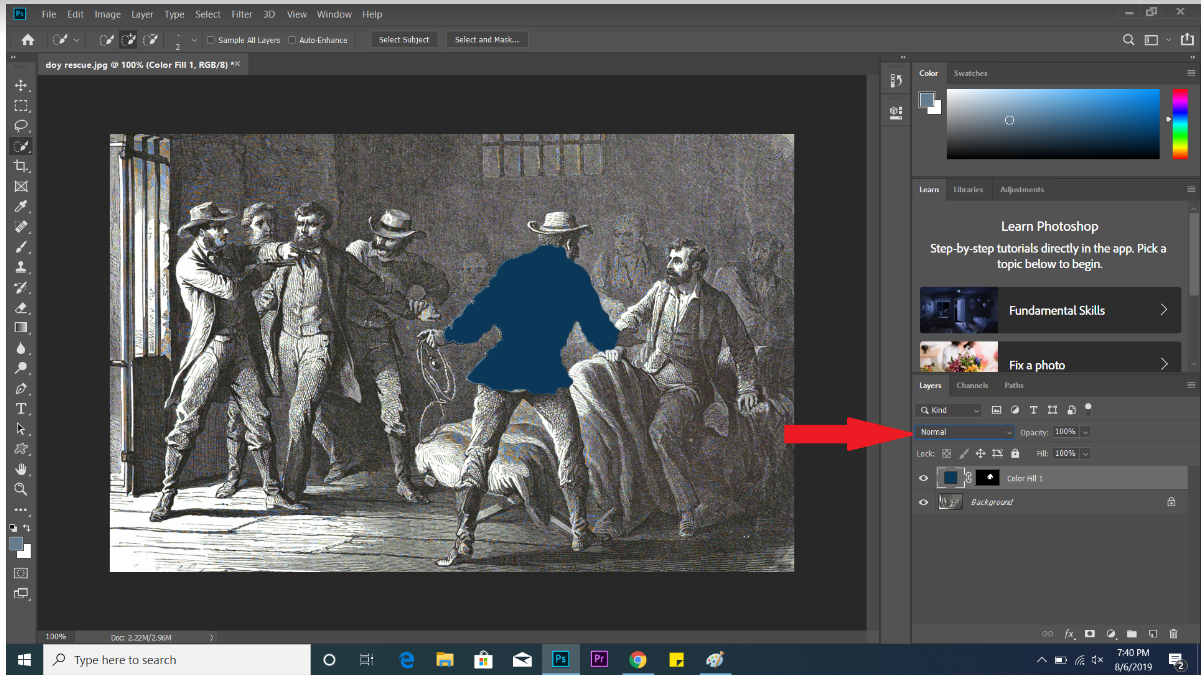
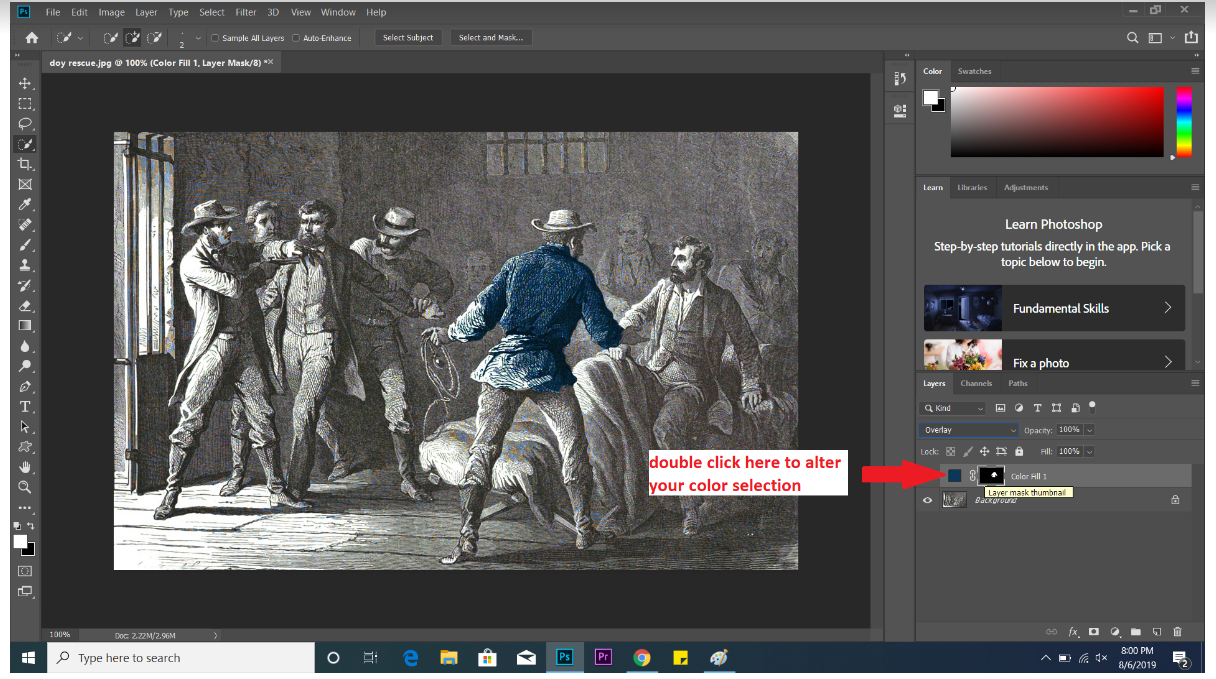
2. Create a new layer. Once your selection has been made, click the tool at the bottom right corner to “create a new fill or adjustment layer.” From the list, select Solid Color, and choose the color that you want to add to your image.

screenshot of Photoshop for colorizing tutorial

screenshot of Photoshop for colorizing tutorial

3. Edit the layer. Right now, the color you just added is completely covering the image. From the drop down menu indicated below, you can change this to make the color blend in more realistically. There are many options to choose from, but Overlay is usually the best. Other options that can work, depending on the brightness/quality of the image, are Lighten, Darken, and Color. You will need to take some time here to see which looks best, and to perfect your color by double clicking on the square of color next to your new layer, and altering it to your liking.

screenshot of Photoshop for colorizing tutorial


screenshot of Photoshop for colorizing tutorial

screenshot of Photoshop for colorizing tutorial

Colorize using paintbrush: Colorizing with paintbrush is better for small details, or adding detail to an already colored layer.

1. Select the Brush tool. Just like with layers, you can choose how the brush adds color to the image by changing the settings in the menu bar along the top. By clicking on the size icon, you can adjust the size and blurriness of the brush tool. From the Mode menu, you can alter the blending of the color into the image; you will want to select from the same options as before: Overlay, Lighten, Darken, and Color. The last important tool in this menu is the opacity tool: this can increase or decrease the transparency of your color, which is helpful if the color is showing up too strongly in the image.

screenshot of Photoshop for colorizing tutorial


screenshot of Photoshop for colorizing tutorial
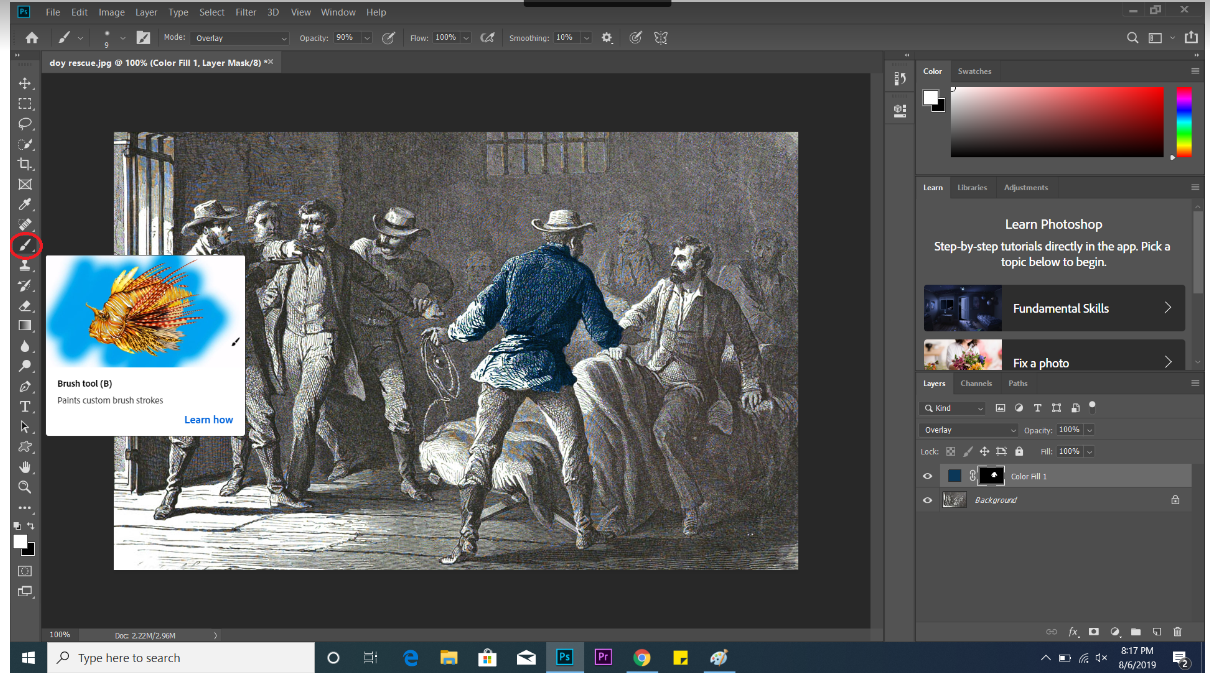
2. Choose your color by selecting “set foreground color” at the bottom-right hand corner of your screen.

screenshot of Photoshop for colorizing tutorial

4. When you are ready, click and drag to brush color onto your image. This allows you more precision and detail than the layers method, but will take more time if you are coloring a large area.

5. If you make a mistake, use the history tool to remove any alterations you made. This tool works the same as the brush tool; just click and drag over the area you want to correct, and it will be reverted to its original state.

screenshot of Photoshop for colorizing tutorial


How to Layer Images in Photoshop or Microsoft Word

Example collage of photographs of Dickinson College staff

Images add detail and visual interest to any multimedia project, but layering multiple images in a collage can create a story all on its own. Even better, it’s very easy to do on any photo editing software, or even Microsoft Word.

How to Layer in Photoshop

1. Once you open Photoshop, select Create New… to start a new project. A window will appear in which you can name your new project and set the size and resolution of your collage. Set the size to your desire, likely based on the size and number of images you wish to include in the collage, and set the resolution to 720 ppi. When you are ready, click
Create.

screenshot of Photoshop for collage tutorial
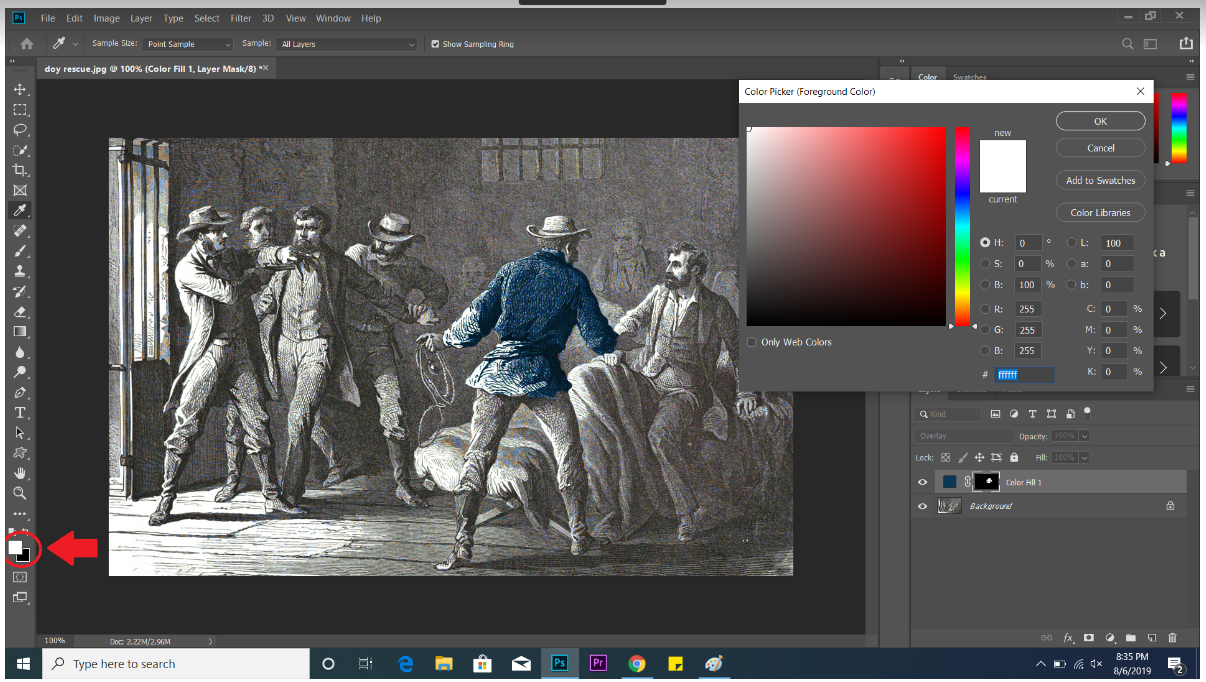
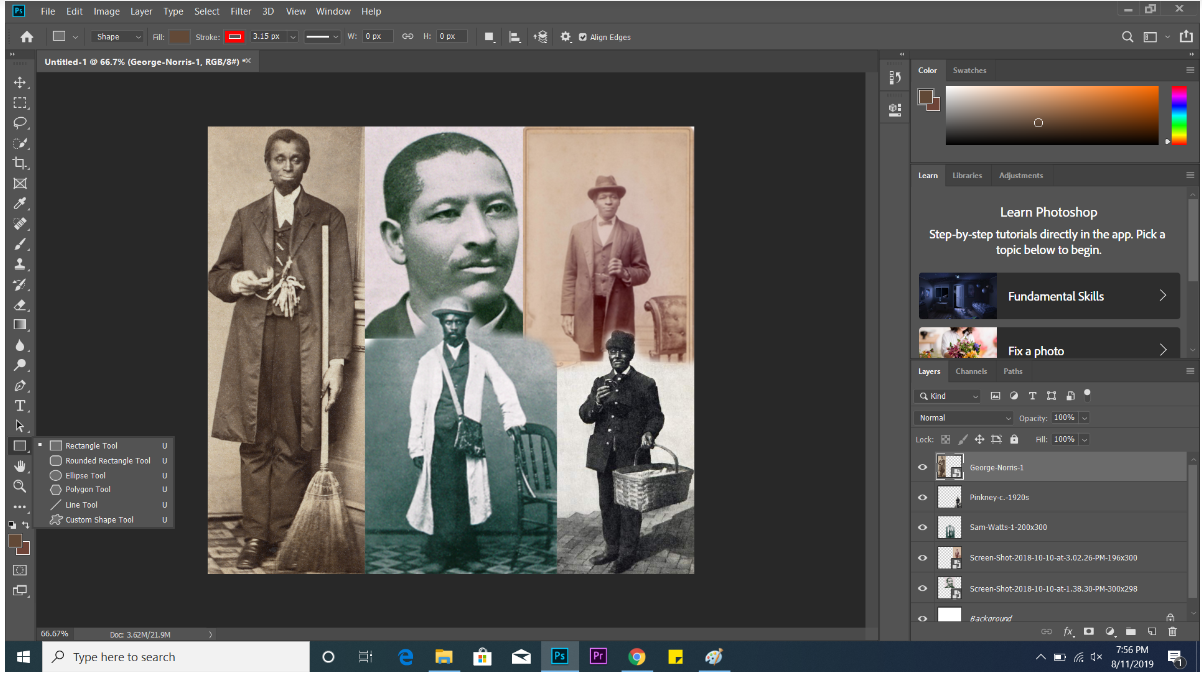
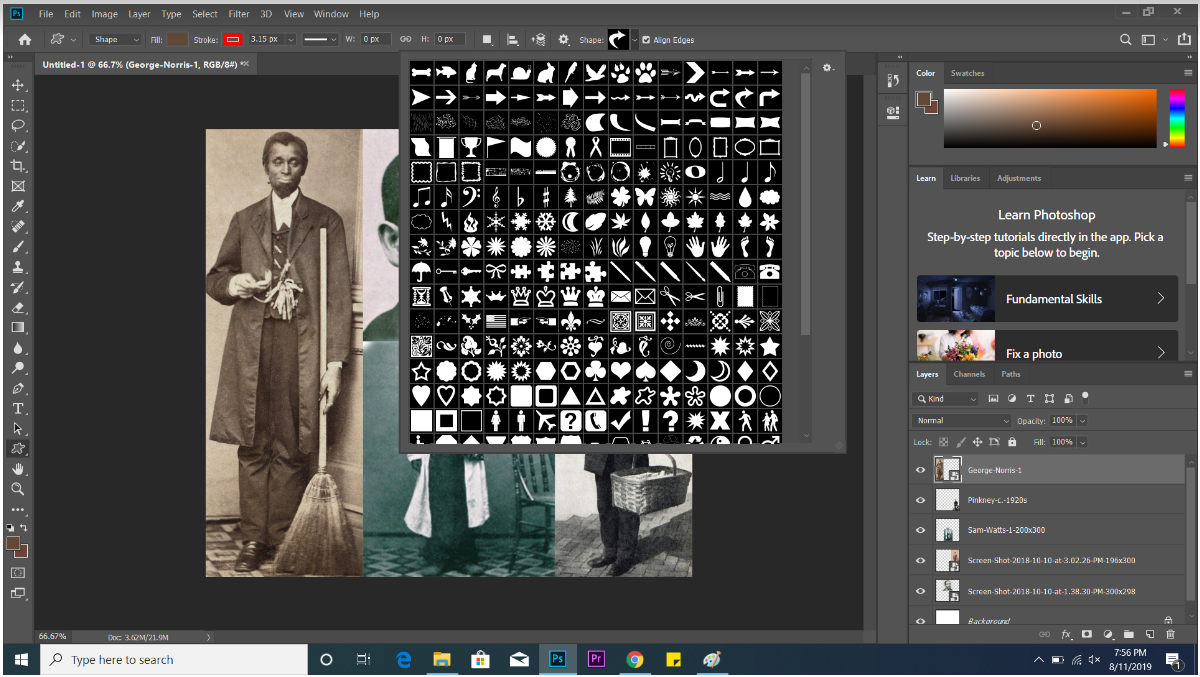
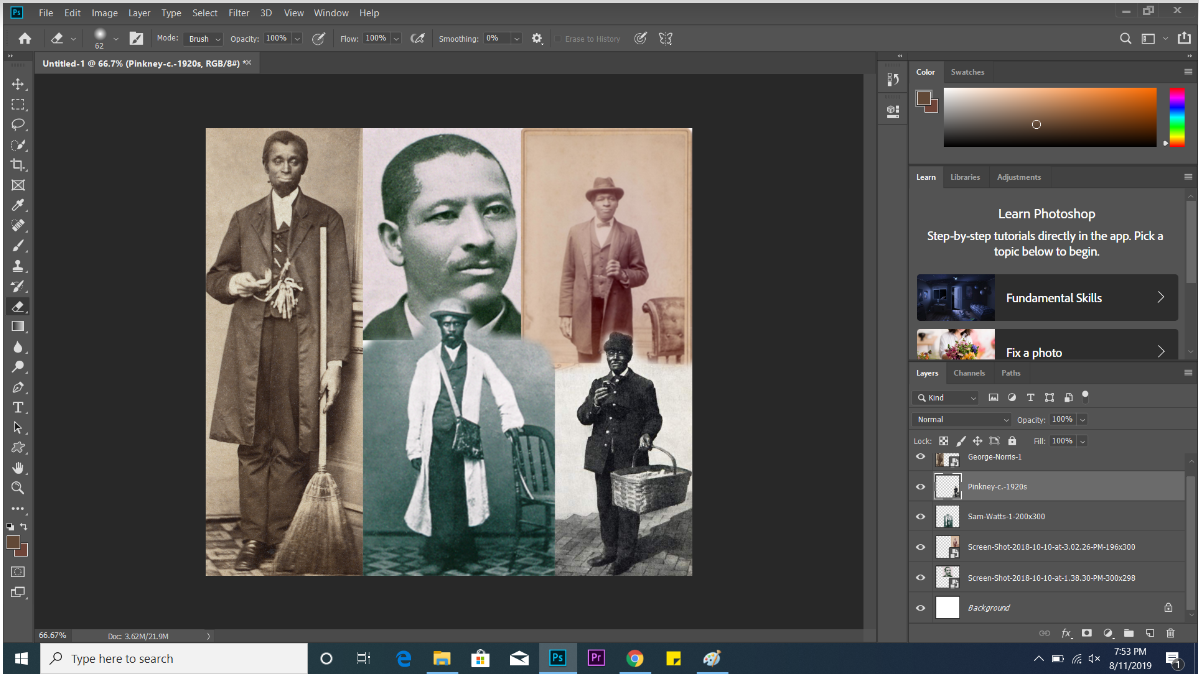
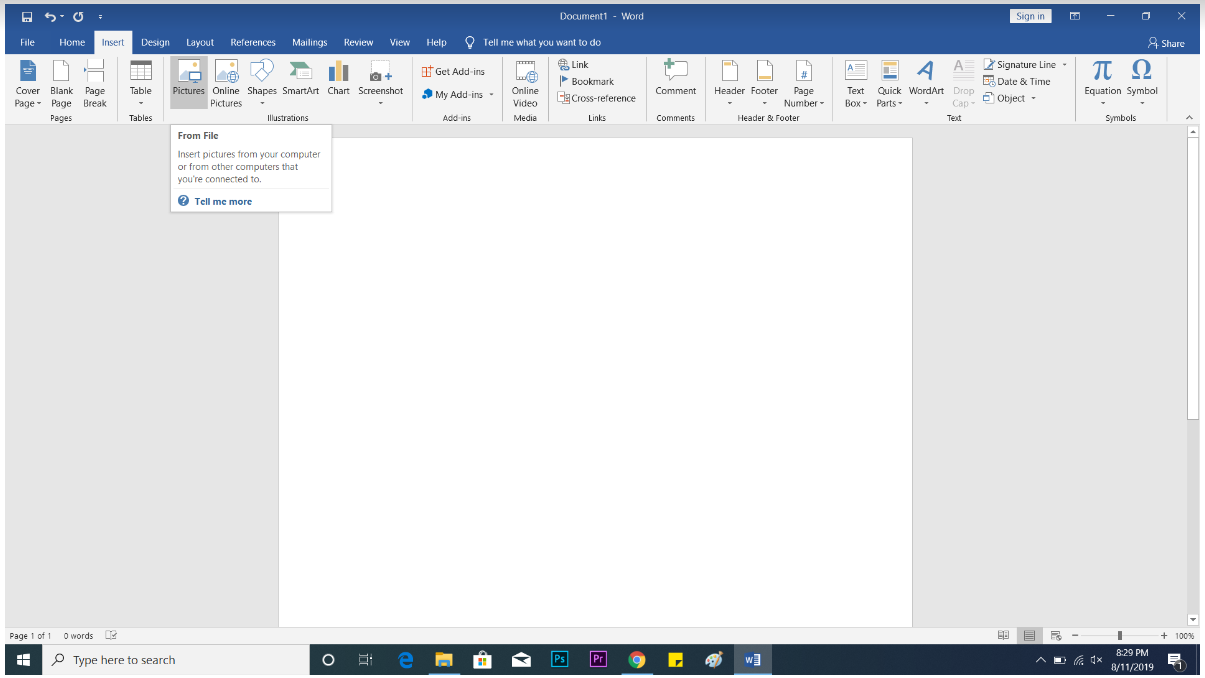
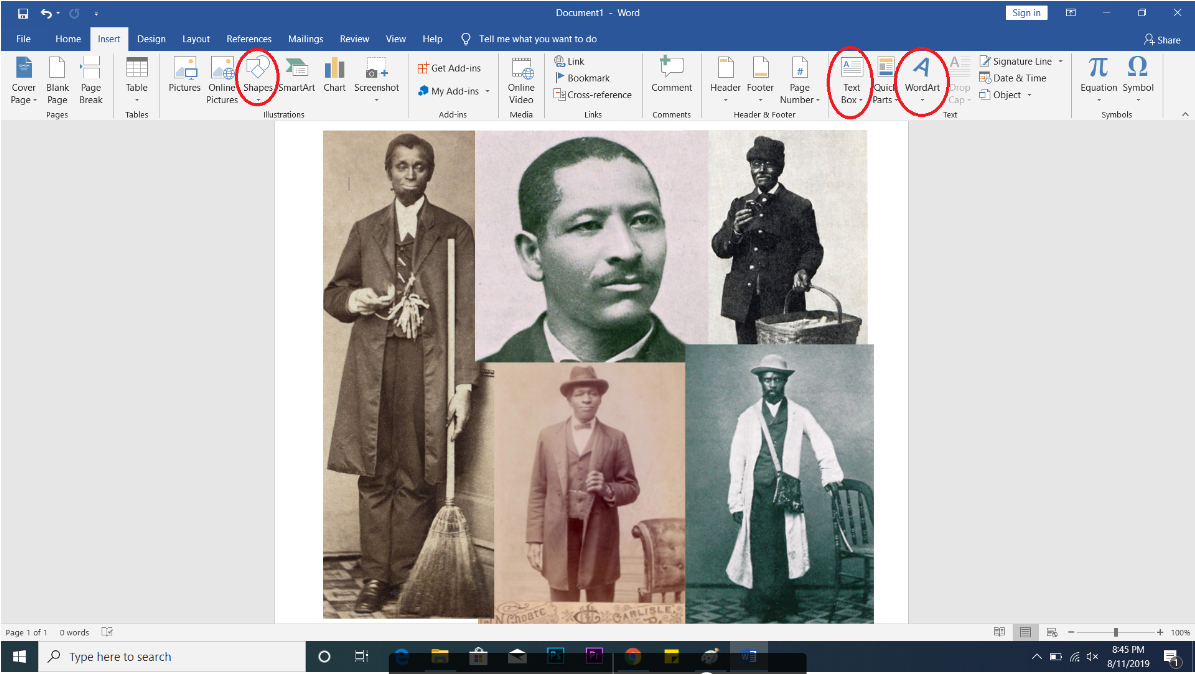
2. Next, you need to add the images you selected for your collage. To do so, it is easiest to
directly drag and drop the images into the new Photoshop project. Once your images are
downloaded to your computer, open your computer’s File Explorer, minimize the screen,
and click and drag each image into the Photoshop window. Adding the images this way
sets them as Smart Objects, which allows them to be resized and edited later on. You will
also notice that each new photo added creates a new layer in the bottom right-hand corner of your screen. Make sure that the Background layer is selected before you click
and drag a new image, otherwise Photoshop will not accept it.

screenshot of Photoshop for collage tutorial


screenshot of Photoshop for collage tutorial
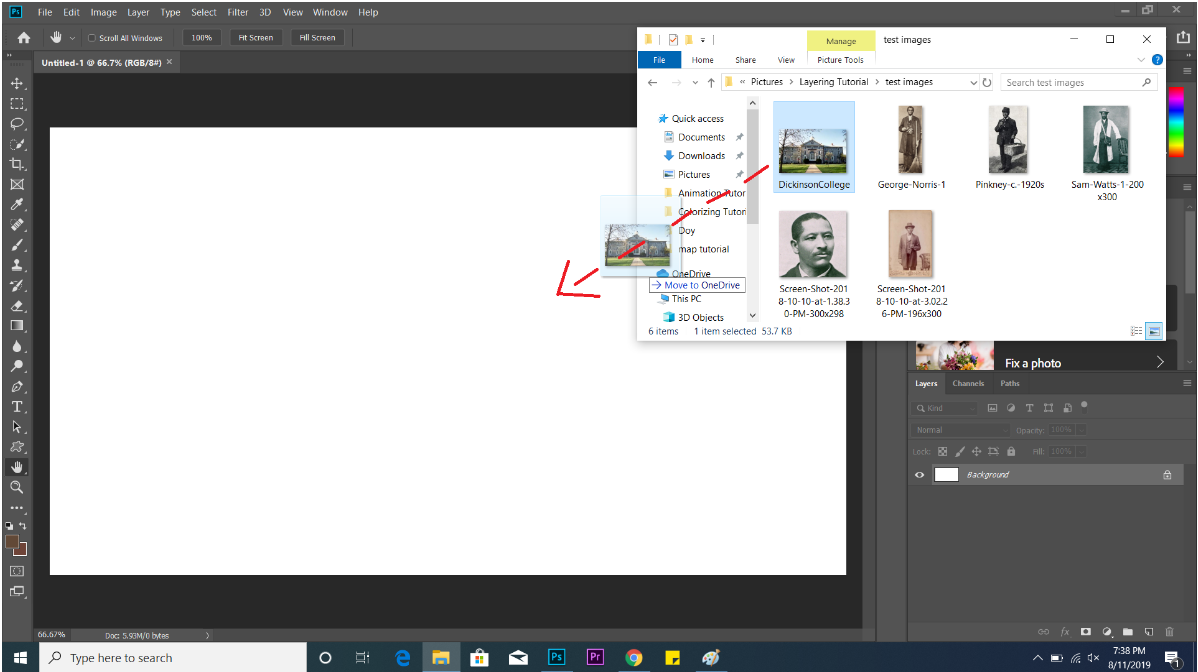
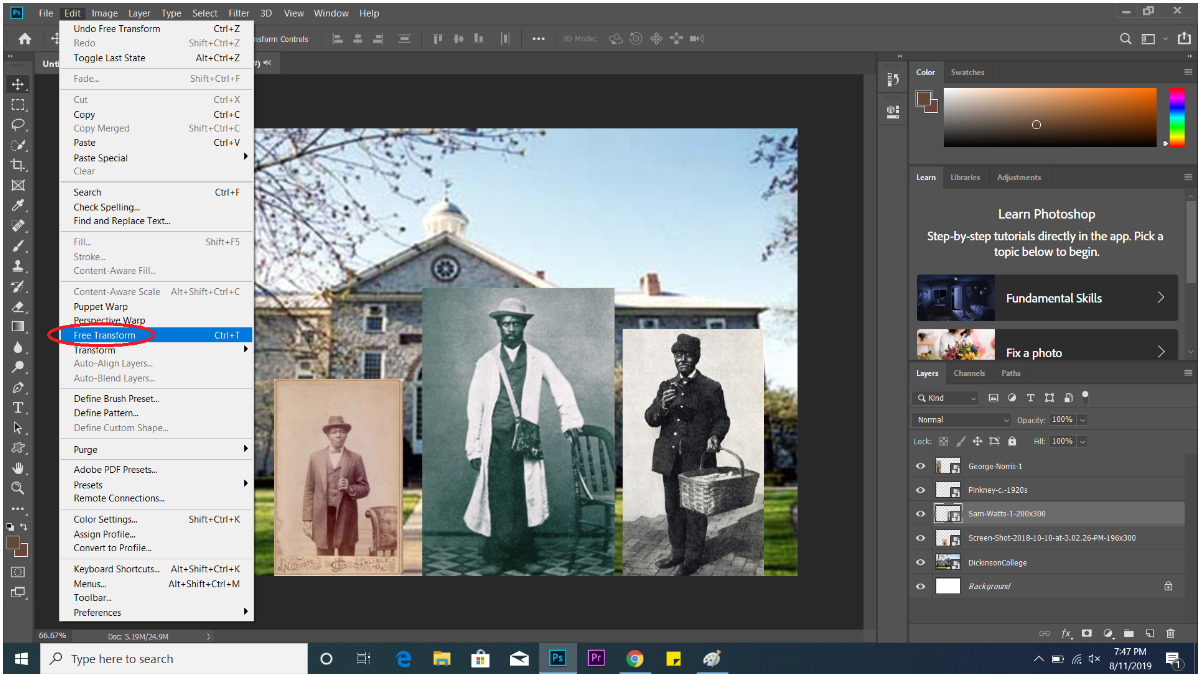
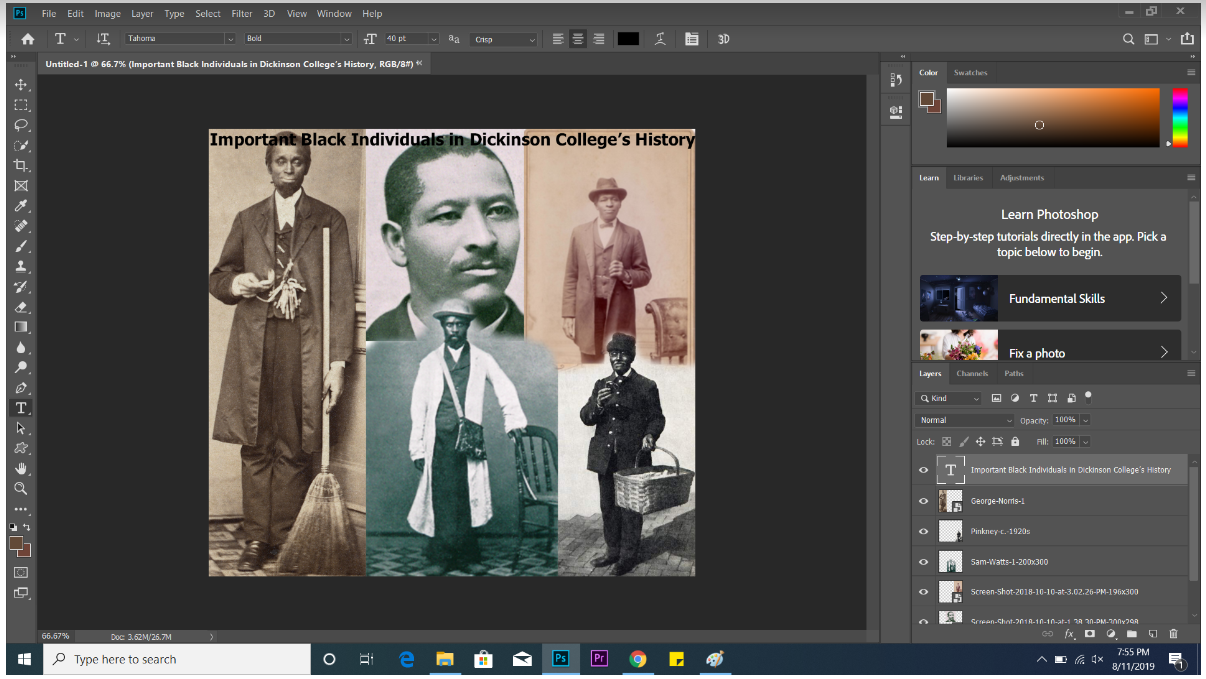
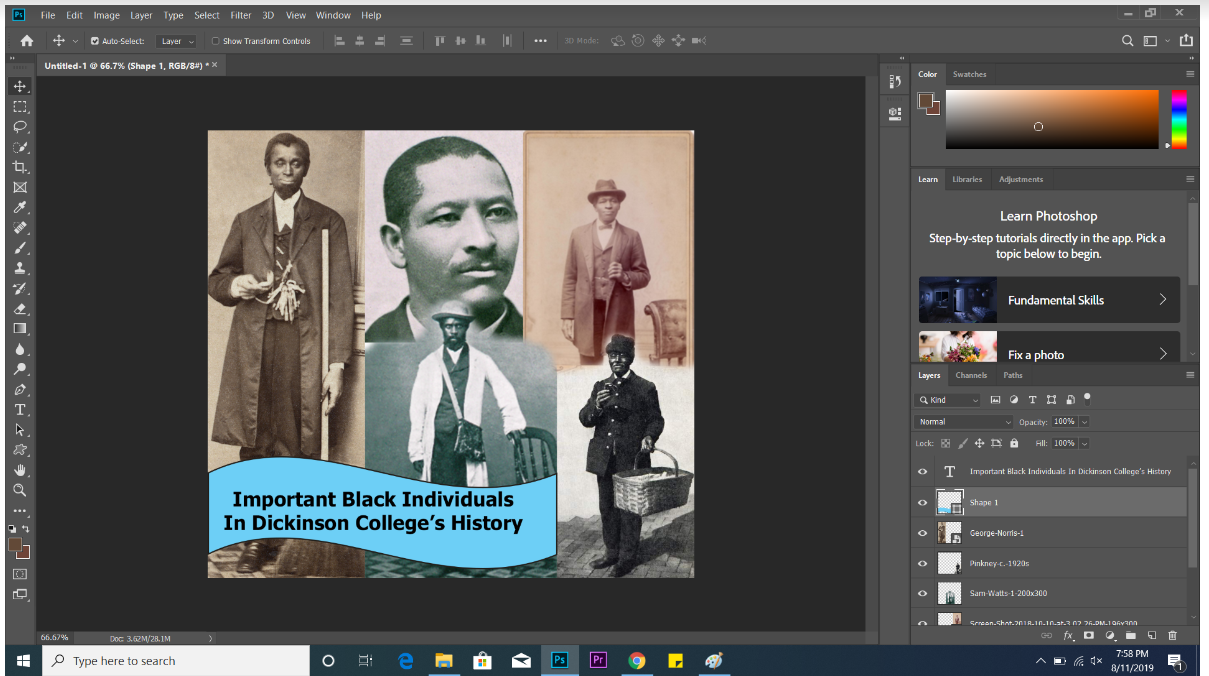
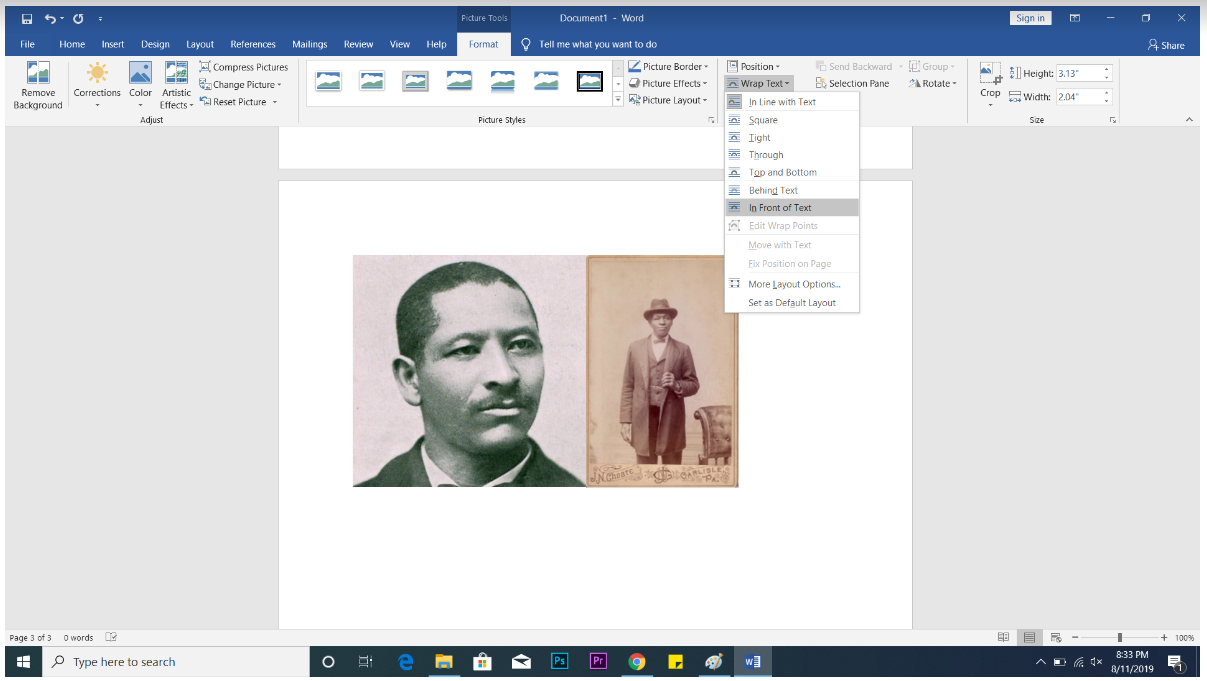
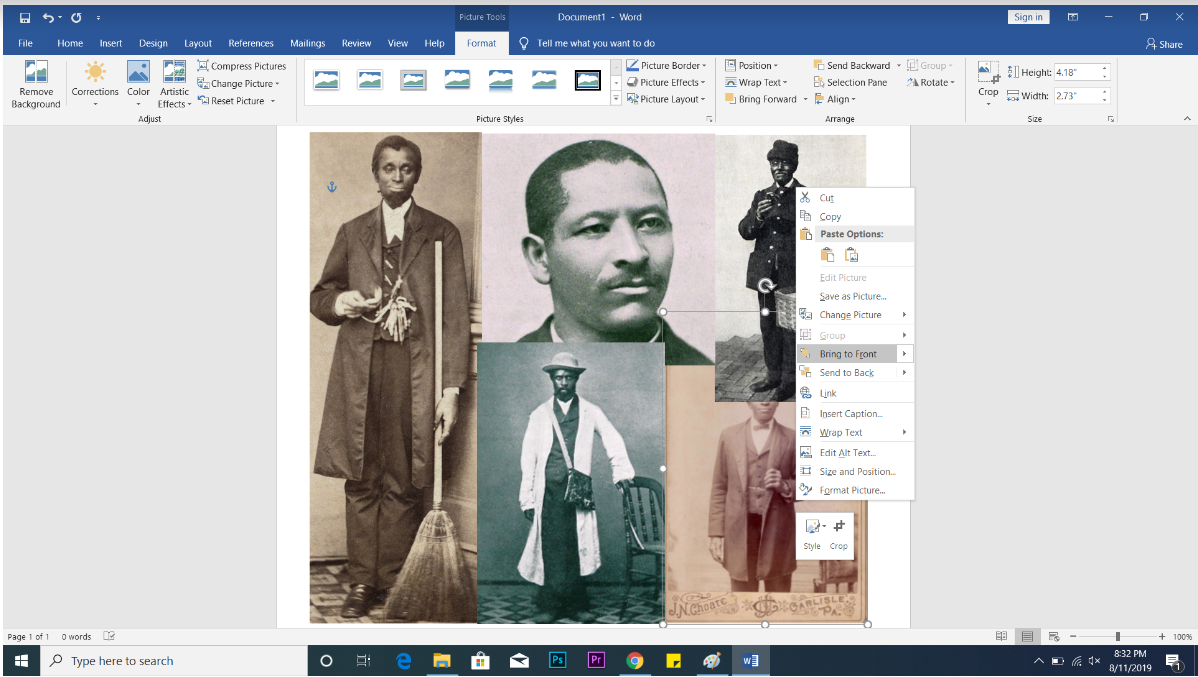
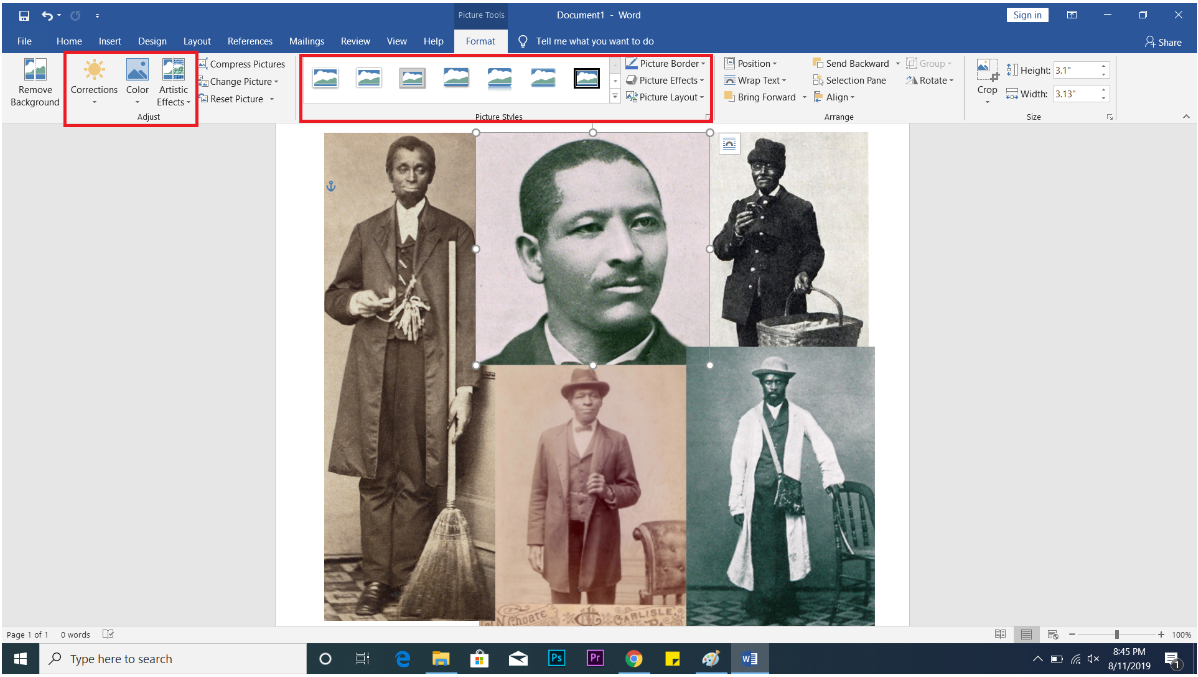
3. Once all your images are added, you will want to edit and move them to create your
collage. To change which images are “on top” (covering others it overlaps with) and
which are “on the bottom” (covered up by other overlapping images) click and drag the
layers on the lower right-hand corner of the screen.

4. To move an image, make sure that the Move tool is selected from the left side of the
screen, and then either click on the image directly or its corresponding layer to select a
single image. Once the image is selected, you can click and drag to move it around on
your screen.

screenshot of Photoshop for collage tutorial

5. To change the size or rotation of the images you have added, select the image and then
click Edit-Free Transform (keyboard shortcut: Ctrl + T) in the menu on the top of your screen. Free transform allows you to resize, move, and rotate your image by clicking and dragging the boxes in each four corners. Use the Move tool and Free Transform to set up the collage the way you
want it.

screenshot of Photoshop for collage tutorial

6. If you change your mind about the images you added, you can add more in the same way
you added them originally, or you can delete them by selecting their corresponding layer
and clicking delete on your keyboard.

7. There are some additional tools in Photoshop that allow you to further improve your
college:

a. Use the Text tool to add a title, a quote, or text information to your collage.

screenshot of Photoshop for collage tutorial

b. To add preset shapes, right click on the Rectangle Tool on the left side of your
screen, and choose Custom Shape Tool. Use the menu that appears along the top
of the screen to set the color, size, and outline thickness of your shape, and then
choose from the shape menu that appears by clicking the drop-down arrow on the
right-hand side of the menu. Click and drag to add the desired shape to your
collage.

screenshot of Photoshop for collage tutorial

screenshot of Photoshop for collage tutorial screenshot of Photoshop for collage tutorial

c. Use the Eraser tool if you want overlapping images to blend/fade into one
another. Before you are able to use the eraser tool, Photoshop will prompt you
that the image will need to be rasterized if you wish to use it. This means that the
image will no longer be a smart object, so make sure you have set the size of the
image to your liking before this step, as it will not easily resize after it is
rasterized. If you are ready, click OK, and then click and drag the eraser tool over
an image (make sure its corresponding layer is selected, otherwise nothing will
erase) to erase part of it.

screenshot of Photoshop for collage tutorial screenshot of Photoshop for collage tutorial

8. Once your collage is finished, select File–Save to save it to your computer.

How to Layer Images in Microsoft Word

Not everyone has Photoshop, but it is possible to create collages of images on more common
software, such as Microsoft Word.

1. Once you open Microsoft Word, click Insert–Pictures from the menu at the top of your
screen. From the window that opens, select the images you want in your collage and click
OK.

screenshot of Word for collage tutorial

2. Once your images are inserted, you will notice that instead of layering on top of one
another, they are next to each other, or perhaps each is on their own line. To fix this,
select an image, and then from the Picture Tools menu at the top of the screen, click
Wrap Text–In Front of Text. This will allow the images to layer and overlap. Follow
the same steps with each image.

screenshot of Word for collage tutorial

3. Now, you can click and drag your images wherever you want on the page to create your
collage. To resize or rotate an image, select it and then click and drag on the circles at
each corner.

4. If you want the images to overlap one another in your collage, you will need to set which
one is layered “on top” of the surrounding overlapping images. To do this, right-click on
an image; in the menu that appears, you will see “Bring to Front” and “Send to Back.”
Click Bring to Front if you want the image to be overtop of the others, or select Send to
Back if you want it to be behind overlapping images.

screenshot of Word for collage tutorial

5. In Word, you can also add shapes, text, or WordArt to your collage within the Insert
menu on the top of your screen.

screenshot of Word for collage tutorial

6. You can also edit each image by playing around with the tools in the Picture Tools menu
that appears when you select an image. Most of these tools deal with filters or color
corrections, and can be altered to change the style/tone of your collage. You can also add
borders to your images to differentiate them within the collage.

screenshot of Word for collage tutorial

7. Once you have completed your collage, select File–Save to save the finished product to
your computer.

How to Animate in Adobe Premiere

How to Animate Images in Adobe Premiere

Images are an essential part of multimedia history projects—but what if you could make those images move? In Adobe Premiere, images can be animated in a variety of different ways to add interest to your blog post, web page, or video. Below are instructions on how to pan & zoom an image and to create moving arrows on a map. However, given a basic understanding of the functions of Adobe Premiere, the options to animate are limitless.

How to Pan & Zoom

1. To start, first open Adobe Premiere and select New Project. Then, upload the image you want to animate by double-clicking the box in the bottom right-hand corner to “Import media to start.”

screenshot of Adobe Premiere animation tutorial

2. Once your image has been uploaded, click and drag it to the Sequence Timeline.

screenshot of Adobe Premiere animation tutorial

3. Now, click on the clip that has been added to your timeline, and you will see a new panel appear in the top left corner under Effect Controls.

screenshot of Adobe Premiere animation tutorial

4. Effect Controls is where you create animation sequences. Motion controls the movement, size, and location of the image—this is the tool you will use to pan & zoom. Click the drop arrow next to Motion, and a list containing Position, Scale, Rotation, Anchor Point, and Anti-Flicker will appear. Click on the “toggle animation” circles next to Position and Scale to turn on animation for those tools. To move the image, click and drag the blue numbers to the right of Position. The first number controls horizontal motion, and the second number controls vertical motion. To zoom in or out of the image, click and drag the blue number next to Scale.

screenshot of Adobe Premiere animation tutorial

5. Next, you will need to set the keyframes for your animation. When you selected toggle animation, a keyframe automatically appeared wherever you had stopped on your timeline. To add more keyframes, drag your timeline forward a few seconds, and then click and drag on the blue numbers next to Position and Scale to move/zoom your image to the desired point. A new keyframe at the new time will automatically be added.

screenshot of Adobe Premiere animation tutorial

6. Keep moving the timeline forward and adding new keyframes to your liking. The keyframes can be moved along the timeline by clicking and dragging. You can also delete a keyframe by clicking on it and selecting Delete on your keyboard. To view your progress, look to the window on the right-hand side of your screen entitled Program, and select the triangle play button. Lastly, to shorten or lengthen the entire duration of the clip (how long you want the animation to last in total), click and drag the edge of your clip in the window at the bottom of your screen.

screenshot of Adobe Premiere animation tutorial

NOTE: This process of toggling animation and adding keyframes is the basic function for all types of animation in Premiere, so once you understand how it works for pan & zoom, you can apply it to the other types of animation in Effect Controls. 


How to Animate Arrows on a Map

Maps make historical narratives much more accessible, and including moving arrows can add clarity and interest.

1. Before you begin in Premiere, you first will need two images: one of the map you want to use, and one with arrows added in. To add arrows onto the map, you can use Photoshop, Paint, Word, or any basic image editing software. To learn how to add and layer shapes to your image, view this tutorial.

2. Once you have your images of the map with and without arrows, upload both of them to Premiere by double-clicking “Import media to start” in the bottom left-hand corner. Next, drag the images over to your Sequence Timeline to the right. You will need the map WITHOUT arrows to be on top of the map with arrows, as seen below. 

screenshot of Adobe Premiere animation tutorial

3. Next, click on the clip of your map without arrows, and you will see a list of animation tools appear in the top-left window titled Effect Controls. Select the drop down arrow next to Opacity, and a new list will appear.

4. To animate the arrows in your map to appear, you will need to add a Mask to your image. To add a mask, select either the oval, square, or pen tools shown under Opacity. All three of these tools create masks: the circle tool creates a oval-shaped mask, the rectangle tool creates a rectangular mask, and the pen tool allows you to create a custom-shape mask. For the purposes of this project, you can choose either the oval or rectangular mask, as those two are the more simple options. Once you select a mask, a new menu will appear underneath titled Mask (1). The Mask will render your entire image transparent, except for the area included within the shape of the mask. So, to make your map have an arrow appear, you will have to first cover the arrow with the mask, and then animate it to move away and slowly uncover the image (of the same map WITH the arrow) beneath.

screenshot of Adobe Premiere animation tutorial


screenshot of Adobe Premiere animation tutorial
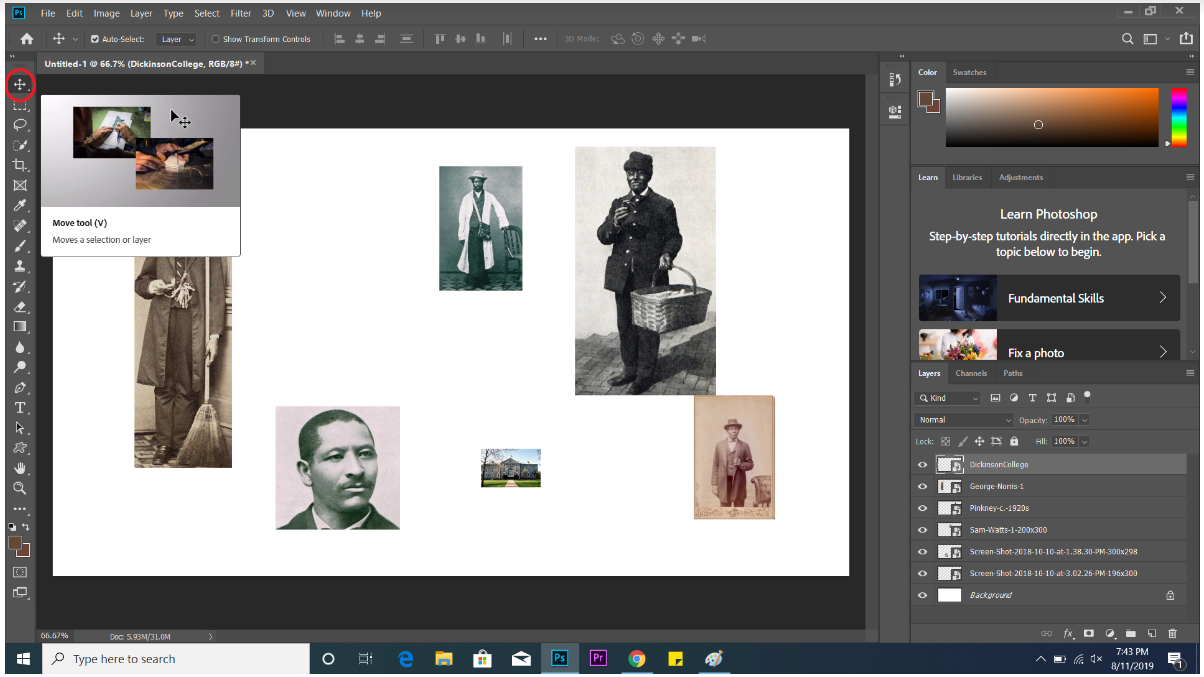
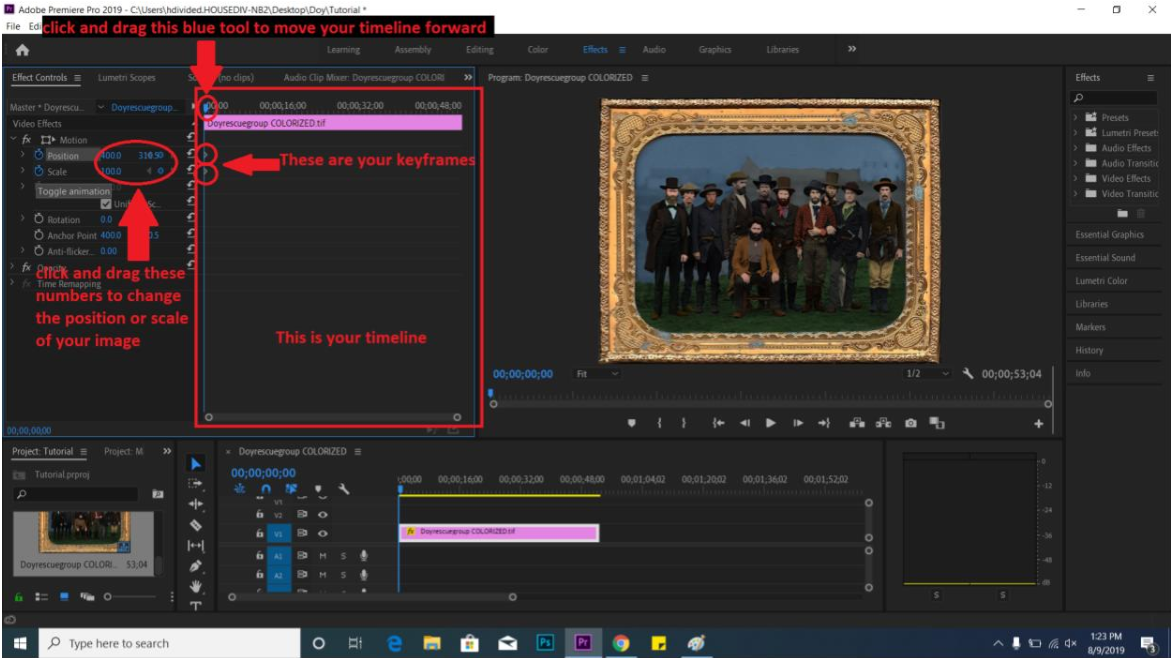
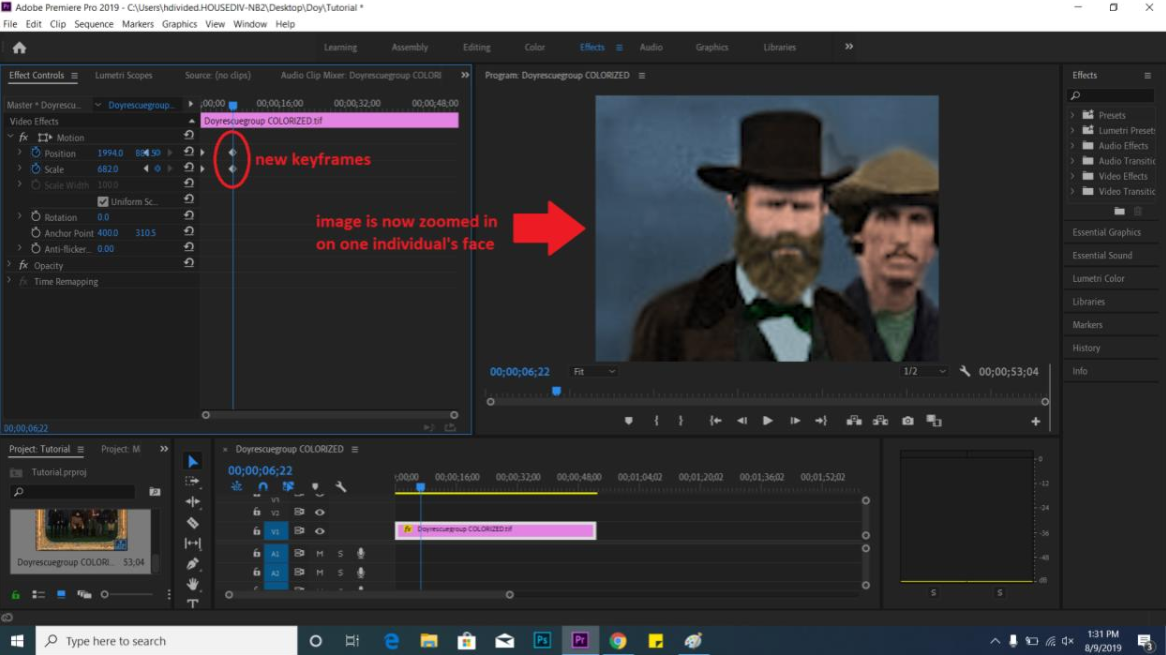
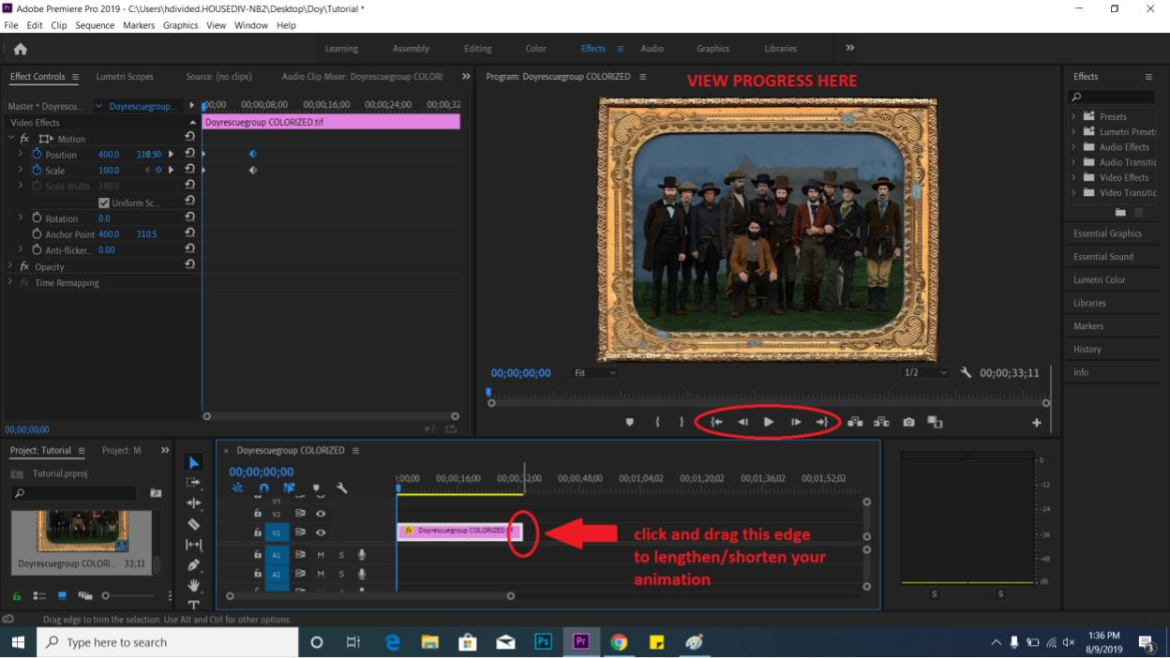
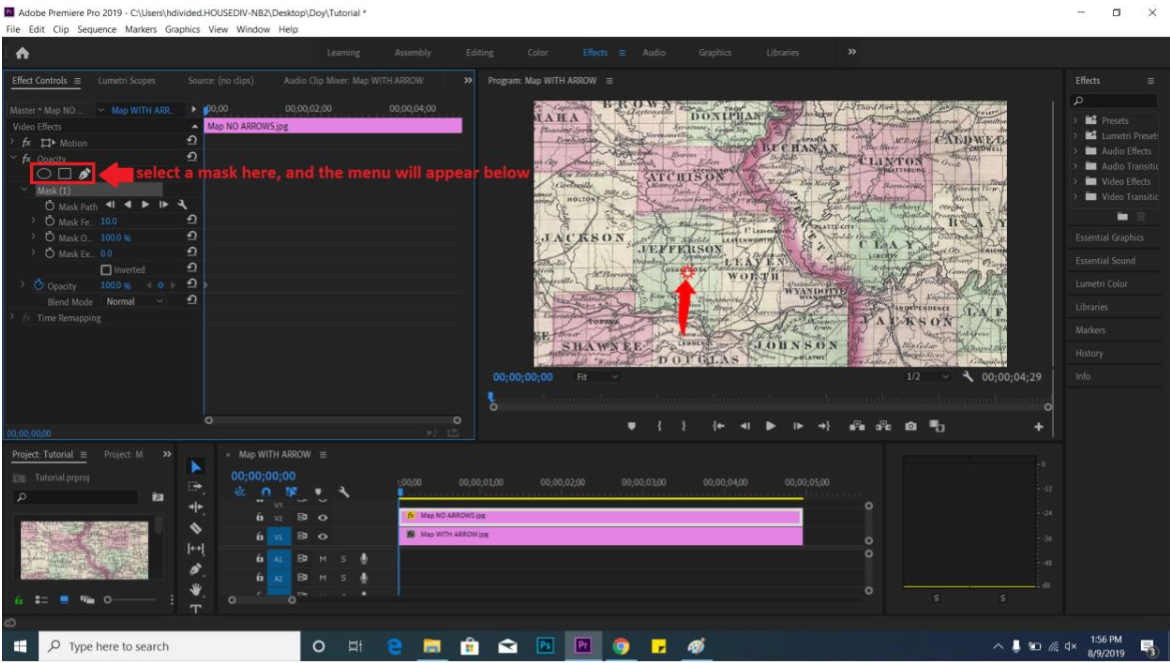
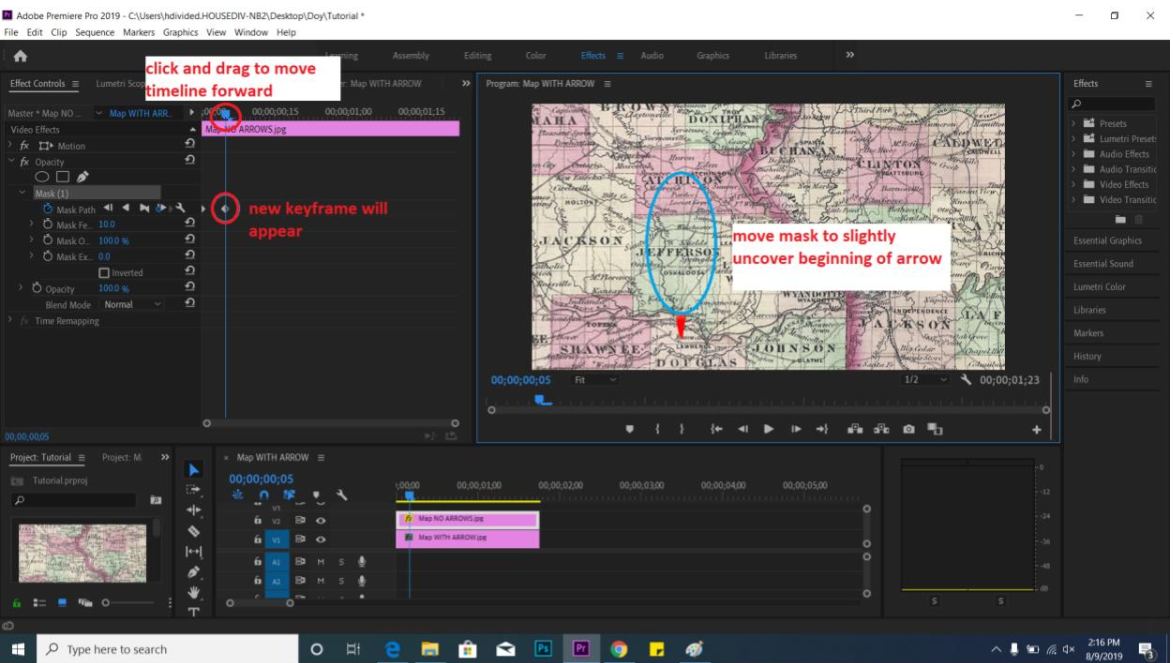
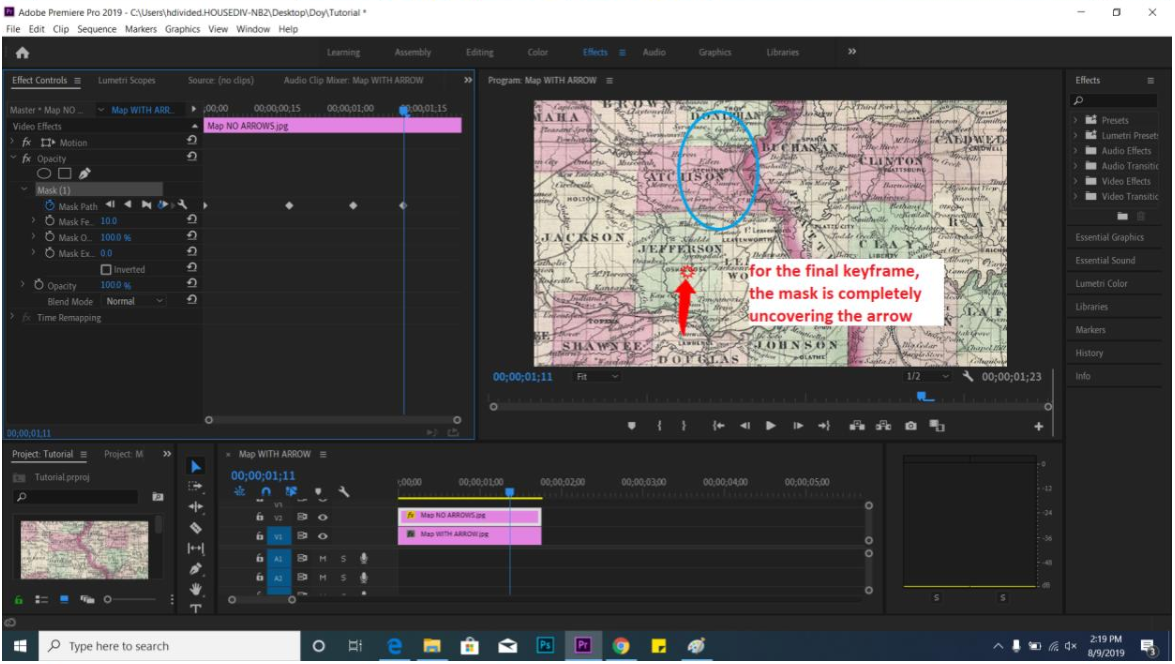
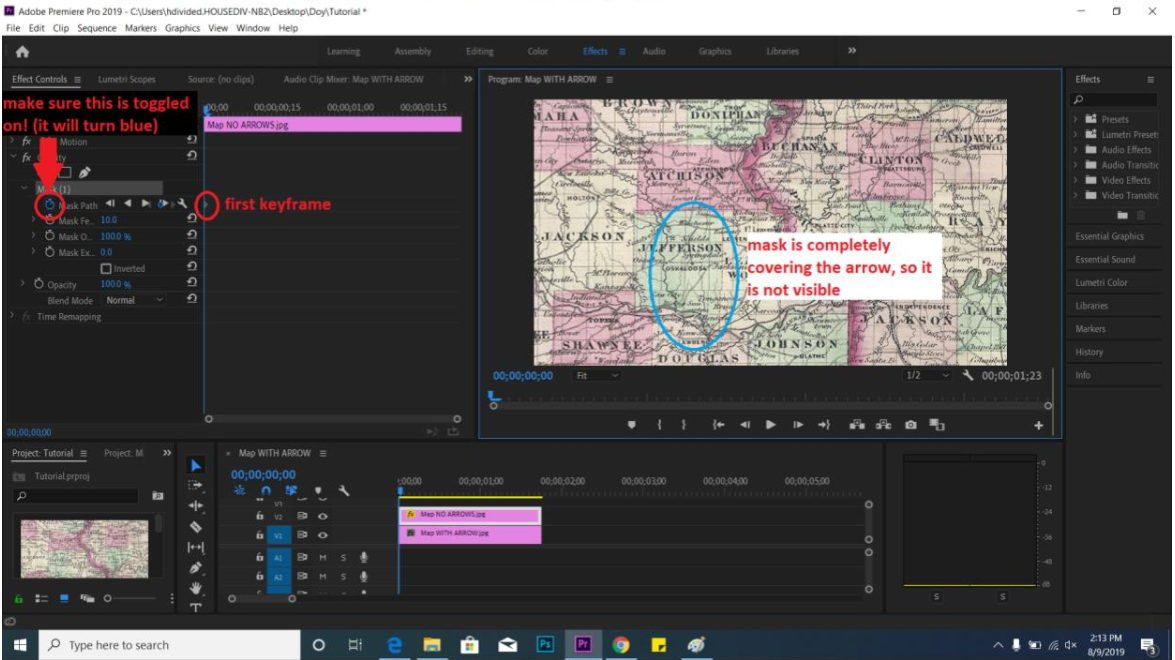
5. To start the animation, set your initial keyframe by making sure the animation for Mask Path is toggled, and drag the mask to completely hide the arrow. Once the animation is toggled on, the keyframe will automatically appear.

screenshot of Adobe Premiere animation tutorial

6. Next, just as with pan & zoom, move your timeline forward a few seconds, and then drag the mask to reveal the beginning of your arrow. A new keyframe will automatically appear at the new time. Continue with this process until the arrow is completely uncovered by the mask and visible.

screenshot of Adobe Premiere animation tutorial


7. As with all forms of animation in Premiere, you can move, delete, and edit the keyframes by clicking on them. To view your progress, watch the video in the window on the right entitled Program. Once you are finished, save your animation as a Premiere project, and then export it into whatever format (video, gif, etc.) you prefer.

screenshot of Adobe Premiere animation tutorial