How to Animate Images in Adobe Premiere
Images are an essential part of multimedia history projects—but what if you could make those images move? In Adobe Premiere, images can be animated in a variety of different ways to add interest to your blog post, web page, or video. Below are instructions on how to pan & zoom an image and to create moving arrows on a map. However, given a basic understanding of the functions of Adobe Premiere, the options to animate are limitless.
How to Pan & Zoom
1. To start, first open Adobe Premiere and select New Project. Then, upload the image you want to animate by double-clicking the box in the bottom right-hand corner to “Import media to start.”

2. Once your image has been uploaded, click and drag it to the Sequence Timeline.
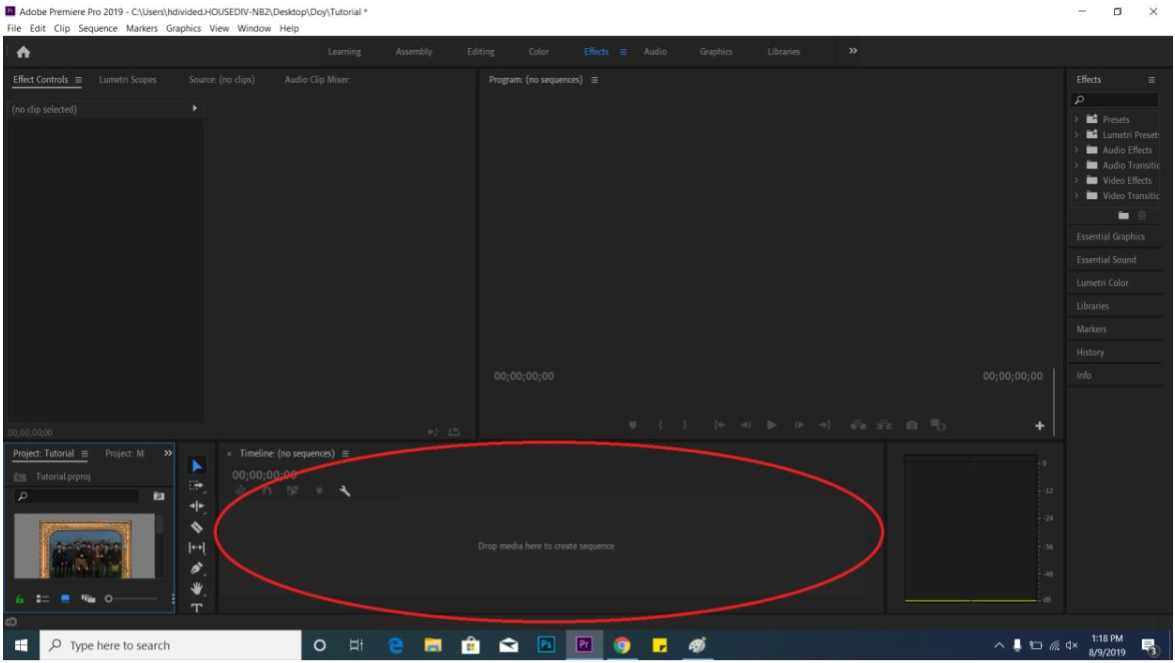
3. Now, click on the clip that has been added to your timeline, and you will see a new panel appear in the top left corner under Effect Controls.

4. Effect Controls is where you create animation sequences. Motion controls the movement, size, and location of the image—this is the tool you will use to pan & zoom. Click the drop arrow next to Motion, and a list containing Position, Scale, Rotation, Anchor Point, and Anti-Flicker will appear. Click on the “toggle animation” circles next to Position and Scale to turn on animation for those tools. To move the image, click and drag the blue numbers to the right of Position. The first number controls horizontal motion, and the second number controls vertical motion. To zoom in or out of the image, click and drag the blue number next to Scale.
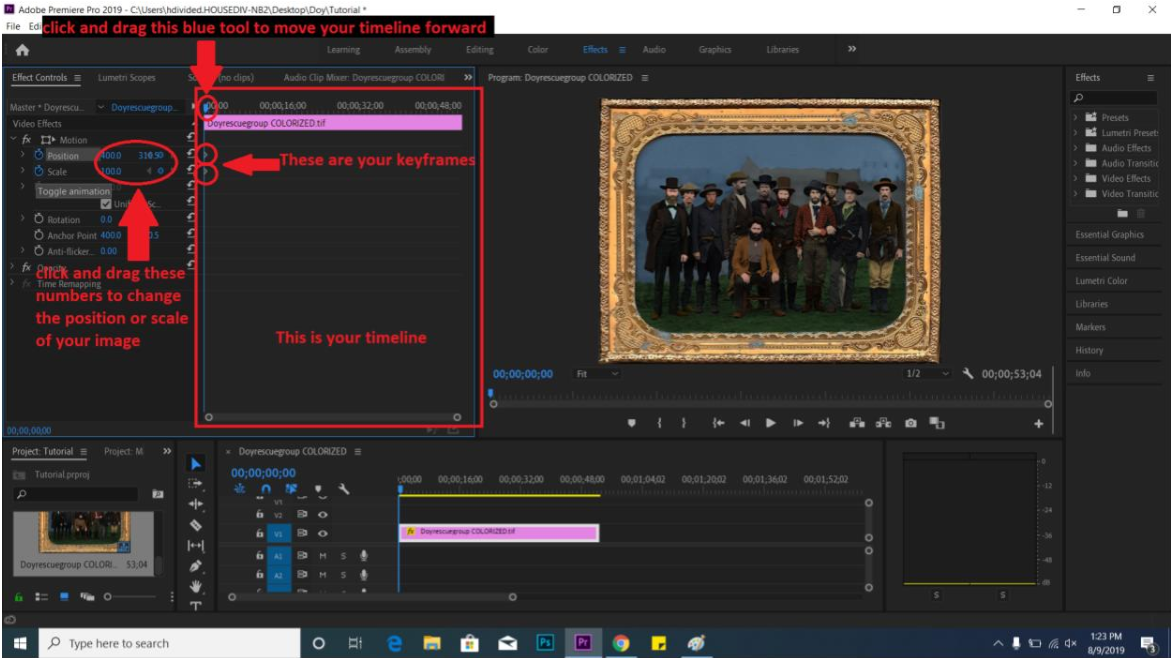
5. Next, you will need to set the keyframes for your animation. When you selected toggle animation, a keyframe automatically appeared wherever you had stopped on your timeline. To add more keyframes, drag your timeline forward a few seconds, and then click and drag on the blue numbers next to Position and Scale to move/zoom your image to the desired point. A new keyframe at the new time will automatically be added.
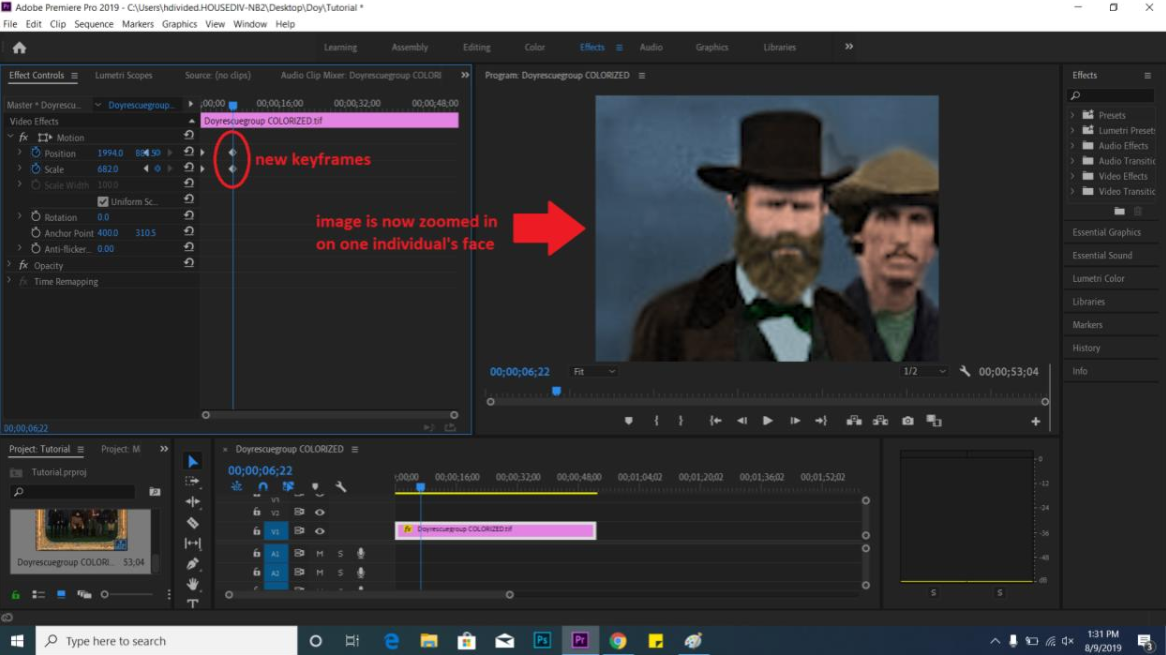
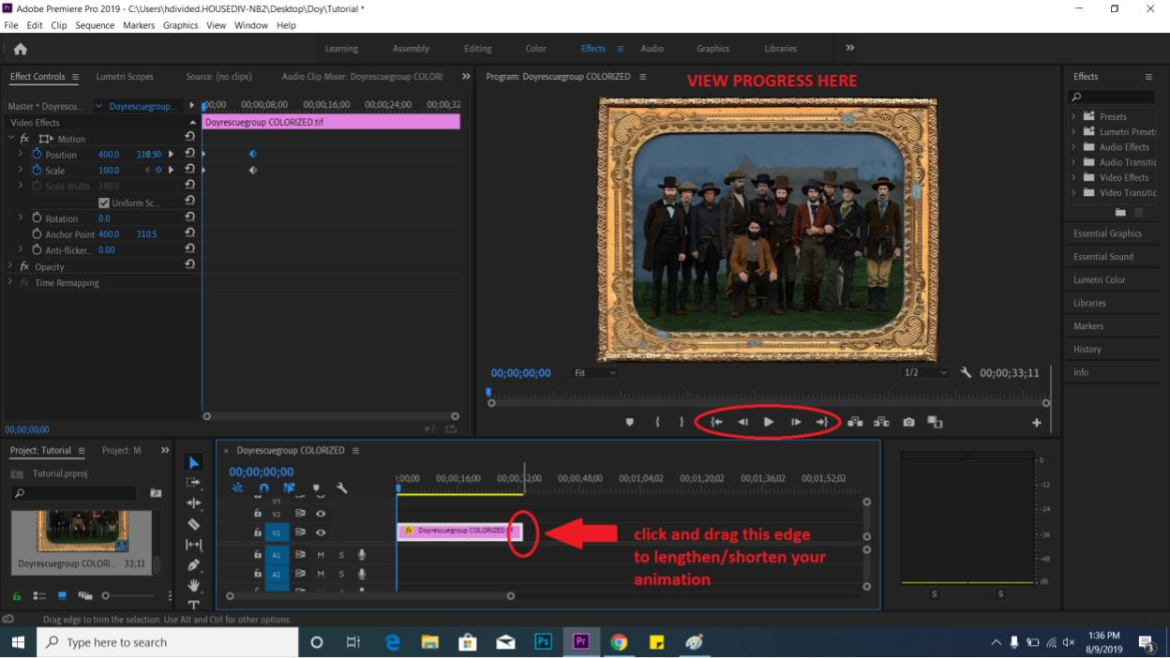
6. Keep moving the timeline forward and adding new keyframes to your liking. The keyframes can be moved along the timeline by clicking and dragging. You can also delete a keyframe by clicking on it and selecting Delete on your keyboard. To view your progress, look to the window on the right-hand side of your screen entitled Program, and select the triangle play button. Lastly, to shorten or lengthen the entire duration of the clip (how long you want the animation to last in total), click and drag the edge of your clip in the window at the bottom of your screen.
NOTE: This process of toggling animation and adding keyframes is the basic function for all types of animation in Premiere, so once you understand how it works for pan & zoom, you can apply it to the other types of animation in Effect Controls.
How to Animate Arrows on a Map
Maps make historical narratives much more accessible, and including moving arrows can add clarity and interest.
1. Before you begin in Premiere, you first will need two images: one of the map you want to use, and one with arrows added in. To add arrows onto the map, you can use Photoshop, Paint, Word, or any basic image editing software. To learn how to add and layer shapes to your image, view this tutorial.
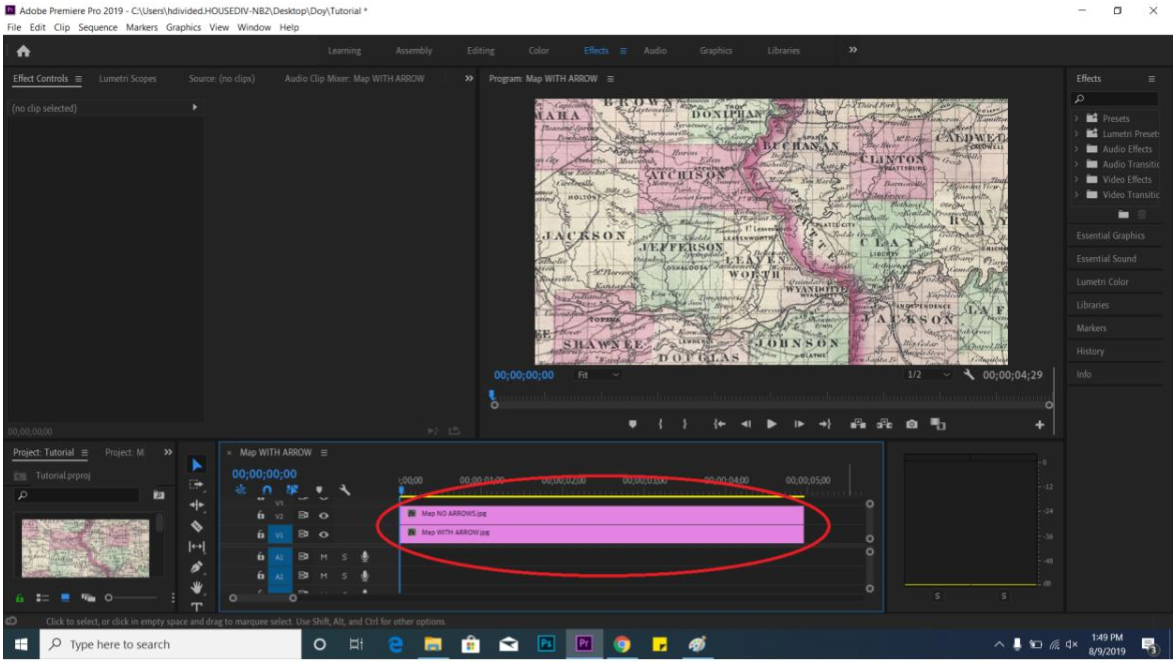
2. Once you have your images of the map with and without arrows, upload both of them to Premiere by double-clicking “Import media to start” in the bottom left-hand corner. Next, drag the images over to your Sequence Timeline to the right. You will need the map WITHOUT arrows to be on top of the map with arrows, as seen below.
3. Next, click on the clip of your map without arrows, and you will see a list of animation tools appear in the top-left window titled Effect Controls. Select the drop down arrow next to Opacity, and a new list will appear.
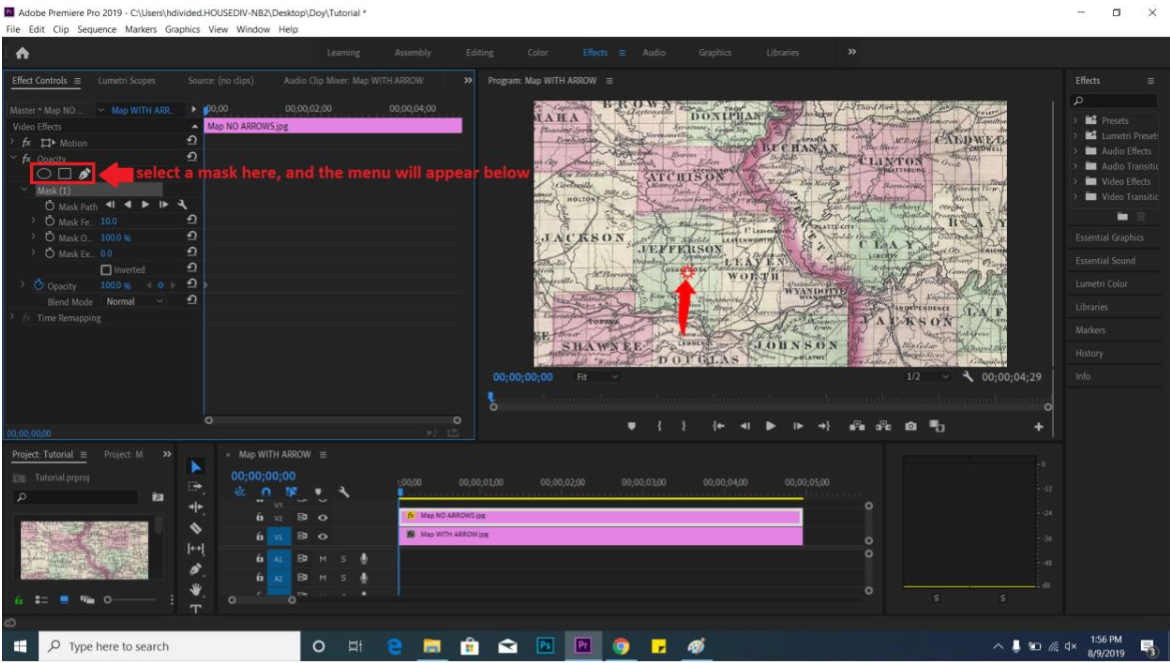
4. To animate the arrows in your map to appear, you will need to add a Mask to your image. To add a mask, select either the oval, square, or pen tools shown under Opacity. All three of these tools create masks: the circle tool creates a oval-shaped mask, the rectangle tool creates a rectangular mask, and the pen tool allows you to create a custom-shape mask. For the purposes of this project, you can choose either the oval or rectangular mask, as those two are the more simple options. Once you select a mask, a new menu will appear underneath titled Mask (1). The Mask will render your entire image transparent, except for the area included within the shape of the mask. So, to make your map have an arrow appear, you will have to first cover the arrow with the mask, and then animate it to move away and slowly uncover the image (of the same map WITH the arrow) beneath.
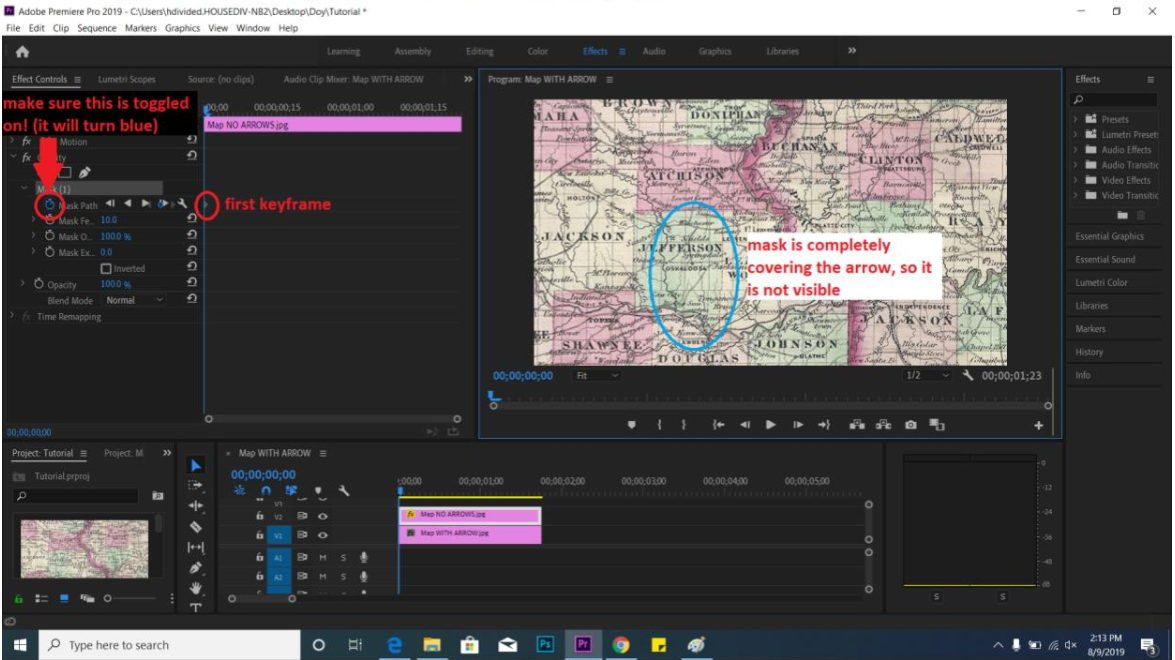 5. To start the animation, set your initial keyframe by making sure the animation for Mask Path is toggled, and drag the mask to completely hide the arrow. Once the animation is toggled on, the keyframe will automatically appear.
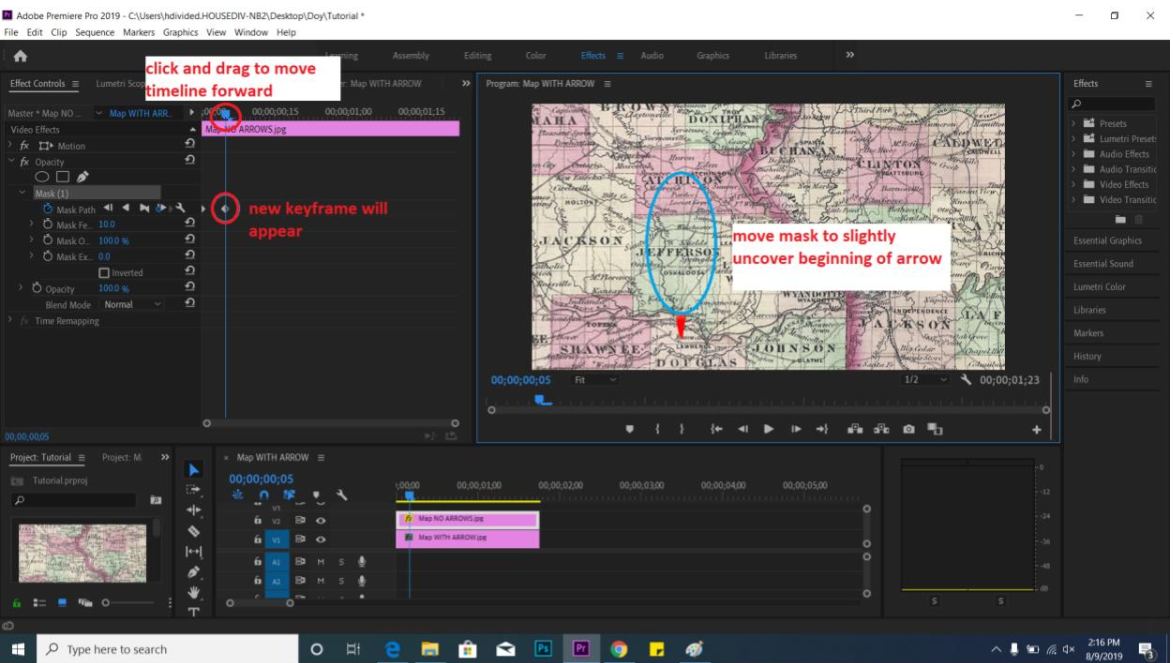
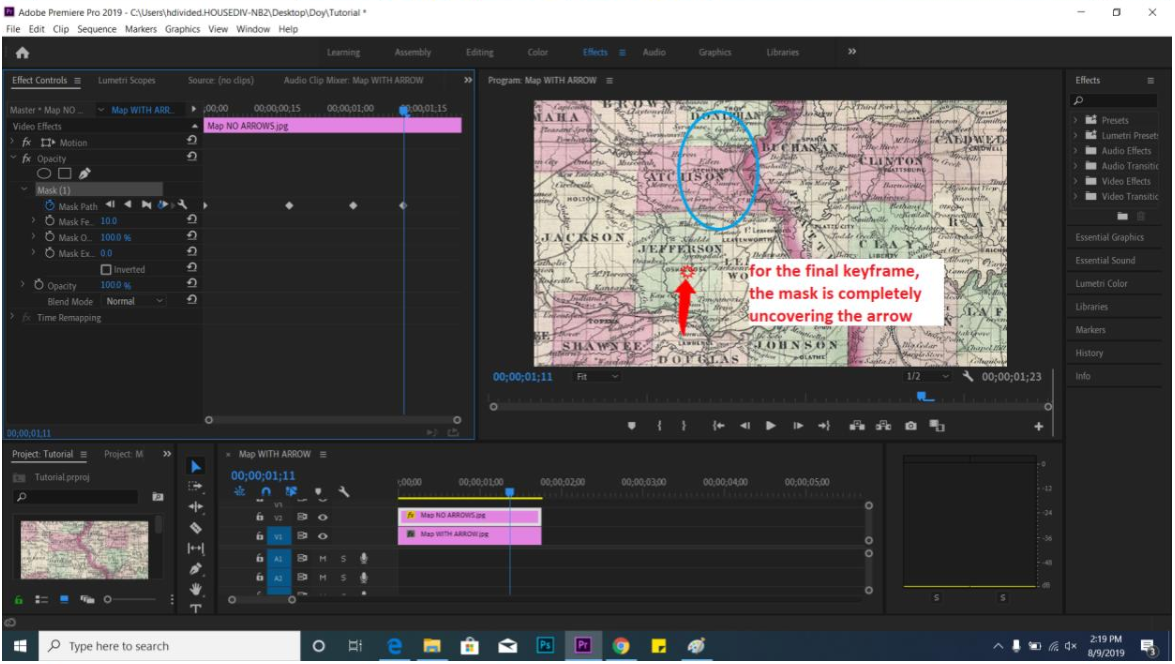
6. Next, just as with pan & zoom, move your timeline forward a few seconds, and then drag the mask to reveal the beginning of your arrow. A new keyframe will automatically appear at the new time. Continue with this process until the arrow is completely uncovered by the mask and visible.
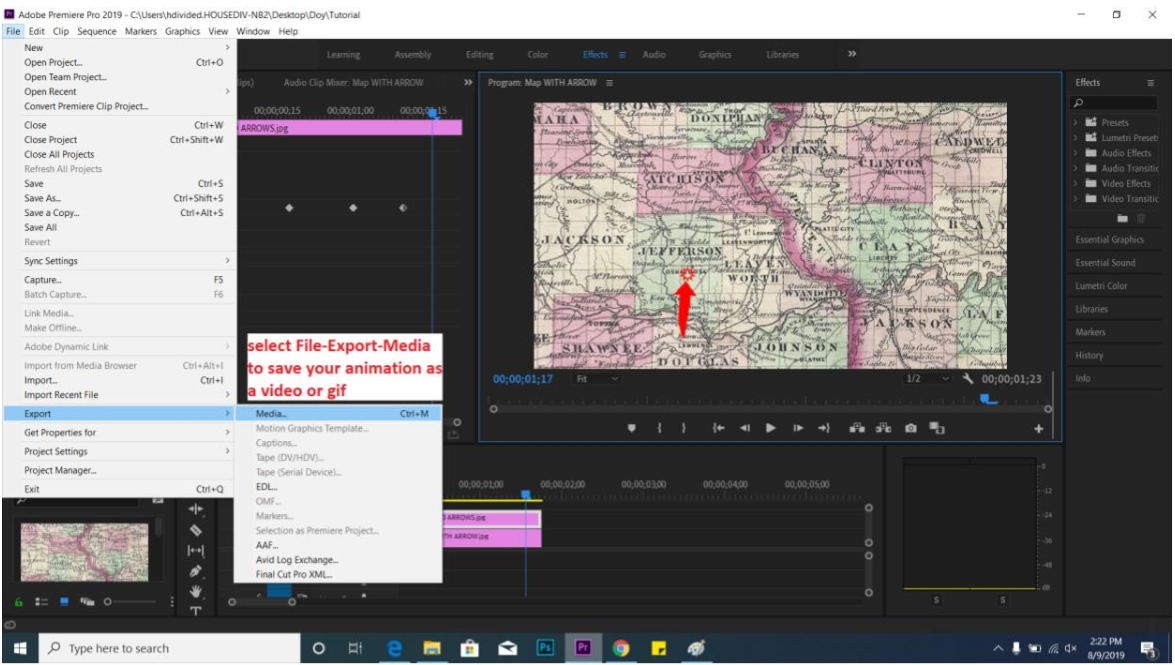
7. As with all forms of animation in Premiere, you can move, delete, and edit the keyframes by clicking on them. To view your progress, watch the video in the window on the right entitled Program. Once you are finished, save your animation as a Premiere project, and then export it into whatever format (video, gif, etc.) you prefer.