
On this page, you will find a short 5-minute general video on how to use WeVideo, the popular, free online video editing platform, and a detailed set of instructions for exactly how to employ this tool for your seminar assignments and projects. Everyone should try to attempt a short video documentary-style reading from one of the texts in the course curriculum –something that you can post with your one of your close reading reflections.
And here is a model close reading video from Jordyn Ney (’23):
Part 1: General Setup
#1 How to start an account
#2 How to create a new video
#3 How to rename video
Part 2: Video Instructions
#4 How to find content on the internet
#5 How to import content into WeVideo
#6 How to put imported content into a video
#7 How to delete imported content from a video
#8 How to modify content once it is in the timeline
#9 How to add text
#10 How to edit text
#11 How to change length of clip
#12 How to zoom in on timeline
#13 How to cut clips
#14 How to make transitions between each clip
#15 How to add more video tracks to your timeline
#16 How to move multiple clips at once
Part 3: Audio
#17 How to use free audio
#18 How to change the volume
#19 How to fade audio
#20 How to add another track
Part 4: What to do when you are done
#21 How to export
IMPORTANT NOTE: ON FREE ACCOUNTS, YOU ONLY GET 5 MINUTES TOTAL OF EXPORTING TIME PER MONTH. THAT MEANS ALL OF YOUR VIDEOS COMBINED CANNOT BE MORE THAN 5 MINUTES. USE YOUR EXPORTS WISELY.
Part 1: General Setup
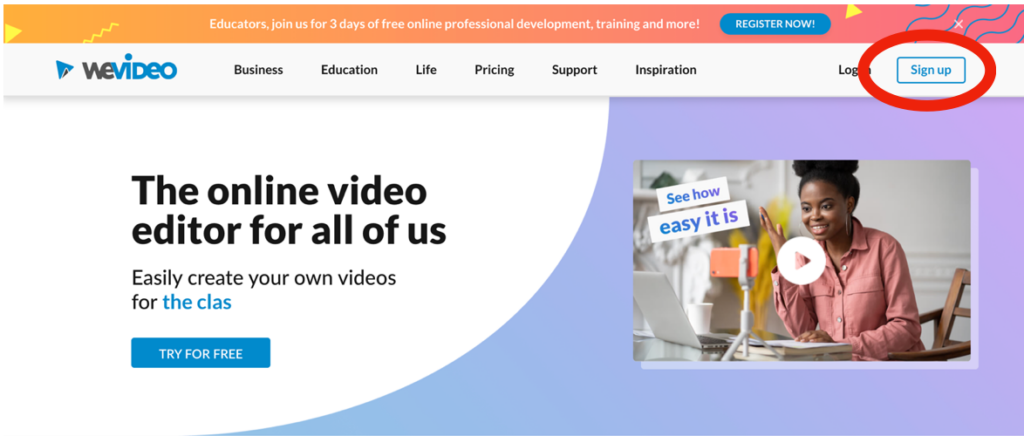
How to start an account:
1. go onto Google Chrome (safari is not a supported browser)
2. in the top right corner, select “sign up” (using your email address)
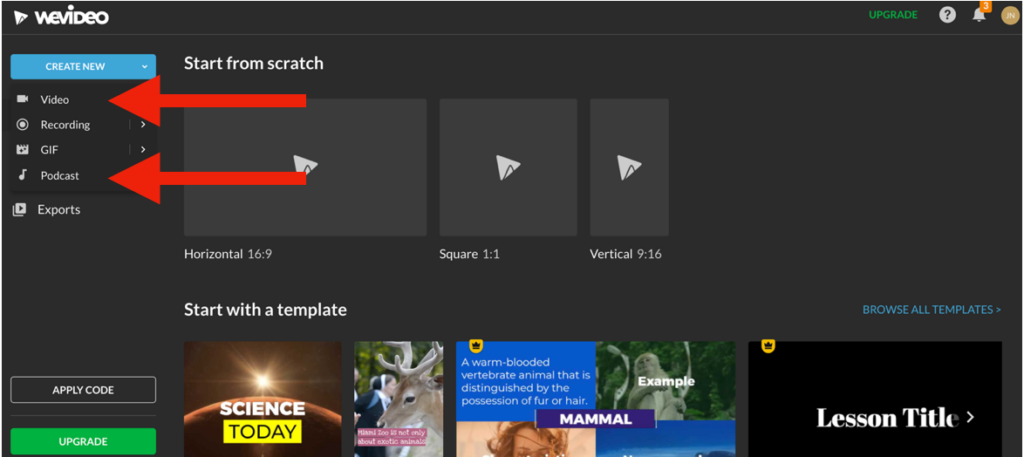
How to create a new video:
1. click the blue “create new” button in the top left corner
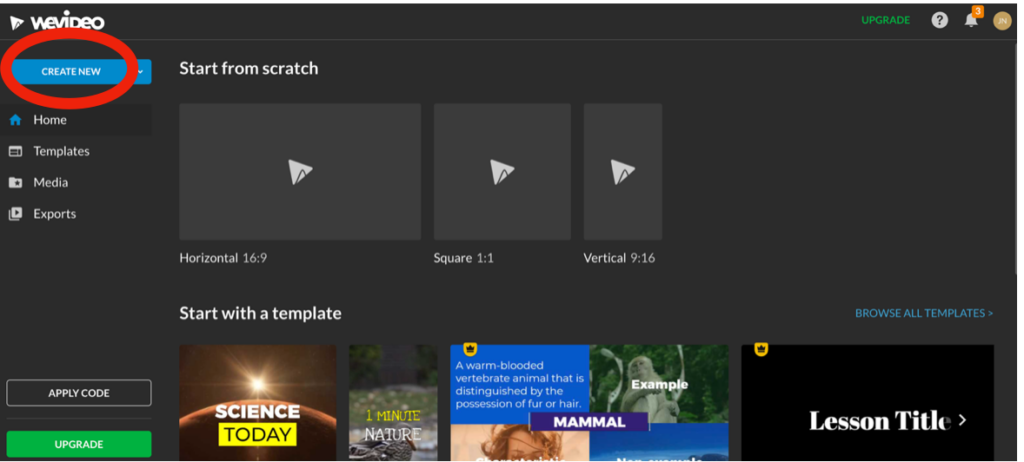
2. select what you would like to record (most likely a video or a podcast)
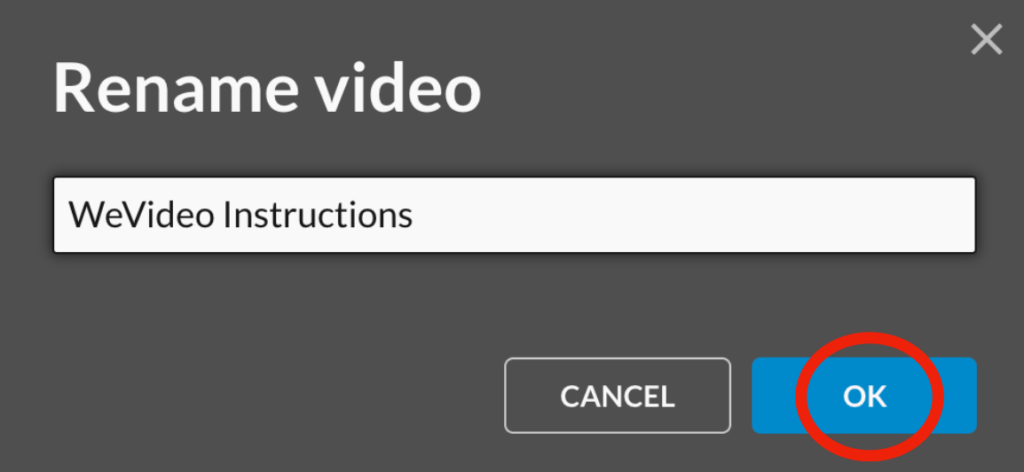
How to rename video:
1. tap my video toward the top left of the page
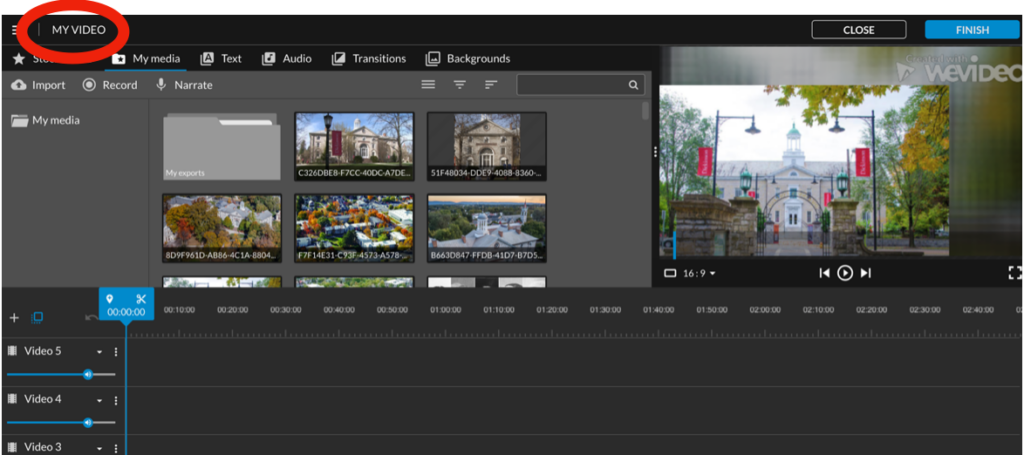
2. rename video and hit “ok”
Part 2: Video Instructions
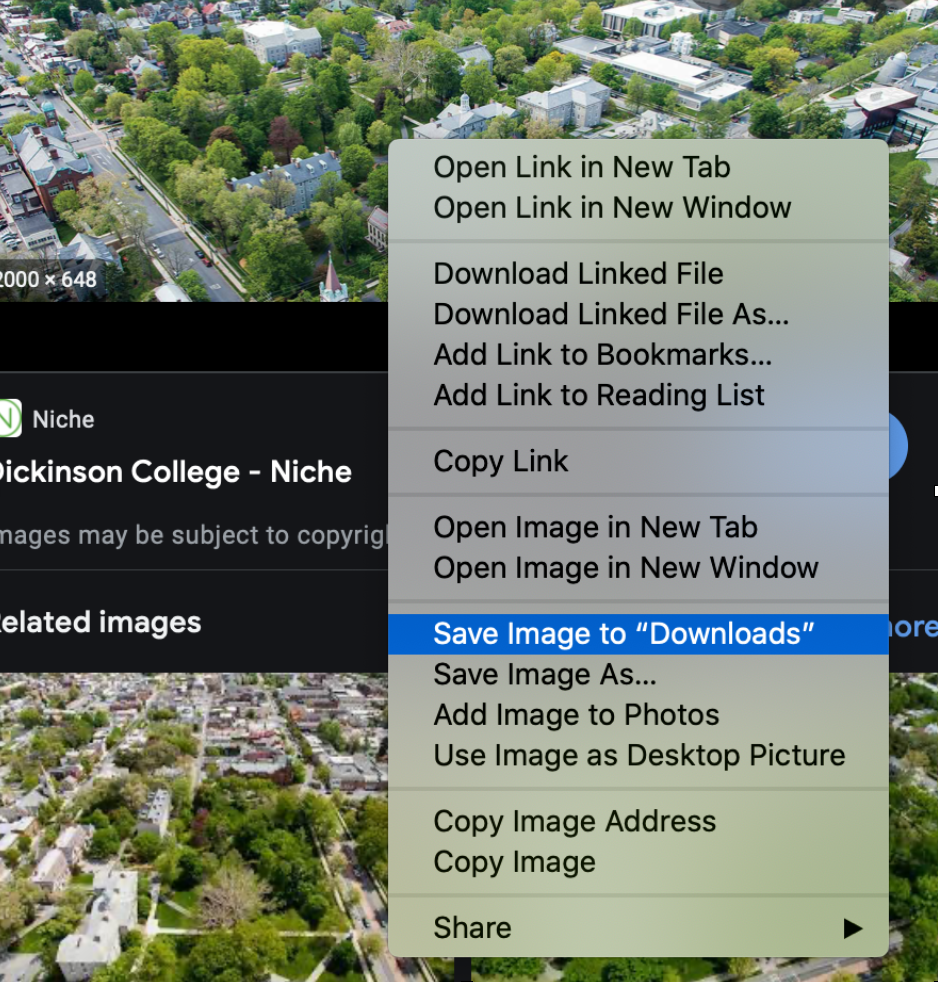
How to find content on the internet:
1. look up image you want on the internet
2. click on image you want and hit “add to photos” or “save to downloads”
OR
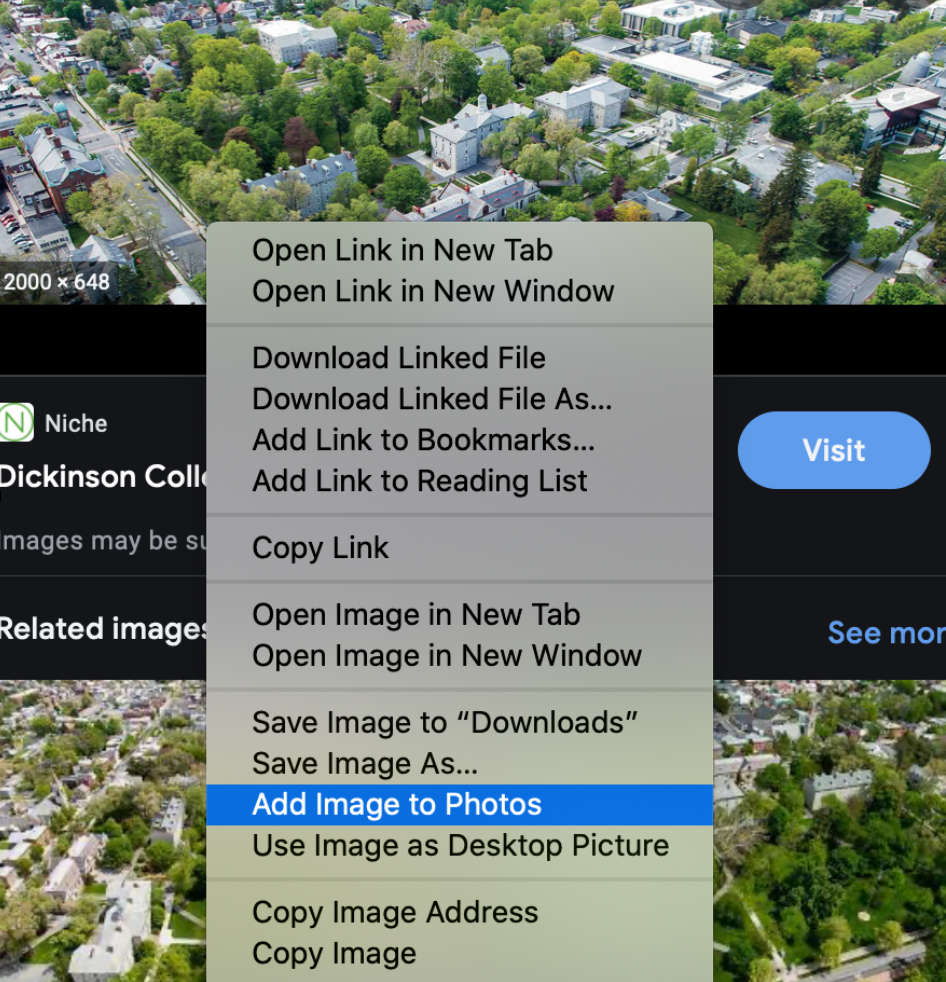
note: remember to save the source where you got your photos from
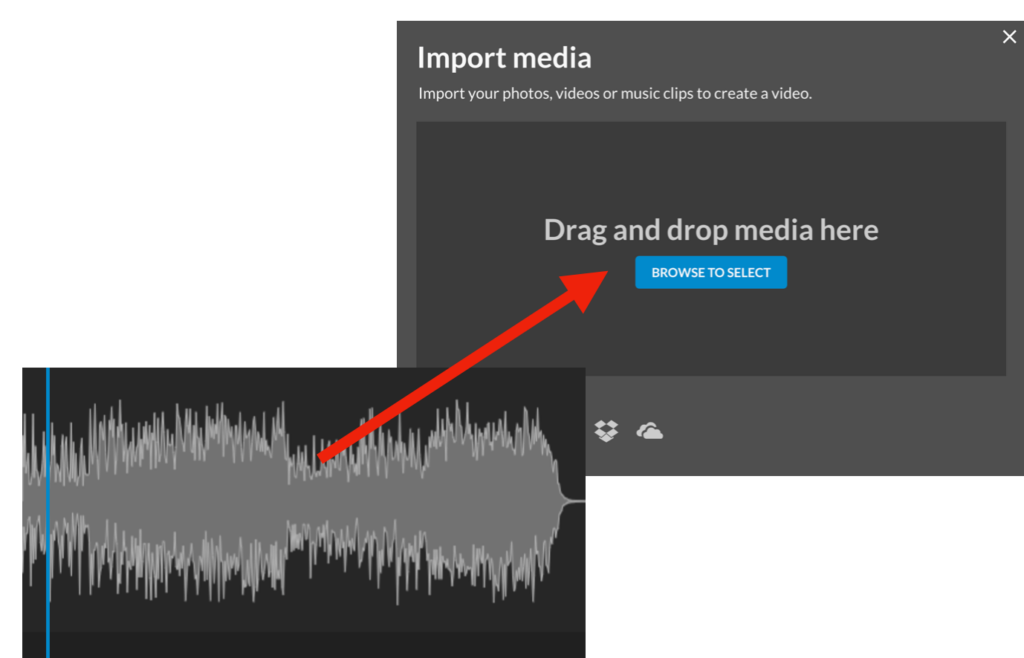
How to import content into WeVideo:
1. go to the “my media folder” towards top of page
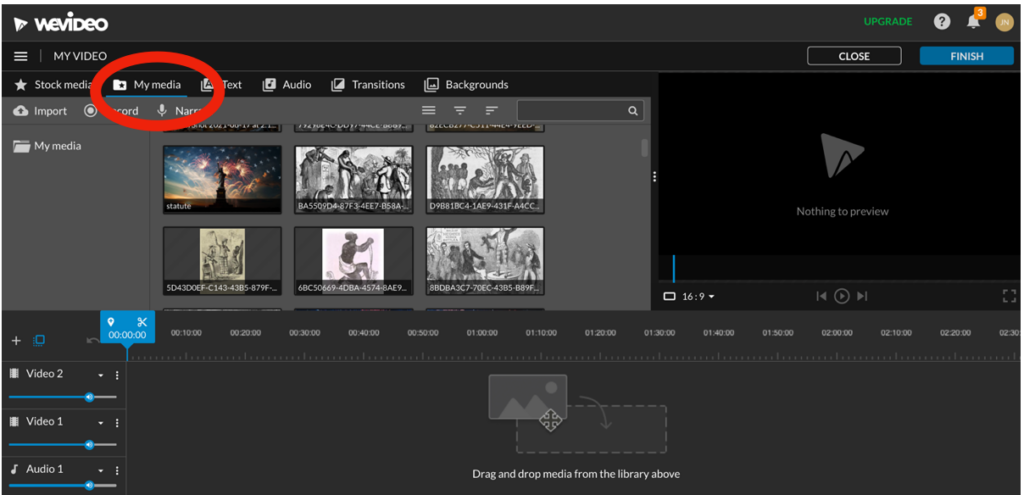
2. hit “import” to the far left
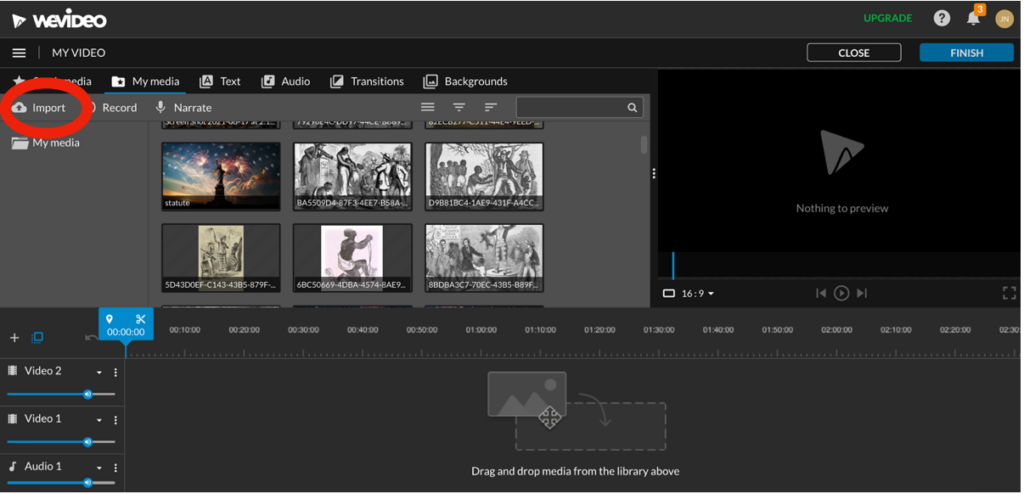
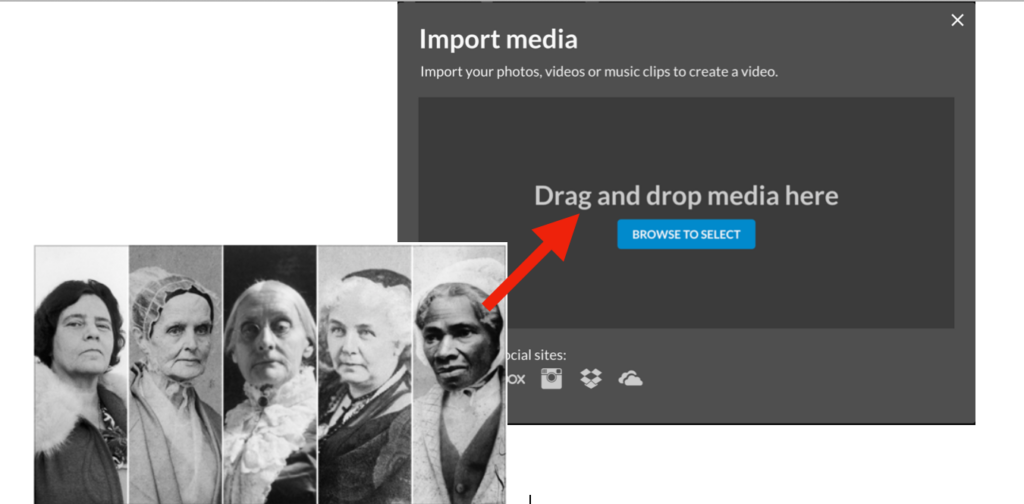
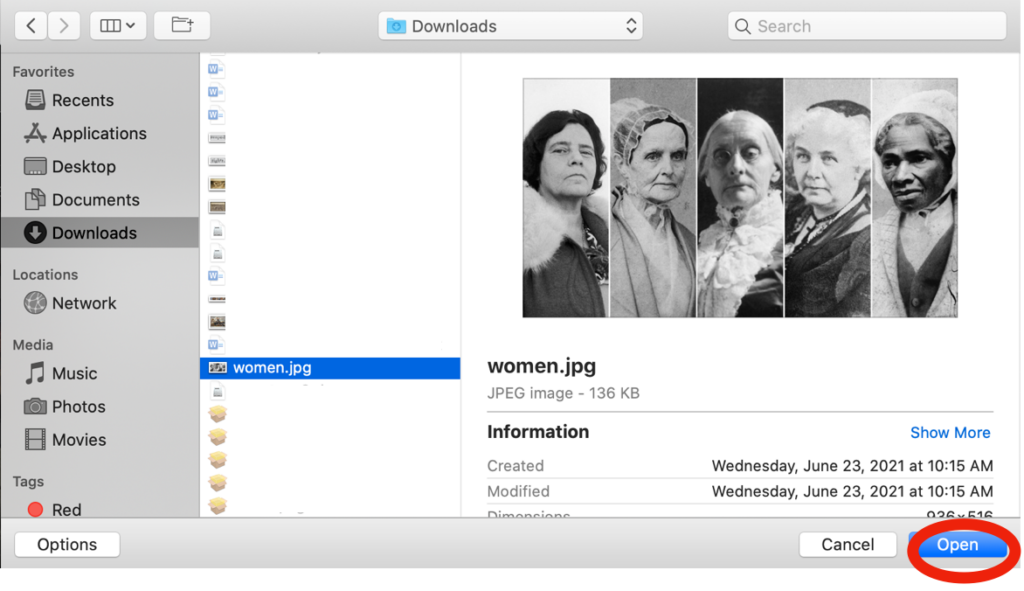
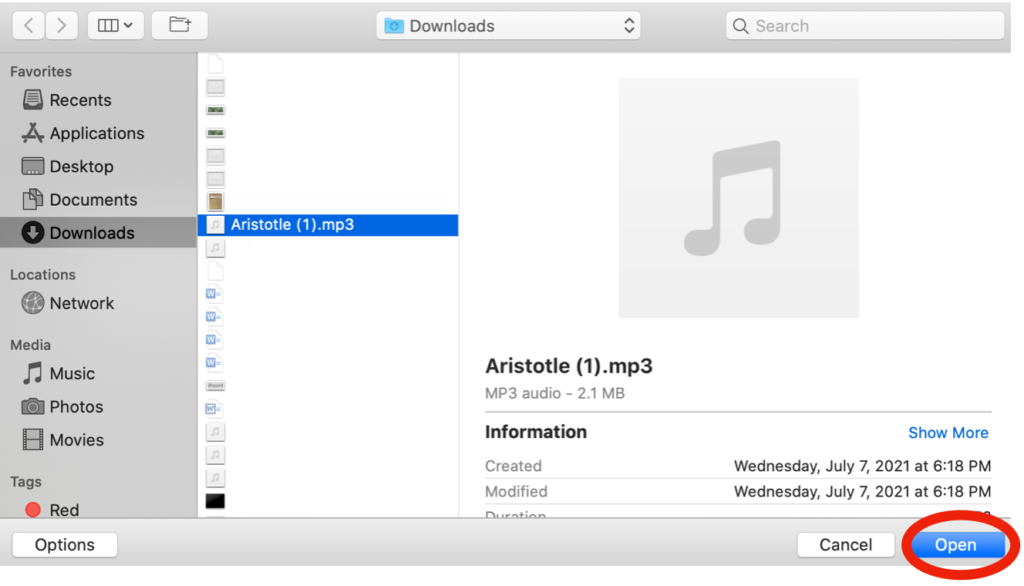
3. once the “import media” window pops up, click and drag the image into the “drag and drop media here” box OR click “browse to select” and go through your files, select the image, and hit “open”
OR
How to put imported content into a video:
1. drag content to the timeline by clicking and holding the image you want to put in the video
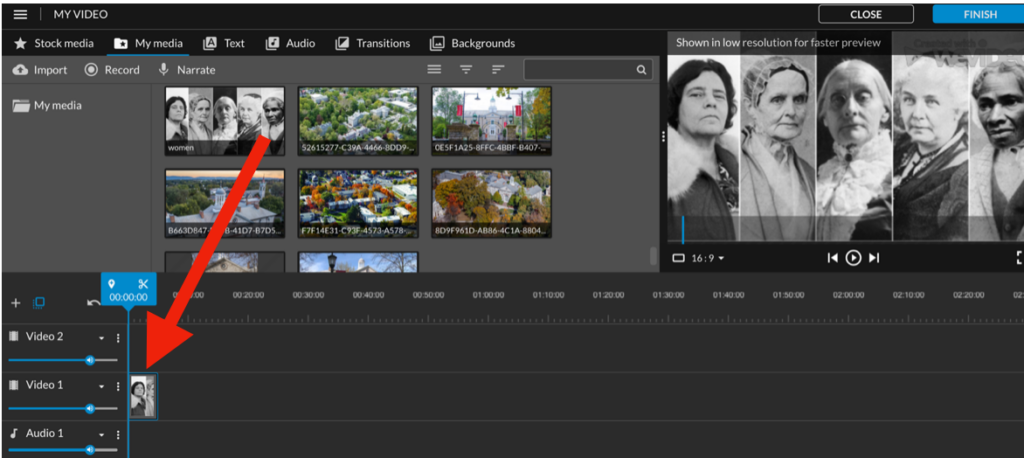
Note: it will turn green around the edges if it is placed in the right area
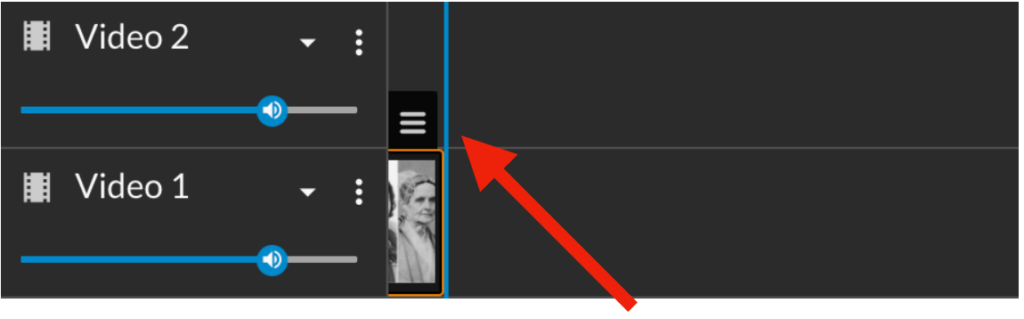
How to delete imported content from a video:
1. click on the clip you wish to delete until you see the three lines
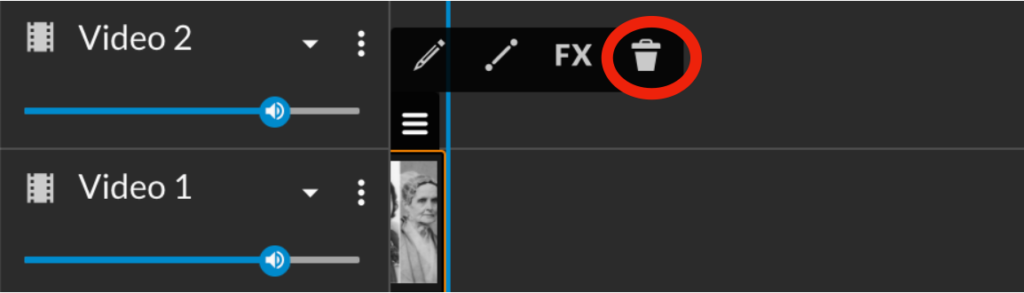
2. click the three lines until you see a popup bar, click the trashcan icon on the popup bar
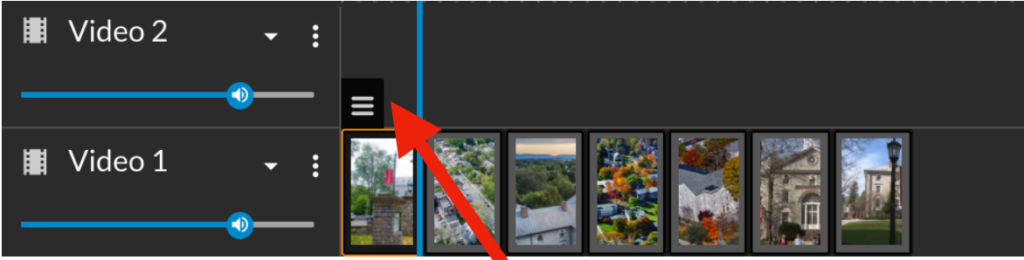
How to modify content once it is in the timeline:
1. click on the clip you wish to modify until you see the three lines
2. click the three lines until you see a popup bar, click the pencil icon on the popup bar
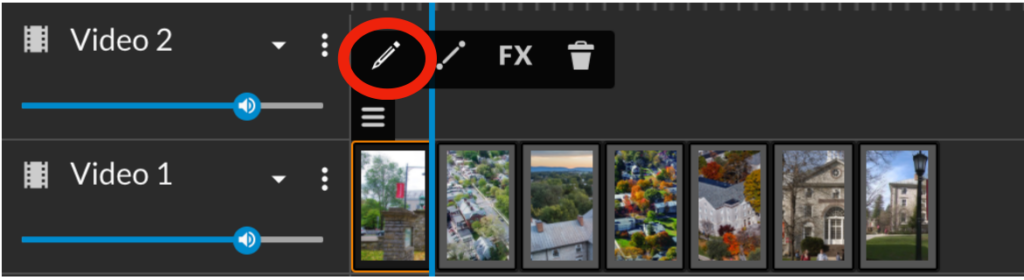
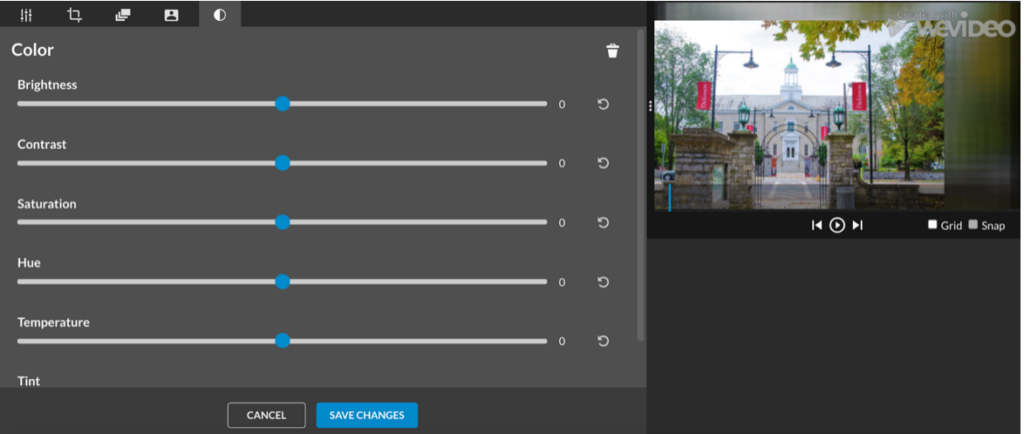
3. This will bring you to an editor screen that looks like this:
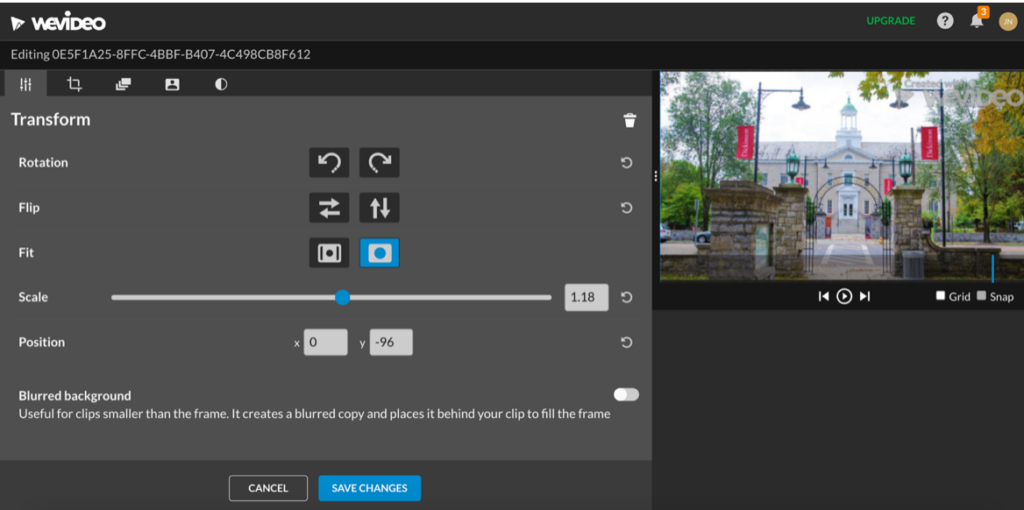
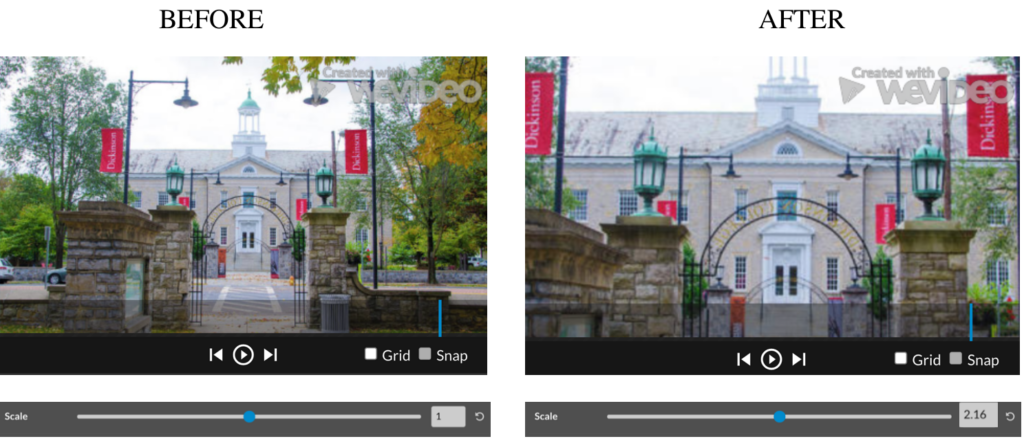
transform sub-tab: allows you to change the position of your clip
- rotate
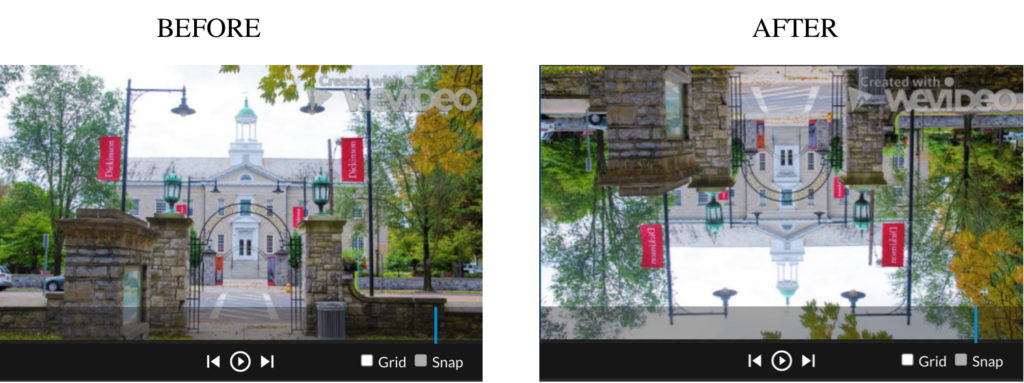
- flip
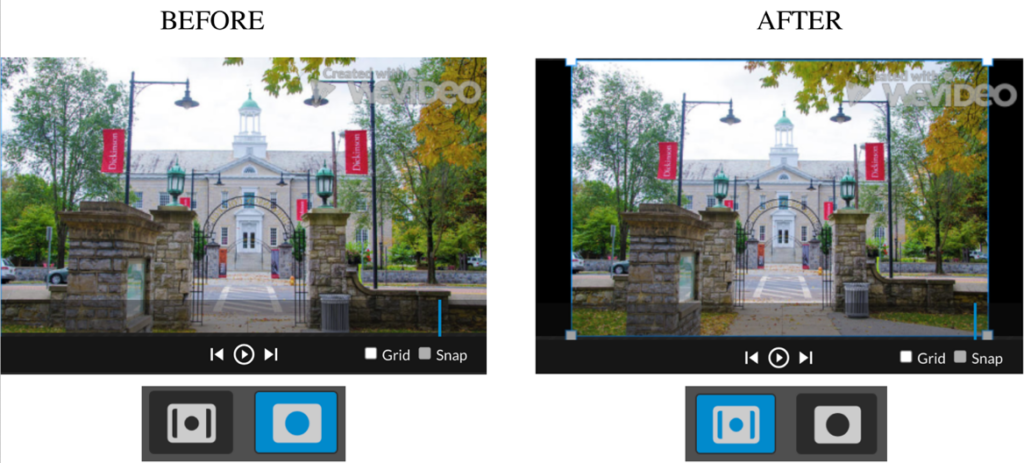
- fit
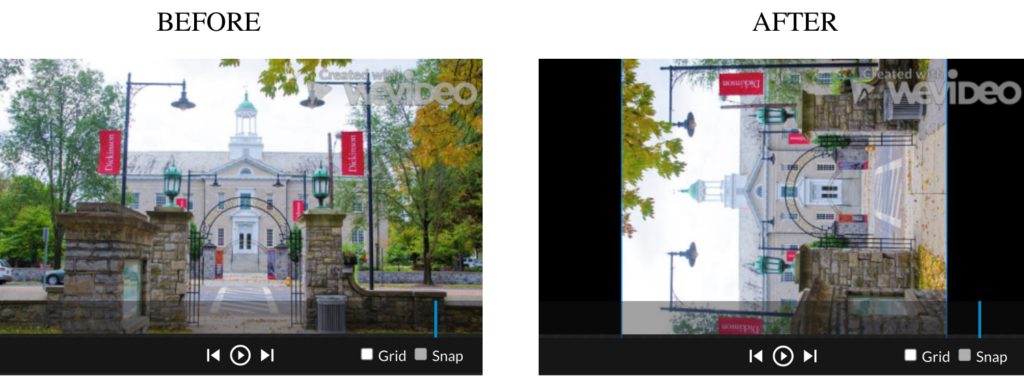
- scale
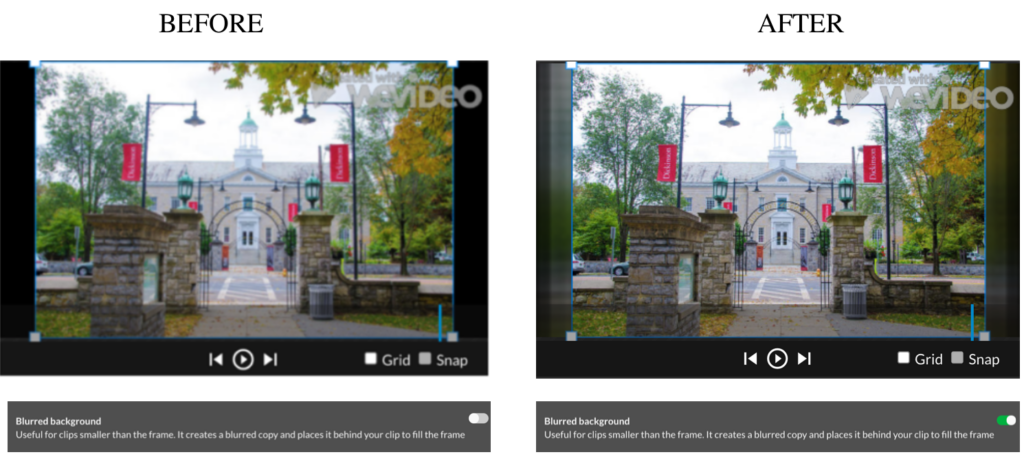
5. blurred background
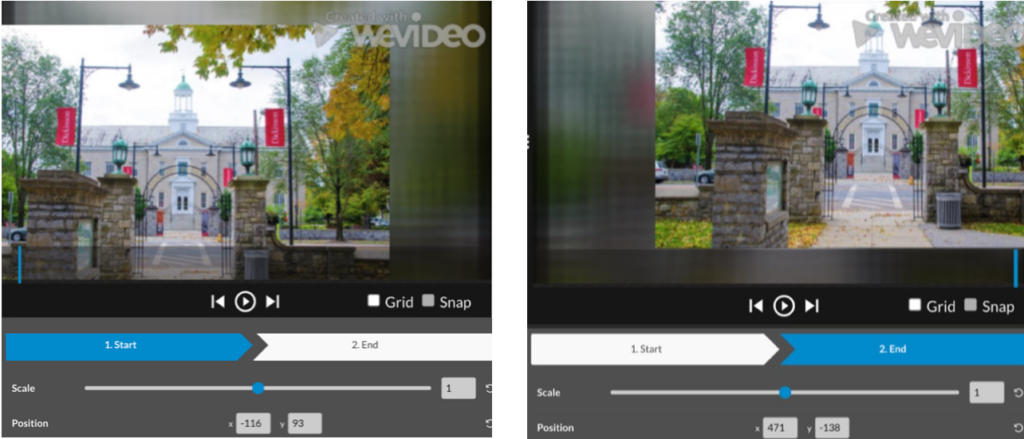
animations sub-tab: allows you to make your clip move
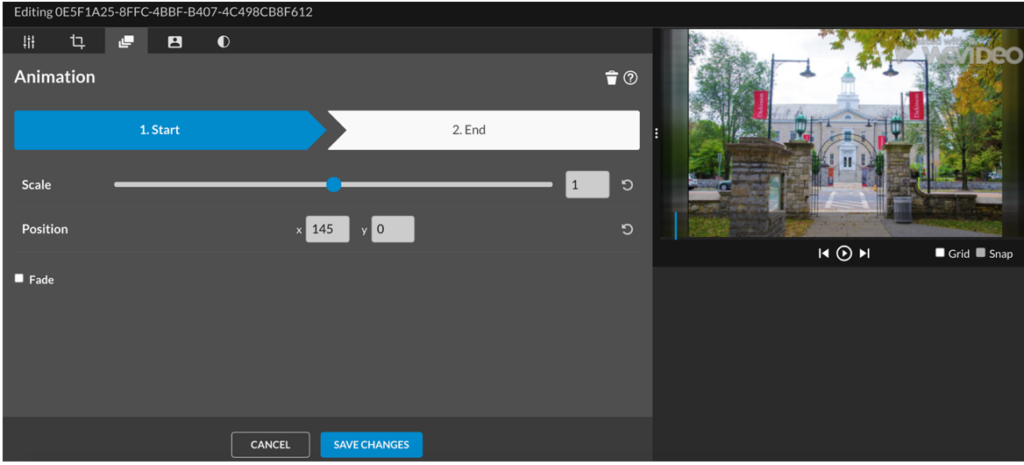
example:
color sub-tab: allows you to change the color of your posts
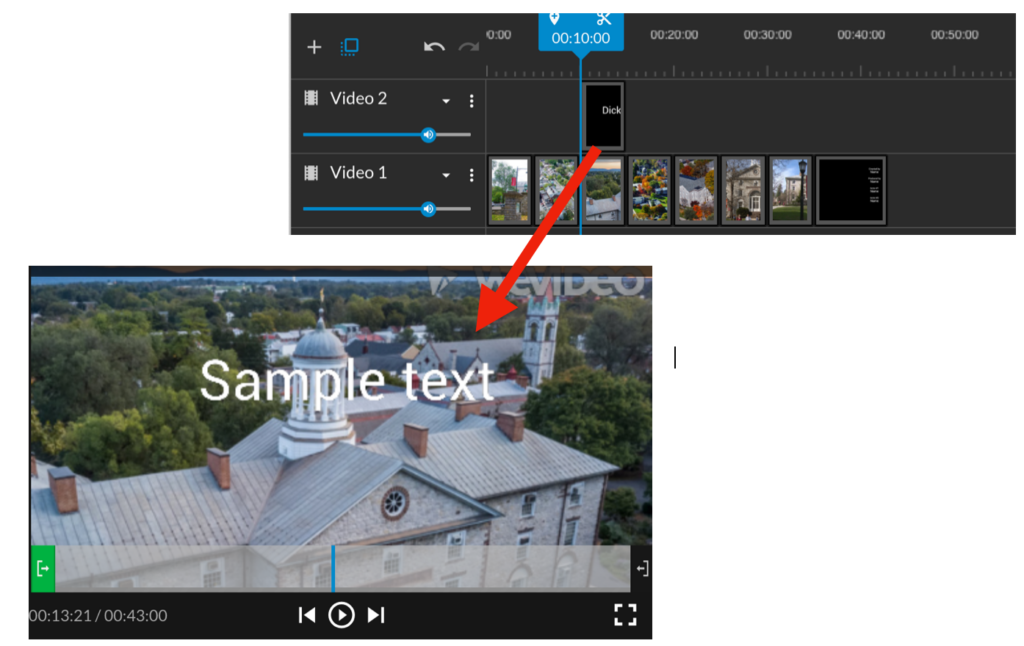
How to add text:
1. click “static” towards the left
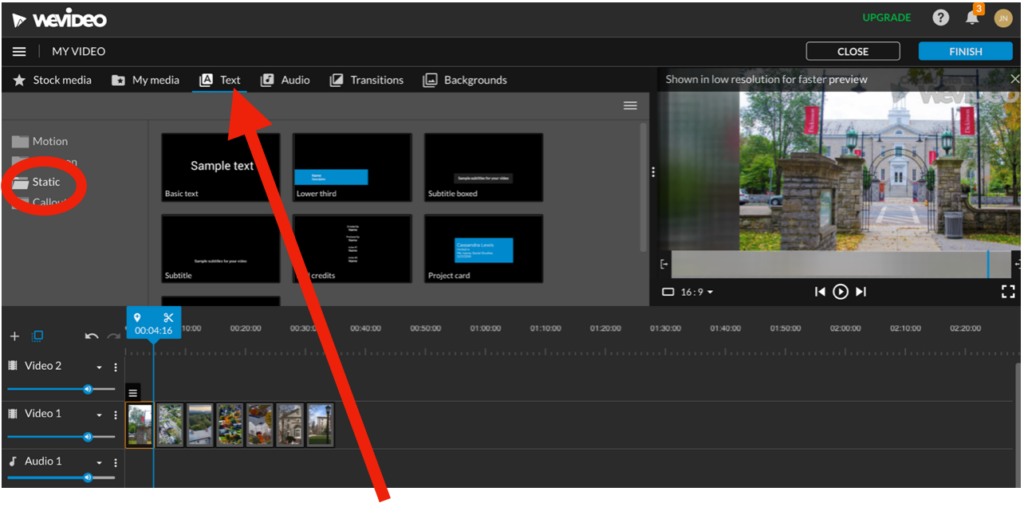
2. click and drag the text style you want into your timeline
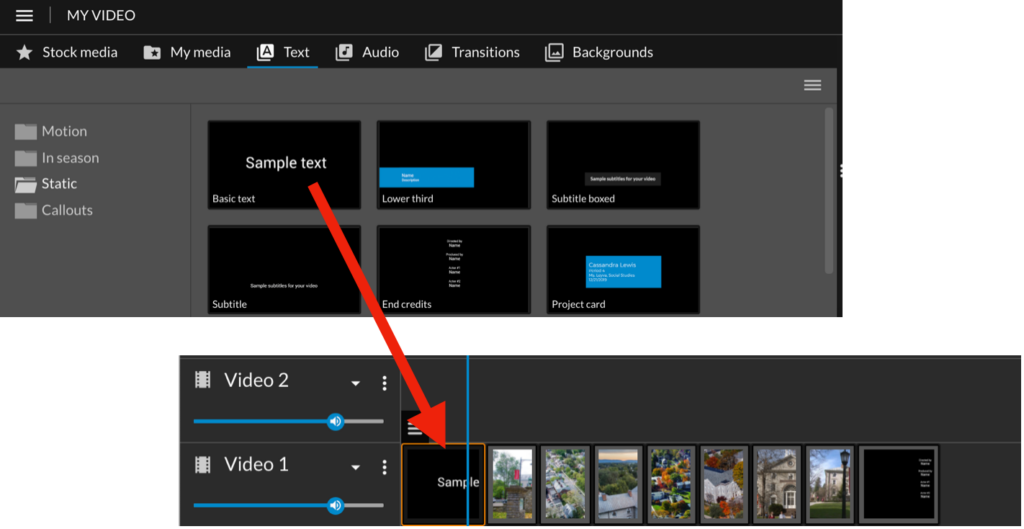
Note: use the “basic text” to add titles and captions to your content; use the “end credits tab” at the end of your video, where you will you’re your content sources
5. put the text next to your other content in the timeline to have it show up on a separate screen
6. put it above the “video 1” timeline into the “video 2” timeline to have it appear on top of already added content
How to edit text:
1. click on the clip you wish to modify until you see the three lines
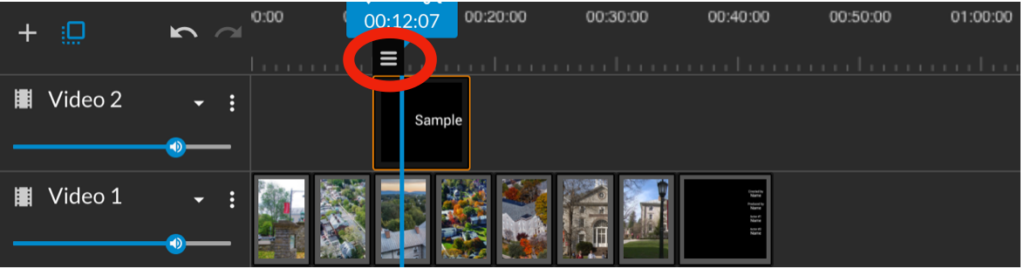
2. click the three lines until you see a popup bar, click the pencil icon on the popup bar, which will bring you to an editor screen

3. how to use the text editor screen:
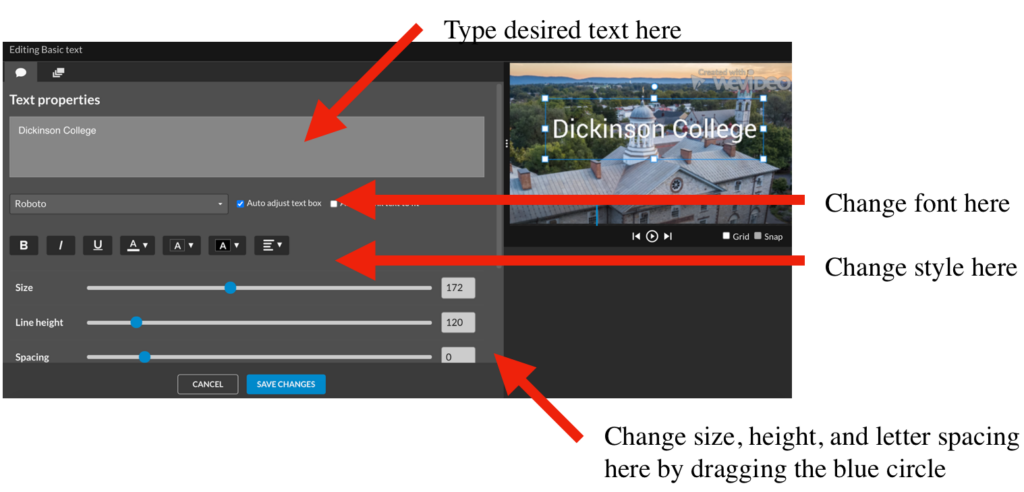
4. hit save changes when done
Helpful hint: you can animate text the same way you animate clips!
How to change length of clip:
1. go into the timeline and clip the edge of the clip you wish to shorten or lengthen
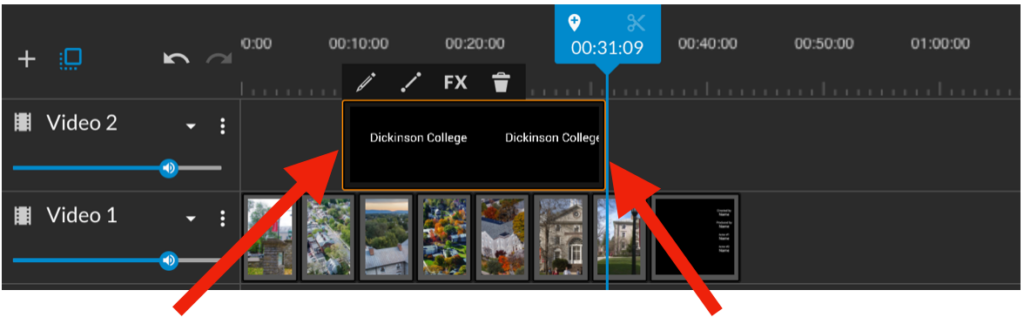
2. drag with your mouse
How to zoom in on timeline:
1. look at bottom right corner of screen where you will see a – + scale
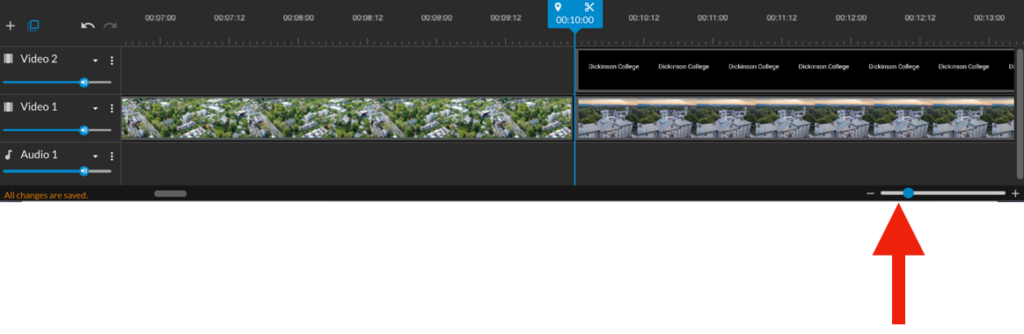
2. click and hold down on the plus minus scale and you will see your timeline clips get larger or smaller
helpful hint: the more you zoom, the more accurately you can cut clips!
How to cut clips:
1. click on the clip you wish to cut until it it highlighted orange
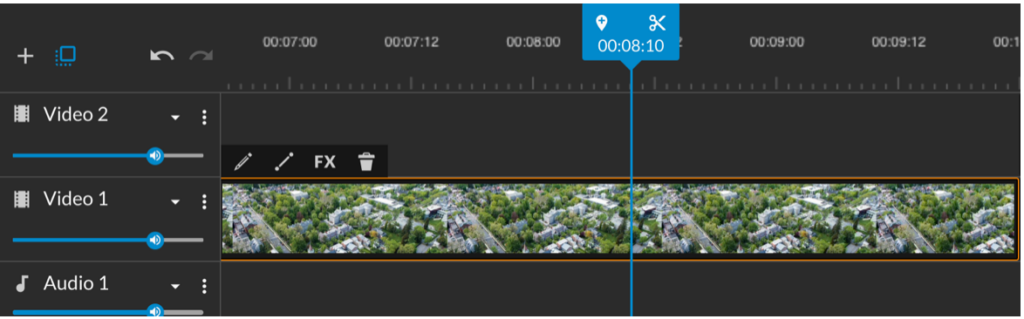
2. position the blue marker where you want to make your cut. On the blue marker, you will see a scissors button.
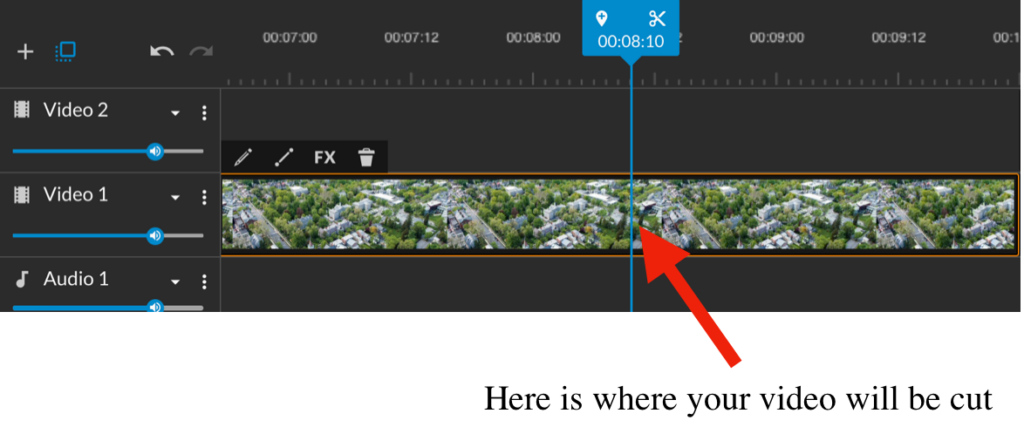
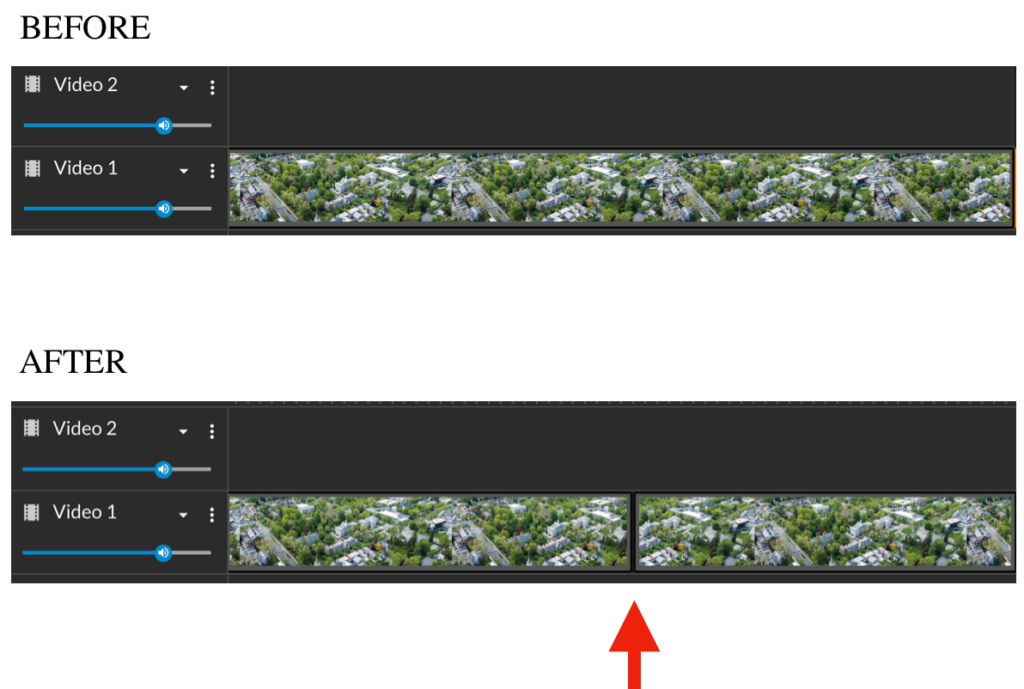
3. click it and it will cut in half
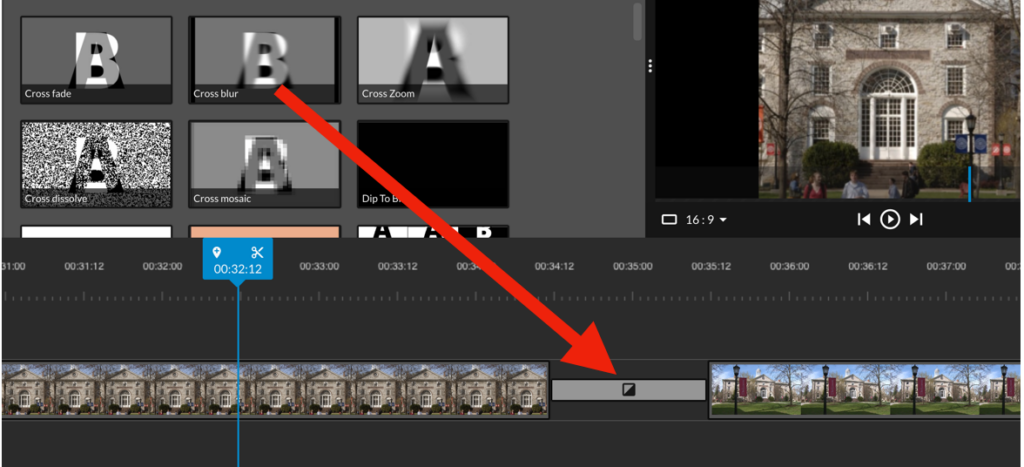
How to make transitions between each clip:
1. go to the transitions tab
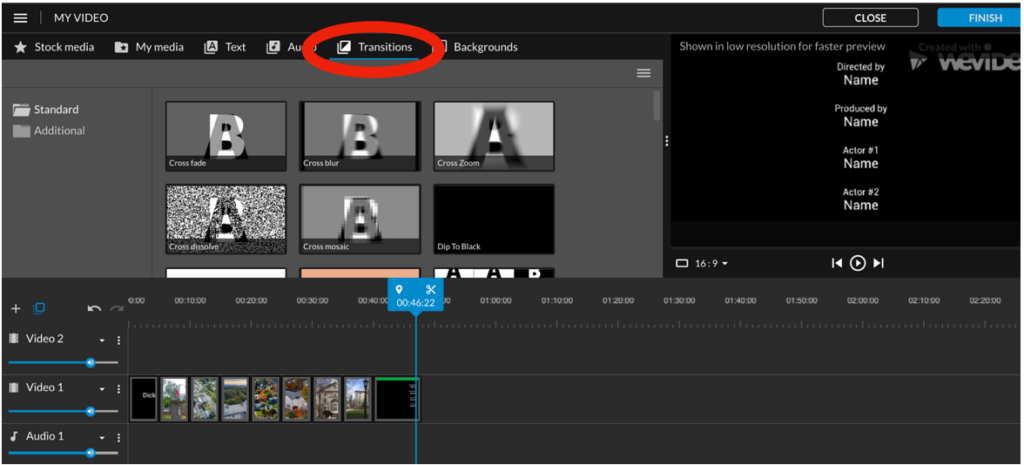
2. click and drag the desired transition into the timeline before, after, or in between the desired clips
How to add more video tracks to your timeline:
1. look to the far left of your screen and click the “+” button
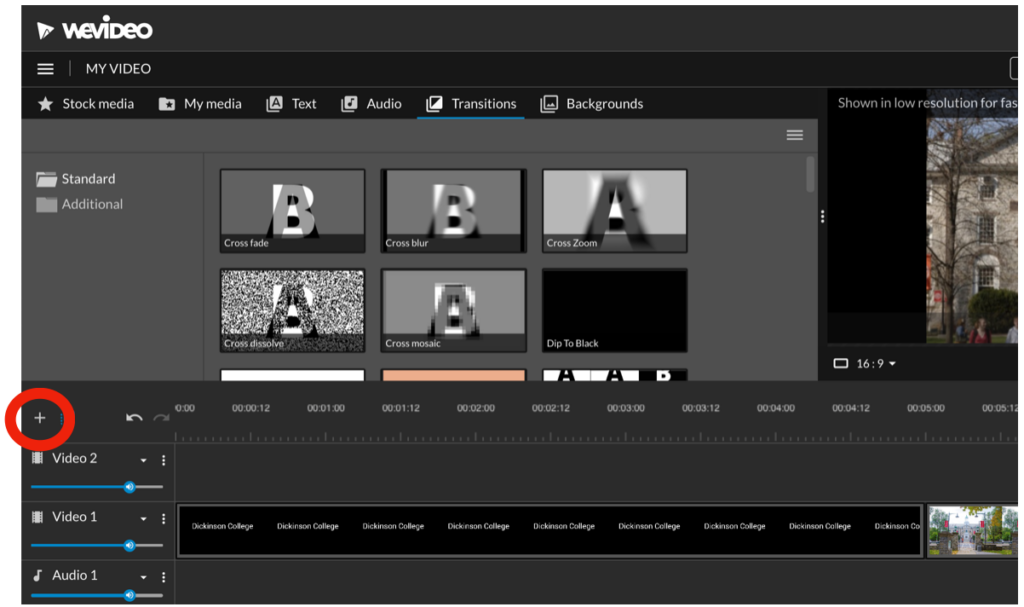
2. when the “add a track” screen pops up, hit “add track”
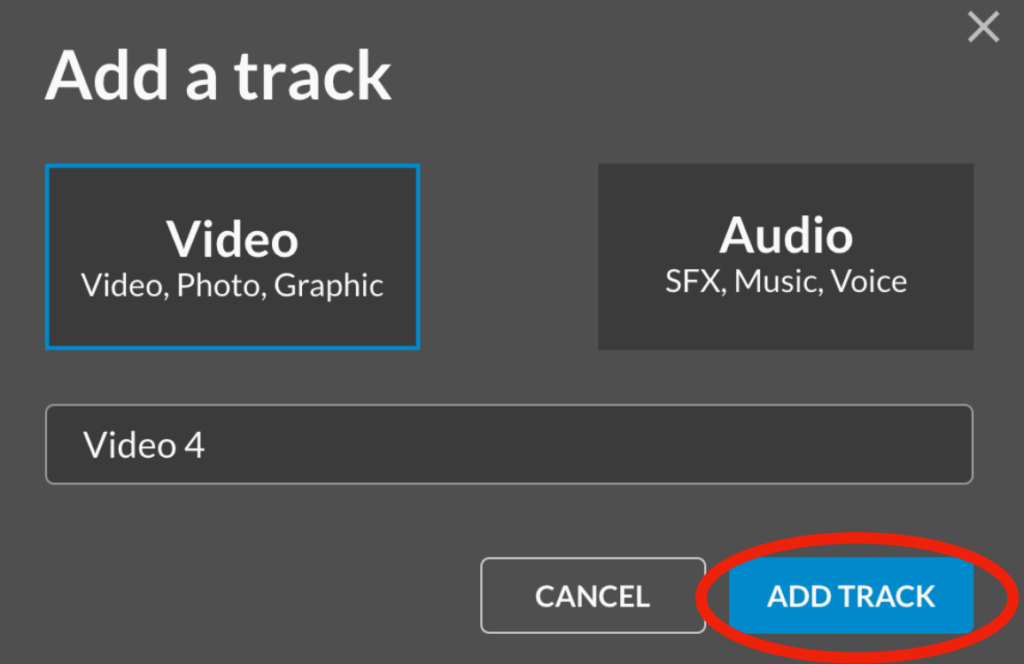
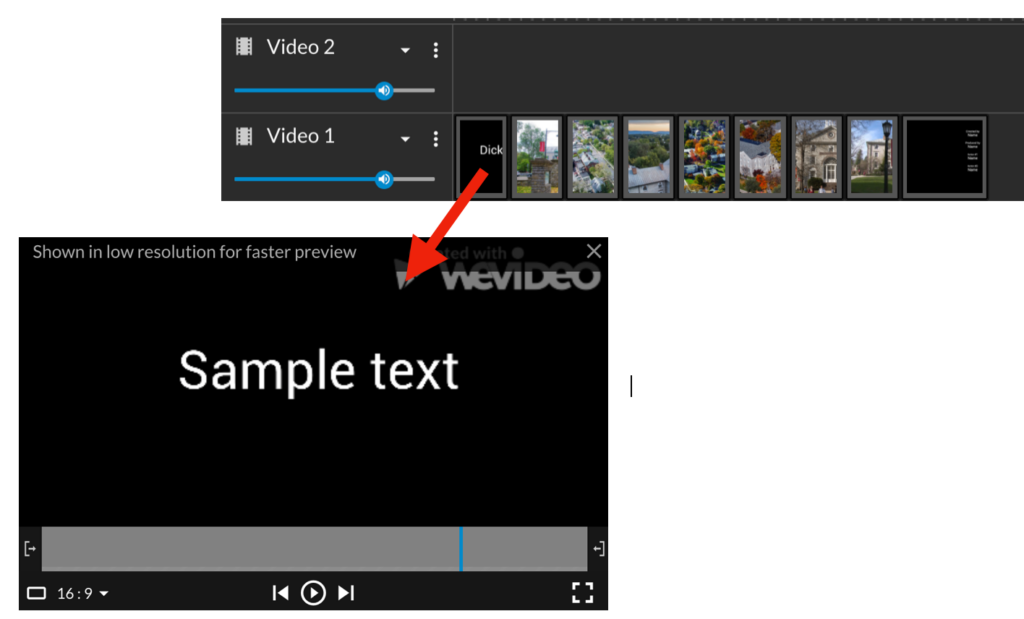
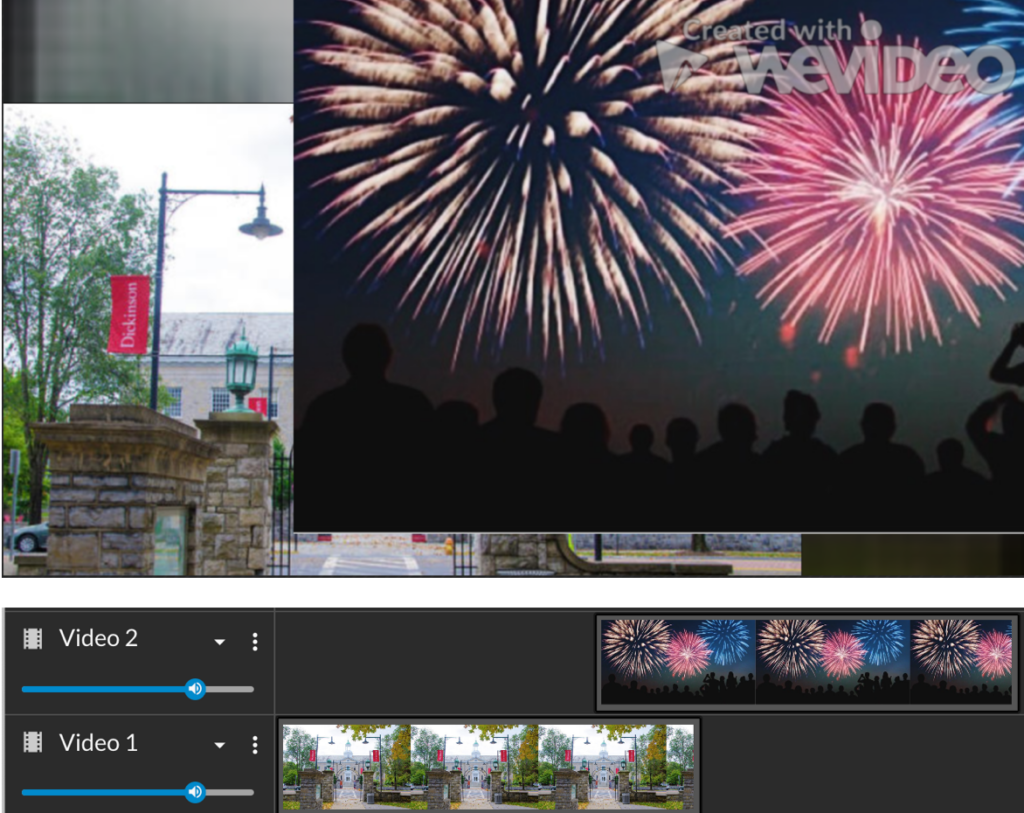
3. You will notice “video 1,” “video 2,” “video 3,” and so on as you add more tracks.
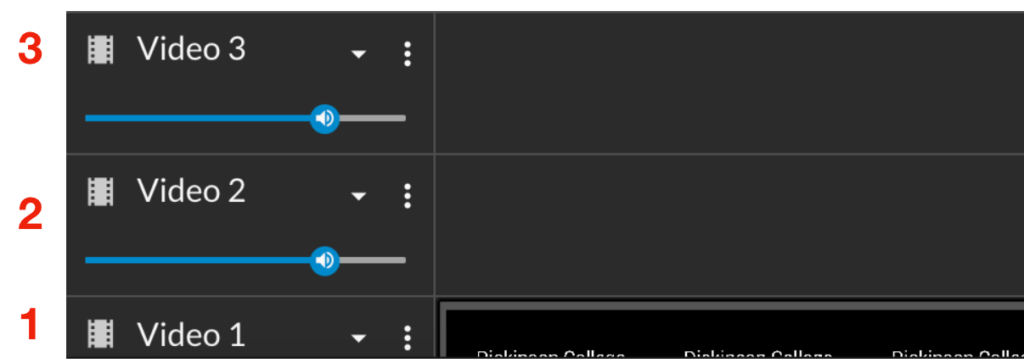
Note: the clips placed on the highest numbered track will appear front and of the clips placed lower. EXAMPLE:
How to move multiple clips at once:
1. click and drag your mouse over every clip you want to drag until they have a green outline

2. when they are properly highlighted, all clips should be outlined blue when you let go of the mouse

3. click anywhere inside the blue outline and all the clips will move together. If you do this correctly, there should be a thick green outline as you try to move them

Part 3: Audio
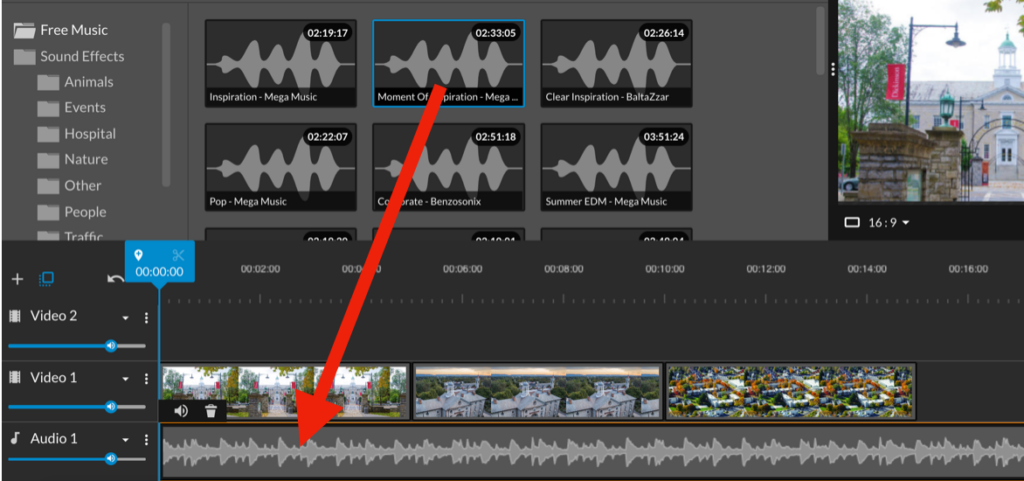
How to use free audio:
1. go to the “audio” tab

2. click on “free music”
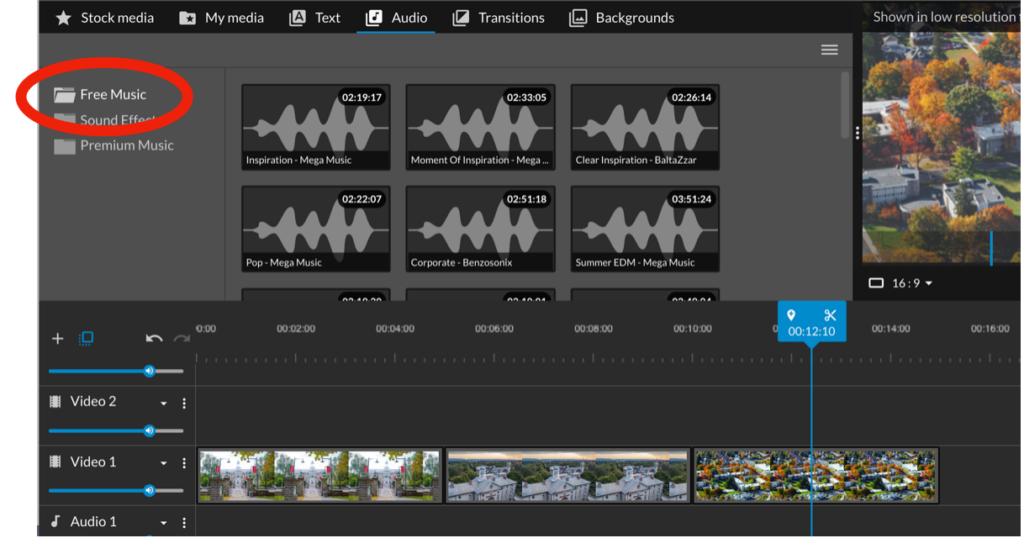
3. after selecting the song you want, click and drag it to the “audio track” in your timeline (below video 1)
How to import audio:
1. go to the “my media folder” towards top of page
2. hit “import” to the far left
3. once the “import media” window pops up, click and drag the image into the “drag and drop media here” box OR click “browse to select” and go through your files, select the image, and hit “open”
OR
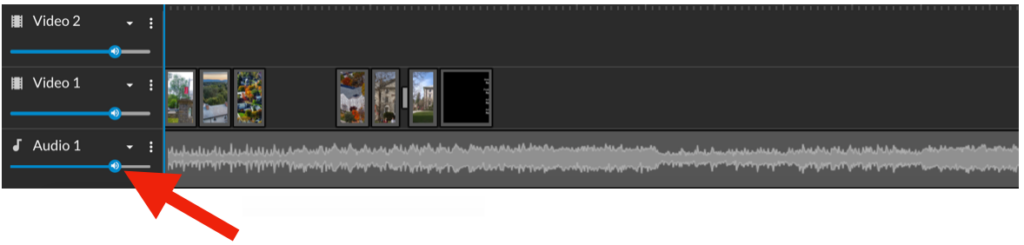
How to change the volume:
1. look to the bottom left of the screen and scroll the blue bar OR click on the clip you would like to change until you see the volume button. When you see it, click it and you can scroll the blue bar
OR
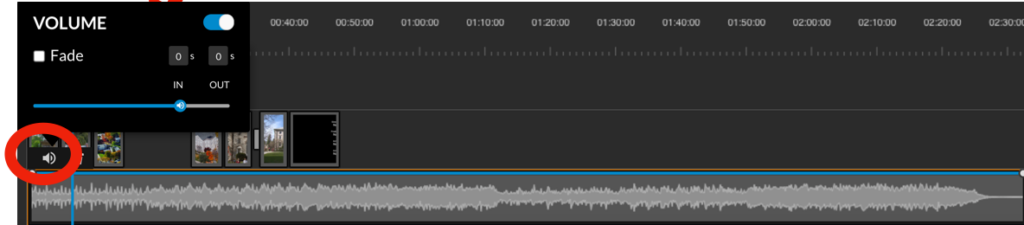
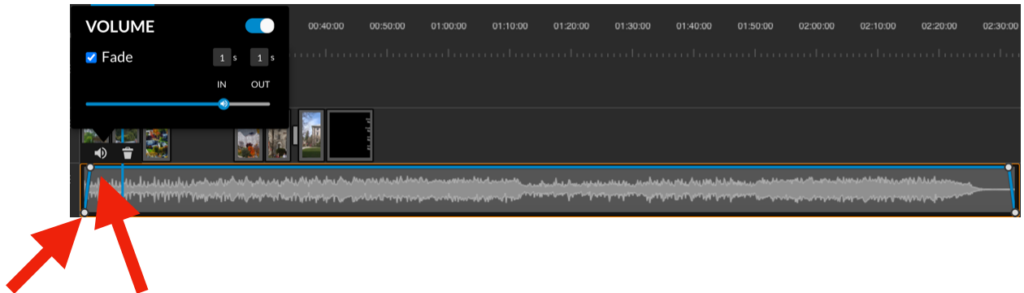
How to fade audio:
1. click on the clip you would like to fade until you see the volume button. When you see it, click it and select the fade box
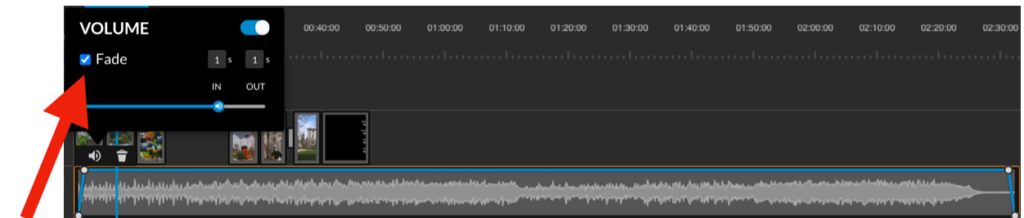
2. small, white dots will appear in your clip. Click and drag them to the desired volume you want
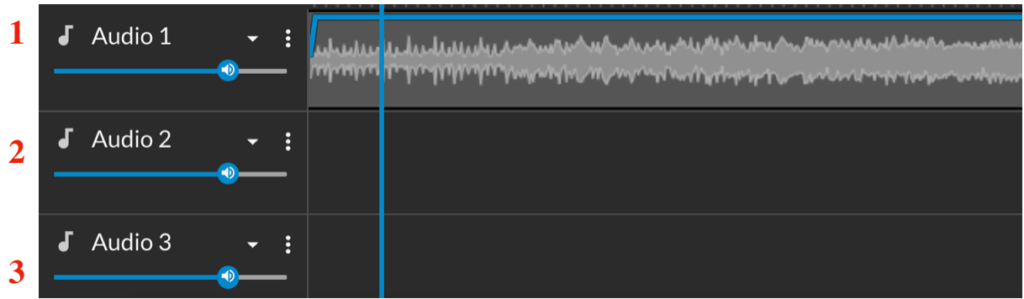
How to add another track:
1. look to the far left of your screen and click the “+” button
2. when the “add a track” screen pops up, hit “add track”
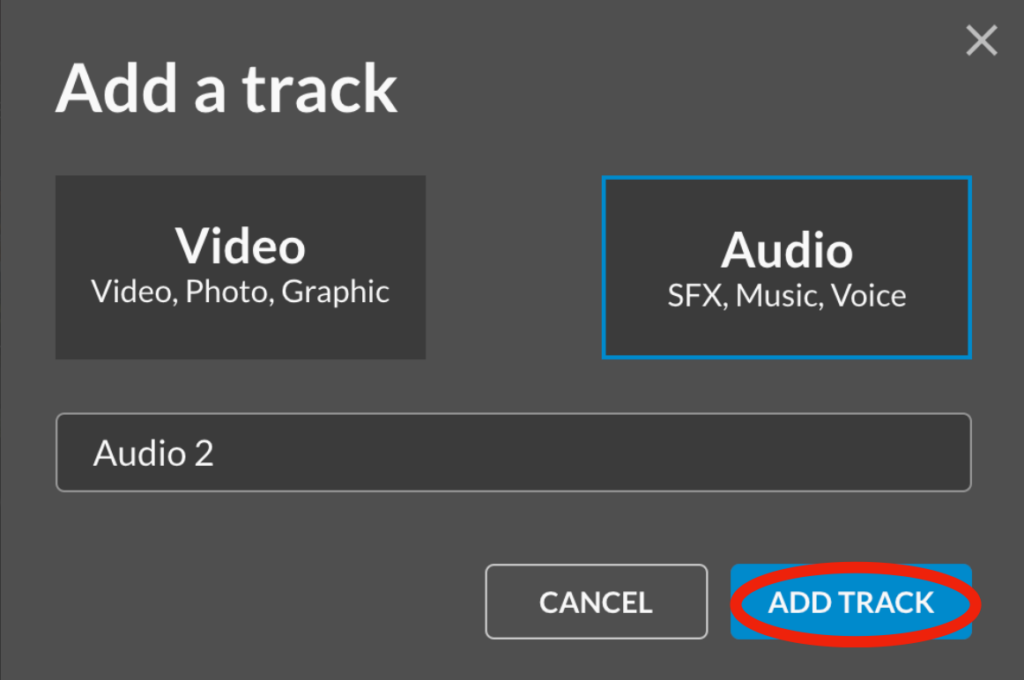
3. You will notice “audio 1,” “audio 2,” “audio 3,” and so on as you add more tracks.
Part 4: What to do when you are done
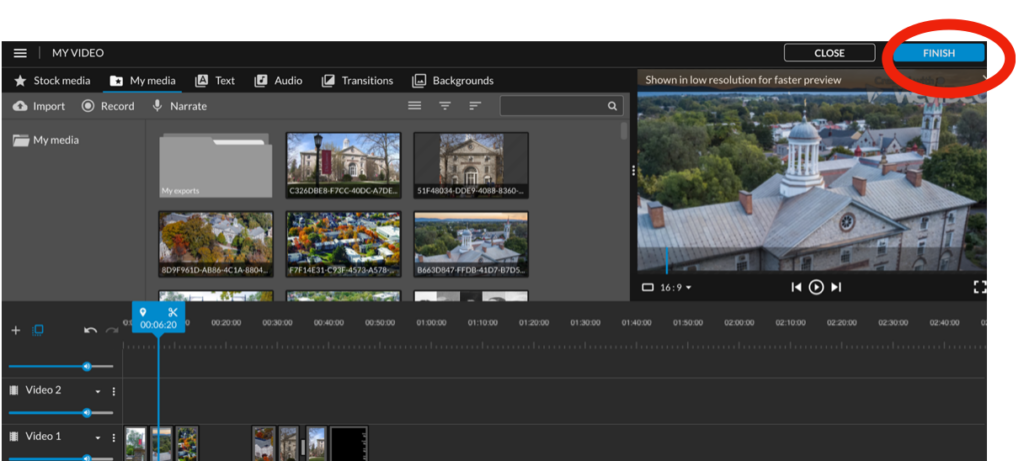
How to export:
1. When your video is complete, go to the top right corner and hit “finish”
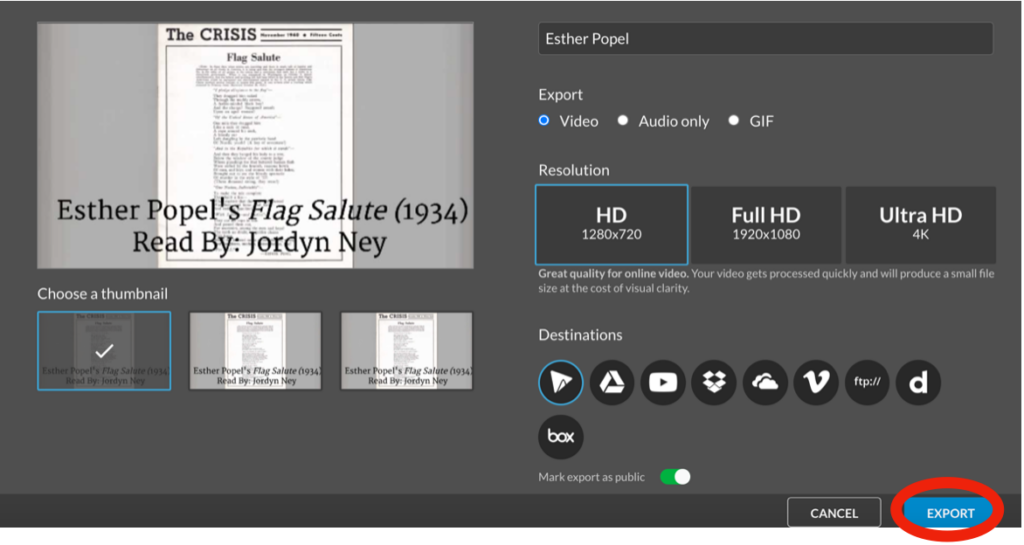
2. once on the export page, hit “export” in the bottom right corner
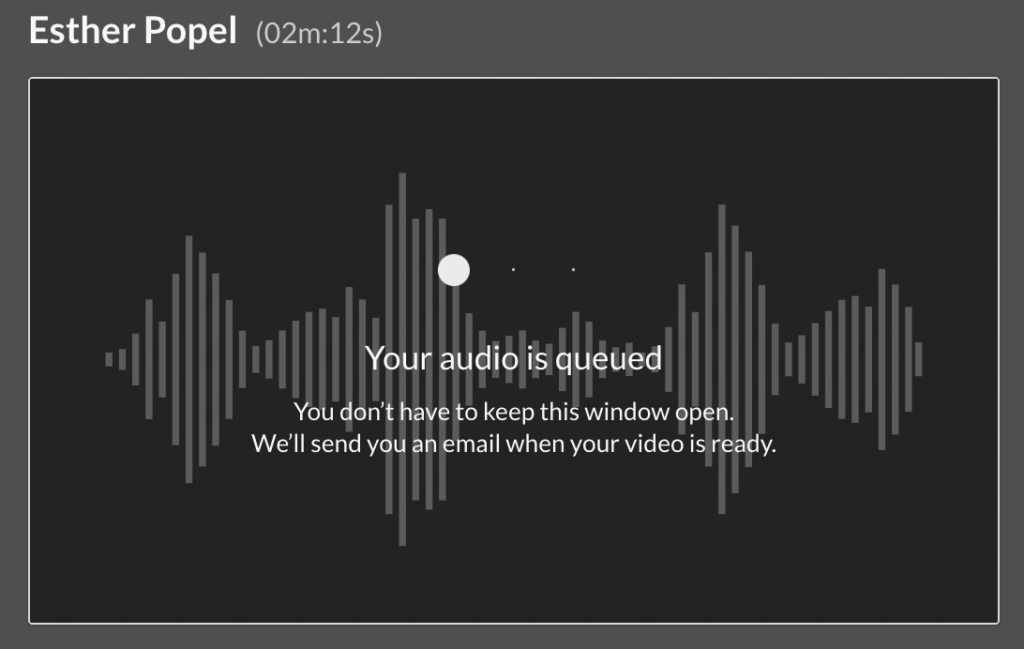
3. it will bring you to a page like this, wait until it is done
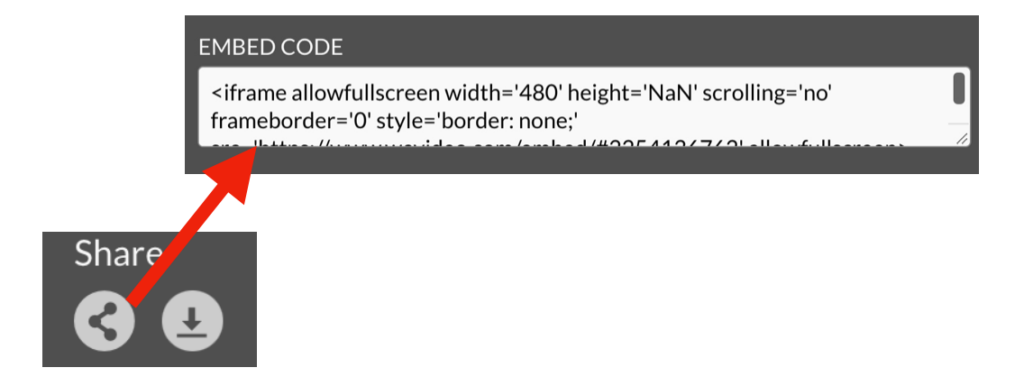
4. once done, copy the embed code so you can put it in your WordPress site
IMPORTANT NOTE: ON FREE ACCOUNTS, YOU ONLY GET 5 MINUTES TOTAL OF EXPORTING TIME PER MONTH. THAT MEANS ALL OF YOUR VIDEOS COMBINED CANNOT BE MORE THAN 5 MINUTES. USE YOUR EXPORTS WISELY.