This post is part of a new summer 2017 “DIY” (do-it-yourself) series by House Divided Project interns Rachel Morgan and Sam Weisman on how to make various types of primary source facsimiles; see posts on CDVs, stereocards, colorized photos, and letters.
On a camping trip for the first time, a student in my mother’s fifth grade class exclaimed that he was surprised the great outdoors “wasn’t all black and white”. The student, raised on video games and smart phones, thought of nature as old-timey, flat. If the vibrant colors and sounds of nature seemed “black and white” to the student, how could the black and white photograph of a moment ever connect?
You take in a black and white photograph all at once. A captivating video by Vox explains how adding a little color helps a viewer relate to the details – familiar denim pants or a cherry red Cola. Among a collection of black and white photos, just one flash of color can help students think differently about the rest. Familiar scenes from the Civil War come to life in color.
A color photograph looks like a slice of reality to the viewer, but the artist knows better. The image is an interpretation of the past: art, not reproduction. Artists run into issues if they present an updated photo as authentic and fail to credit the original artist. Professional color artists debated how to present recolored images in this insightful piece. Students should be able to recognize that the new colors are not necessarily correct. If you are going to colorize Civil War era images, and especially if you post them online, make sure to clearly credit the original photograph and explain that you modified the new one. As always, make sure the image is credited for reuse. A “before and after” comparison proves very transparent, because the viewer can compare the artists work with the original. Being open about a colorized image does not make it less teachable. Students may look at black and white images differently if they imagine the alternative colors in the scene. See some good examples of how to present such work from the coverage by the Daily Mail and here from Time magazine in 2013 when new digital technologies helped make colorizing easier.
I learned how to colorize this summer and then made my first recolored photo in about an hour . With a few simple Photoshop tricks, vibrant color photos of history can be regular features in the classroom.
The quickest way to recolor a photo is essentially one of the oldest. In the 1890s, photographers tinted sections of their photo negatives and then layered them by color. The layer technique on Photoshop imitates this “photochrom” process for a quick and easy recolor. It is perfect for classroom use but only the tip of the iceberg in the art of recoloring.
I learned how to colorize photos from this tutorial by the Photoshop Video Academy:
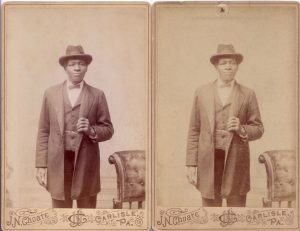
Bear in mind – colorization works best with a large, high-res image. Color brings out detail, and this is both a blessing and a curse when it comes to old, maybe damaged images. The best parts of the photograph will be more vivid but so will the blurry or unclear elements. Even with a high quality image, it may be difficult to decide what color to use. Shadows and camera angles can obscure parts of a picture. Your impulse may be to zoom in very close to seamlessly select parts of the photo. This is essential, but make sure you regularly zoom out to get the big picture. Notice my subject’s left hand in the color image below. Up close, this seemed like a shadow but zooming out on the original image, I recognized fingers. Keep the original picture open in a different tab so you can flip back and forth.
I started off with this portrait. The background and lighting are simple. Also, the face and hands make up a relatively small part of the image. Human skin tones are very difficult to get right and are one of the more noticeable differences if you get them wrong. Textiles are much easier. From my experience, I find full-body images easier to recolor than facial details or group photographs.
Where possible, use historical records or period models for color inspiration. Expert color artists will obsessively research to find the right colors for their subjects’ clothes but for classroom purposes, imagination and an educated guess can still make for a convincing photograph. I had no reason to believe my subject’s shirt was red, for example. Google “Lincoln in color” to see how many different ways artists have interpreted the same portrait.
The blacks and whites in old photographs do not carry over well into color. In fact, they fall on the spectrum of gray. So, even if part of an image will remain white or black in the finished product, it should still be recolored. For example, I tinted my subject’s coat a very dark blue so the color was consistent with the richer tone of the new image.
Try to keep the colors muted. An overzealous recoloring job will stand out. Compare your work with other colorized photographs, or even modern photographs of period artifacts.
All of these details will “unflatten” a black and white photograph. Maybe a student will discover that old photos weren’t so flat to begin with. Or, like Dorothy opening her door into the land of Oz, color will reveal a new world.



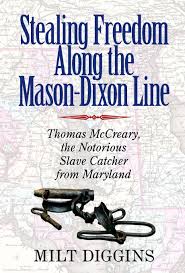 Editor’s Note: There has been an avalanche of important new scholarship on the Underground Railroad over the last twenty years, and yet there remains a critical gap in the literature. Scholars know comparatively little about the slave catchers (or kidnappers) who chased after the fugitives (or freedom seekers). This is a challenge that Maryland historian
