This post is part of a new summer 2017 “DIY” (do-it-yourself) series by House Divided Project interns Rachel Morgan and Sam Weisman on how to make various types of primary source facsimiles; see posts on CDVs, stereocards, colorized photos, and letters.
Imagine holding the tear-stained letter from a loving wife to her husband, a Union soldier. Then, follow the soldier through news clippings to the bloody Battle of Antietam. Hold the wife’s letter in one hand and the soldier’s death notice in the other.

House Divided Project facsimile collection
When students leaf through facsimile documents, they connect with these emotional stories. The authentic feel of a replica letter adds an interactive, physical layer to the study of primary sources.
Within my first week as an intern at the House Divided project, I picked up some tricks to quickly reproduce primary source documents. A few key details can make a facsimile ready for classroom use with little time and effort.
Getting the Paper Right
Paper was not made from wood pulp until after the Civil War. This is good for historians because newspapers and letters from this time are often better preserved than documents from the early 20th century. Most documents were off-white though, no matter how hard printers tried to clean them with bleach or lime.
“Fine writing” in books was printed on laid paper, a thin, woven, lightly coated sheet similar to Resume paper. Illustrations were printed on coated paper. The facsimile equivalent of this is photo glossy paper. People would have seen major events in the Harper’s Weekly or Frank Leslie’s Illustrated Weekly. The Harper’s Weekly archives are subscription-based but the Library of Congress carries many of the same photographs for free.
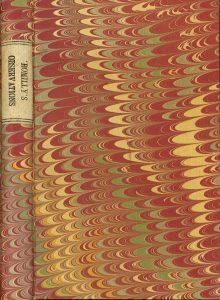
Realistic marbled binding on a facsimile diary or damage to a replica letter really feels like a piece of the past. Think about what practical details are missing from an image. For example, I bound a pamplet from the Southern Historical Society with colorful marbled paper.
To get the feel right, it can be useful to stop by your local historical society or archives to handle some original documents.
Patriotic Letters
A red, white, and blue sailor raises the flag of Union, surrounded by words of wartime optimism. Decorated stationary and envelopes like this were one of the main trends of the Civil War. Facsimiles of patriotic letters help bring to life the experience of the era. One of the House Divided documentary projects features this patriotic letter.
How to make a patriotic letter:
- Format the page size to 5″ by 8″.
- Add faint blue lines on the front and back, spaced about 3/8″ apart.
- Download a patriotic cartoon image, printed in red, white, and blue.
- Position an image in the upper left corner of the page.
- If reproducing a handwritten letter, transcribe the text and paste the transcript on the back. Feel free to correct misspelling or illegible sections.
How to make a formal letter:
- Format page size to 8″ by 10″.
- Switch to landscape mode.
- Divide into three sections, each about 3.5″ by 8″.
- Add message using period appropriate font or handwriting.
- Print and fold in thirds.
I printed letters on manila paper which was popular in the Civil War era. The same effect can be reached by recoloring the paper background in Microsoft Word. Go to the Design tab and select Page Color on the right of the tool bar. It may be difficult for students to read the handwriting so transcribing a letter in advance is very useful.
Learn more:
Sullivan, Bob (February 26, 2009) “19th Century Stationery Items” Civil War Wiki


Related Articles
2 users responded in this post
I like DIY tutorials!
Really interesting note about how paper was not made of wood pulp before the Civil War and how that helped preserve the documents we now posses. Getting the paper right is indeed quite important for achieving the look and feel of the era. Very nice facsimile collection!
Leave A Reply
Please Note: Comment moderation maybe active so there is no need to resubmit your comments