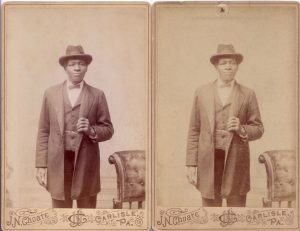
This post is part of a new summer 2017 “DIY” (do-it-yourself) series by House Divided Project interns Rachel Morgan and Sam Weisman on how to make various types of primary source facsimiles; see posts on CDVs, stereocards, colorized photos, and letters.
If you mention MySpace, you just dated yourself. Believe it or not, fads in social networking gave away their times just as easily 150 years ago. “Carte de visites” (CDV) were a mid-nineteenth century phenomenon like Facebook or Instagram. These portrait cards captured the nation in “cardomania”. Photography itself dates in the United States from the 1830s and 1840s, but early daguerreotypes were expensive and rare. By the late 1850s, the widespread emergence of printed photographic cards, CDVs, allowed friends and family to share their images with each other in relatively inexpensive ways. They often used the CDVs to create albums that, in effect, marked the boundaries of their social network.
This summer, I made several CDV printouts for classroom use. I found woodcut portraits and newspaper photographs to make CDVs. Then, I added some teaser introductions. When visitors enter the House Divided studio, they can pick up a CDV and find their subject in the exhibit.
I used Photoshop to make these CDVs but Microsoft Word works just as well on a budget.
How to make a CDV:
- Buy some cream colored card stock. Avoid cardboard.
- Download an image of your subject. It could be a full body portrait, head-shot, or illustration.
- If the image is colored or black and white, apply a sepia tone filter in Microsoft Word.
- Resize the image to about 2″ by 3.5″.
- Insert a blank CDV background and resize to 2.5″ by 4″
- Leave about 3/4″ space below the image.
- Insert a text box in the space at the bottom. Make sure it’s set to “no fill” and “no outline.”
- Add the subject’s name to the bottom of the CDV. Use a period appropriate font or write it in by hand.
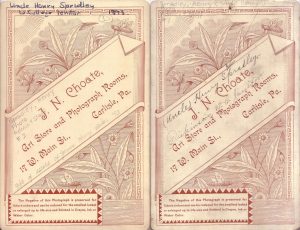
After the Civil War, larger cabinet cards replaced CDV. A cabinet card usually featured the photographer’s name on the front and an elaborate design on the back.
- How to make a cabinet card:
- Buy thicker card stock or thin cardboard.
- Download and resize a 5.5″ by 4″ portrait or landscape photo.
- Download and resize a 6.5″ by 4.25″ blank background.
- Find a graphic back to the card.
- Leave space at the bottom to insert the photographer’s logo.
A CDV can easily be adopted into a cabinet card and vise versa just by resizing and adding the photographer’s information. With some period costumes, students could even make their own CDVs or cabinet cards.
Read more:
The American Museum of Photography (2004) “A Brief History of the Carte de Visite”


Related Articles
No user responded in this post
Leave A Reply
Please Note: Comment moderation maybe active so there is no need to resubmit your comments