Images are a powerful way to connect to the past. Illustrations and photographs can put
faces and places to names, or give the minute but extremely significant human detail to
historical narratives that may otherwise be bland or irrelevant to people today.
Cons of Colorizing
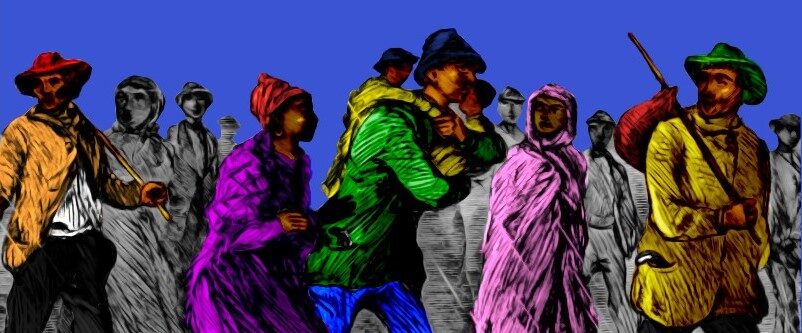
Some argue that colorization of photos is historical blasphemy. Without knowing exactly what color a city bus was in 1950 or the precise shade of a person’s skin color, adding color to black and white photographs is “misleading” and ruins the integrity of the image. Proponents of photo colorization argue that colorized photographs are not supposed to replace the original or tell a new historical narrative, but that they are meant to provide an interpretation of the image that can make historical photographs—and their stories—more fresh and accessible for people who would otherwise be uninterested in a distant, black and white past.
Not to mention, colorizing historical photos doesn’t have to be completely without historical integrity. Large colorizing projects like the Smithsonian’s America in Color series involved hours of research to identify the accurate colors for buildings, people, clothing, and other objects that appeared in their historical photographs and film.
How to Colorize Using Adobe Photoshop
Doing anything in Photoshop can seem a daunting task to any beginner to the program, but colorizing can be a simple, albeit long process given a working understanding of a few of the program’s tools and functions.
Before you begin, you must select and prepare your image. It is important to select good quality image with high resolution (referring to the number of pixels in the image) and as little grain (spots in the image) or color/fading as possible. The better the quality of the image, the better the finished product will be.
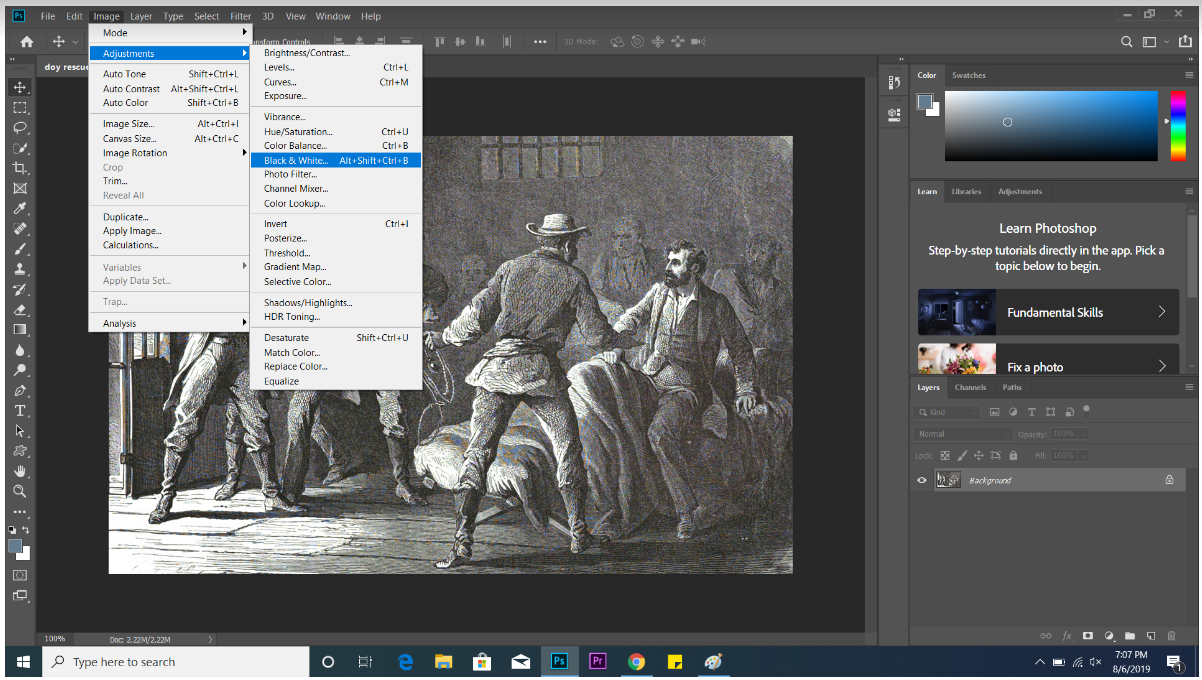
- Some steps can be taken to improve the image’s quality using Photoshop: From the menu bar at the top, select Image, then Adjustments. If there is any color in the image, like in the example below, select Black and White to remove any extra color that would interfere with the colorization. Altering the brightness, contrast, and exposure can also fix blurriness or too much brightness in an image.
Colorize using layers:
Colorizing an image with layers is best for large areas with little variation in color, or as a first step to adding color to your image.
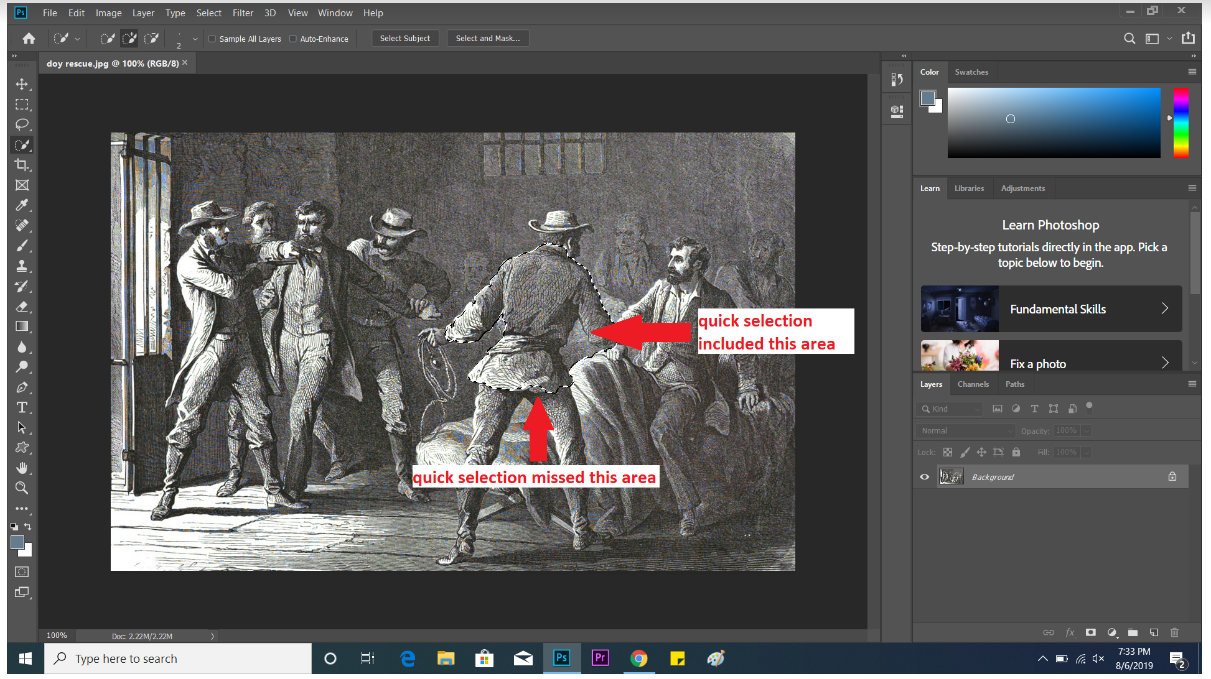
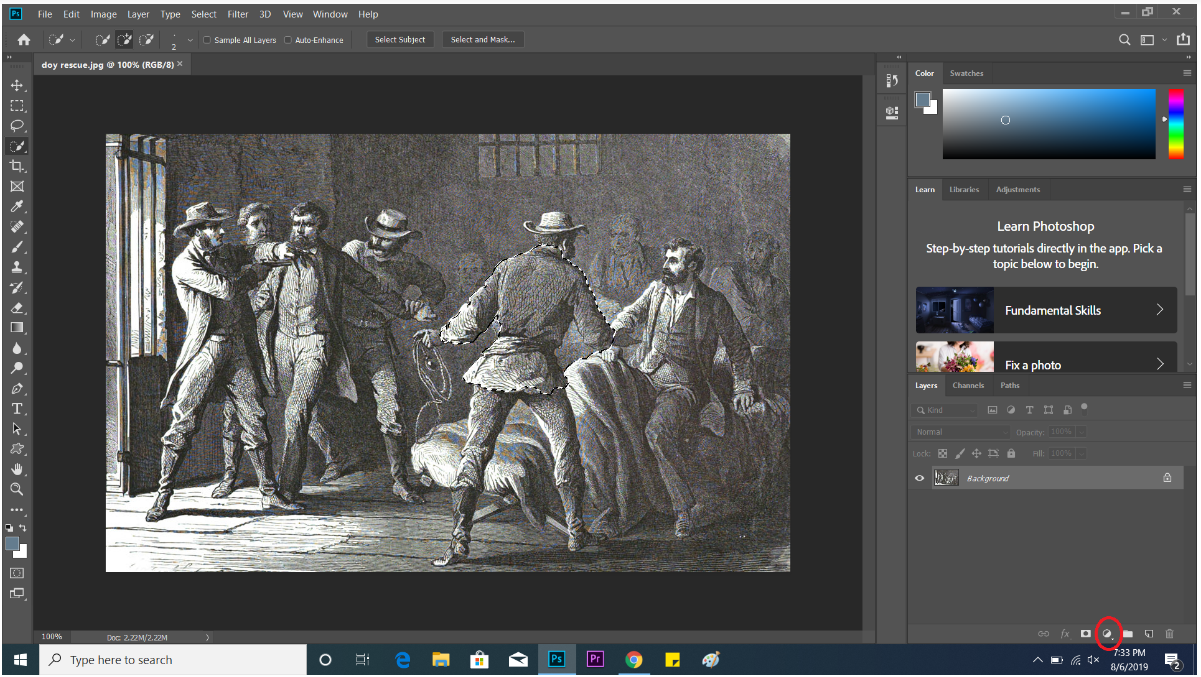
1. First, select the area of the image that you want to color. There are three tools that you can use to make a selection: the regular marquee tool, the lasso tool, and the quick selection tool. The quick selection tool is the optimal choice for creating a layer to colorize; all you need to do is click and drag the mouse in the area you want to color. The quick selection tool will follow the mouse and select all the similar-colored parts of the image. If the area you are colorizing has significant variation in color/shade, the quick selection tool might not select areas that you want, or include areas that you don’t. To erase parts of your selection, press the ALT key on your keyboard, and click and drag the mouse over the area.
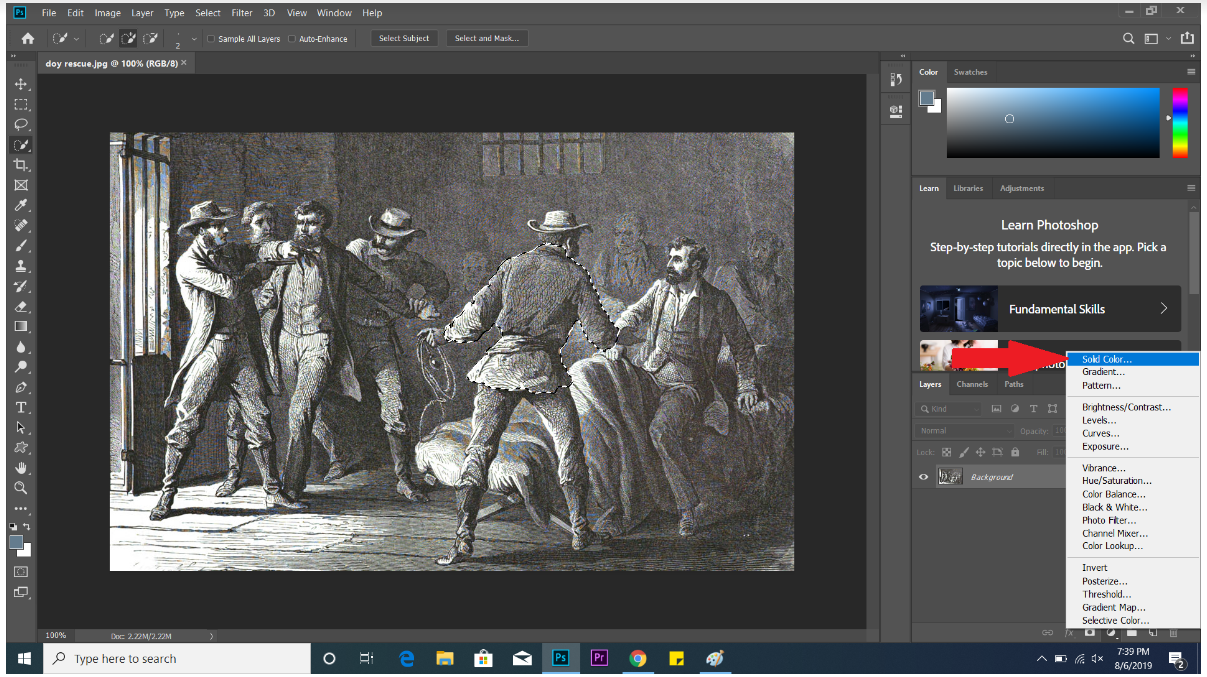
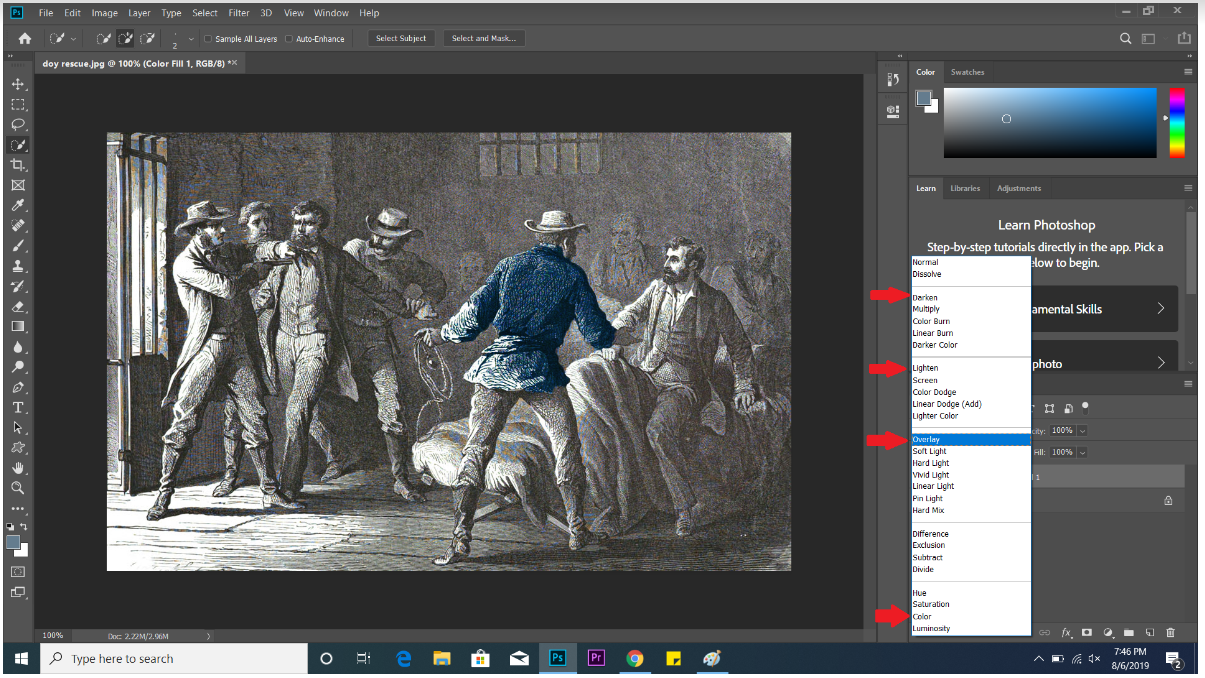
 2. Create a new layer. Once your selection has been made, click the tool at the bottom right corner to “create a new fill or adjustment layer.” From the list, select Solid Color, and choose the color that you want to add to your image.
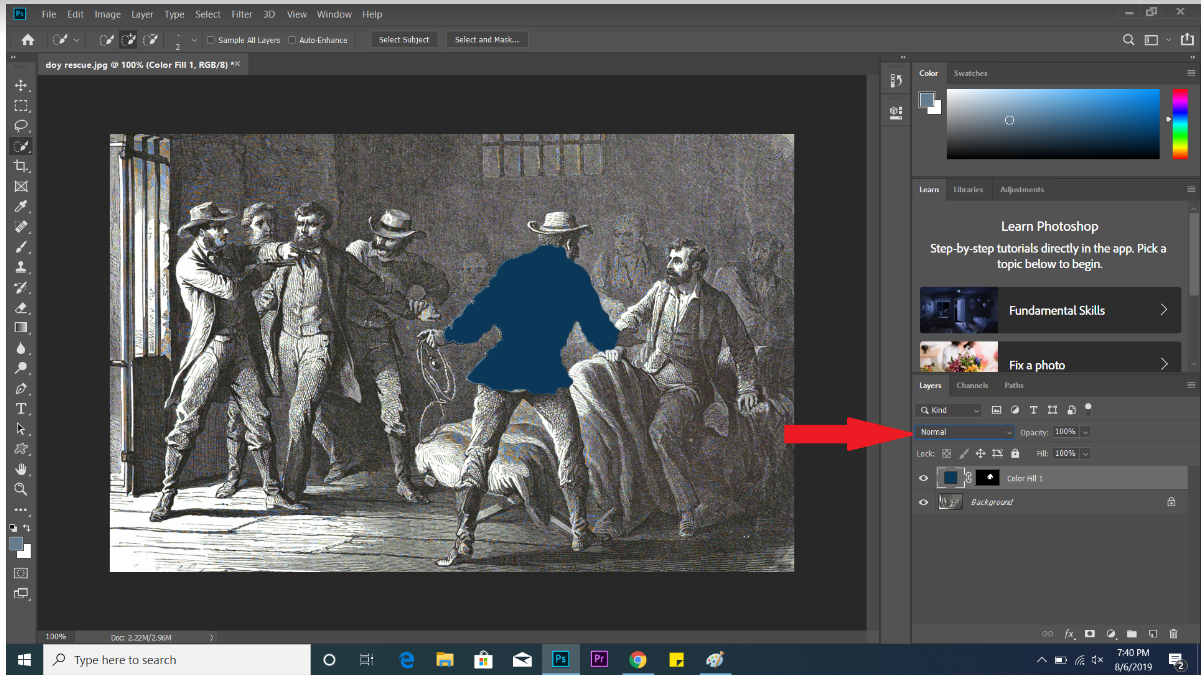
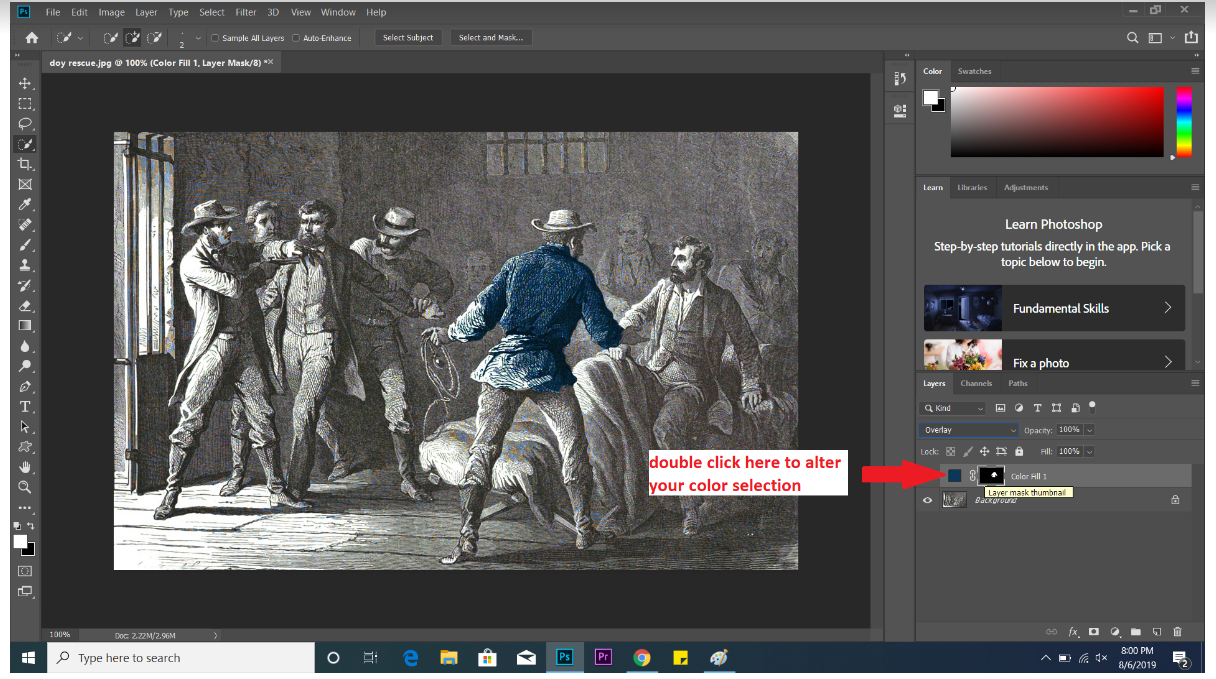
3. Edit the layer. Right now, the color you just added is completely covering the image. From the drop down menu indicated below, you can change this to make the color blend in more realistically. There are many options to choose from, but Overlay is usually the best. Other options that can work, depending on the brightness/quality of the image, are Lighten, Darken, and Color. You will need to take some time here to see which looks best, and to perfect your color by double clicking on the square of color next to your new layer, and altering it to your liking.
Colorize using paintbrush: Colorizing with paintbrush is better for small details, or adding detail to an already colored layer.
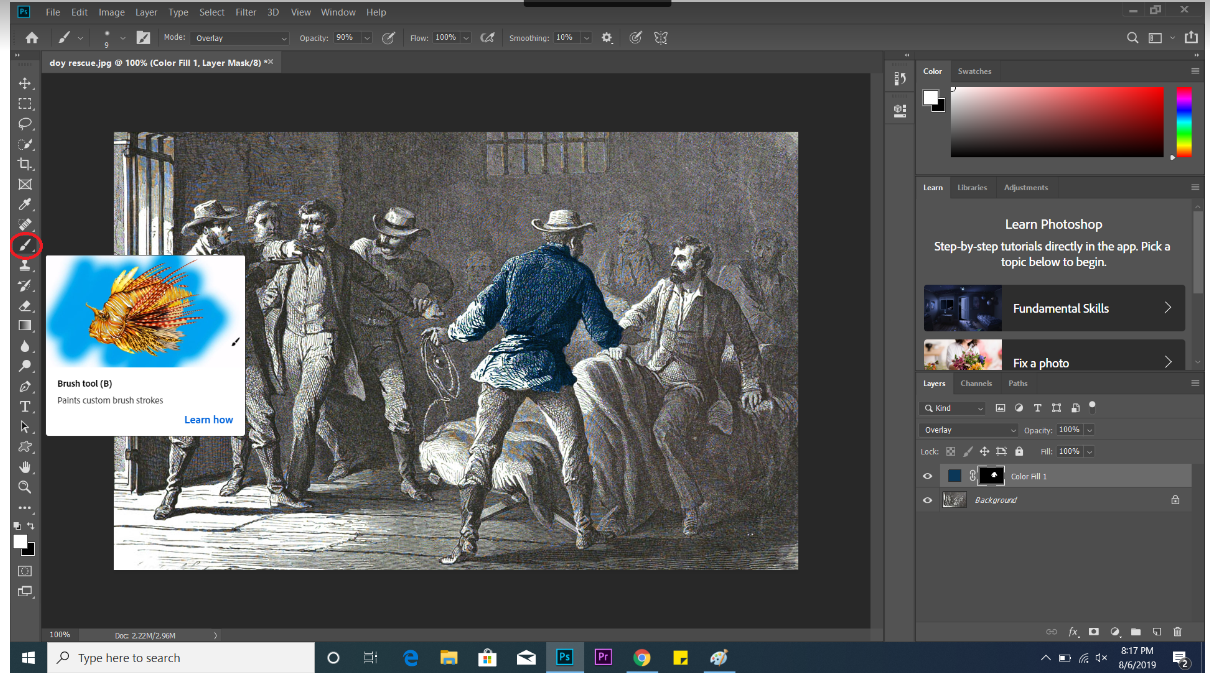
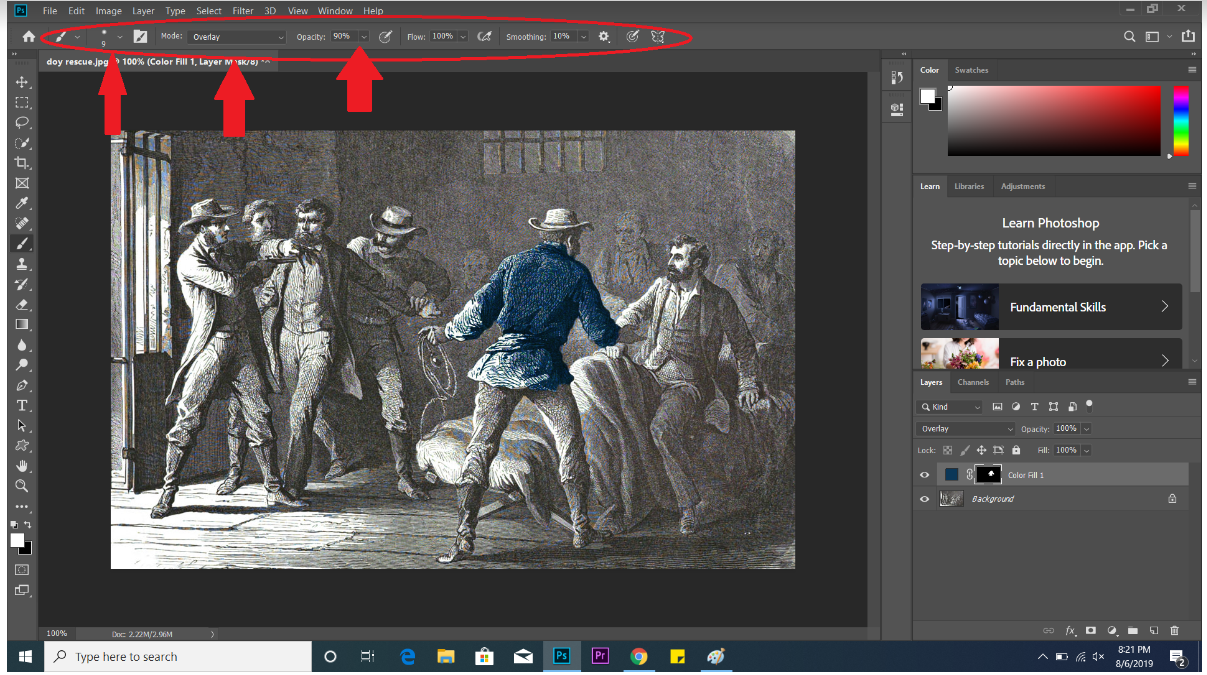
1. Select the Brush tool. Just like with layers, you can choose how the brush adds color to the image by changing the settings in the menu bar along the top. By clicking on the size icon, you can adjust the size and blurriness of the brush tool. From the Mode menu, you can alter the blending of the color into the image; you will want to select from the same options as before: Overlay, Lighten, Darken, and Color. The last important tool in this menu is the opacity tool: this can increase or decrease the transparency of your color, which is helpful if the color is showing up too strongly in the image.
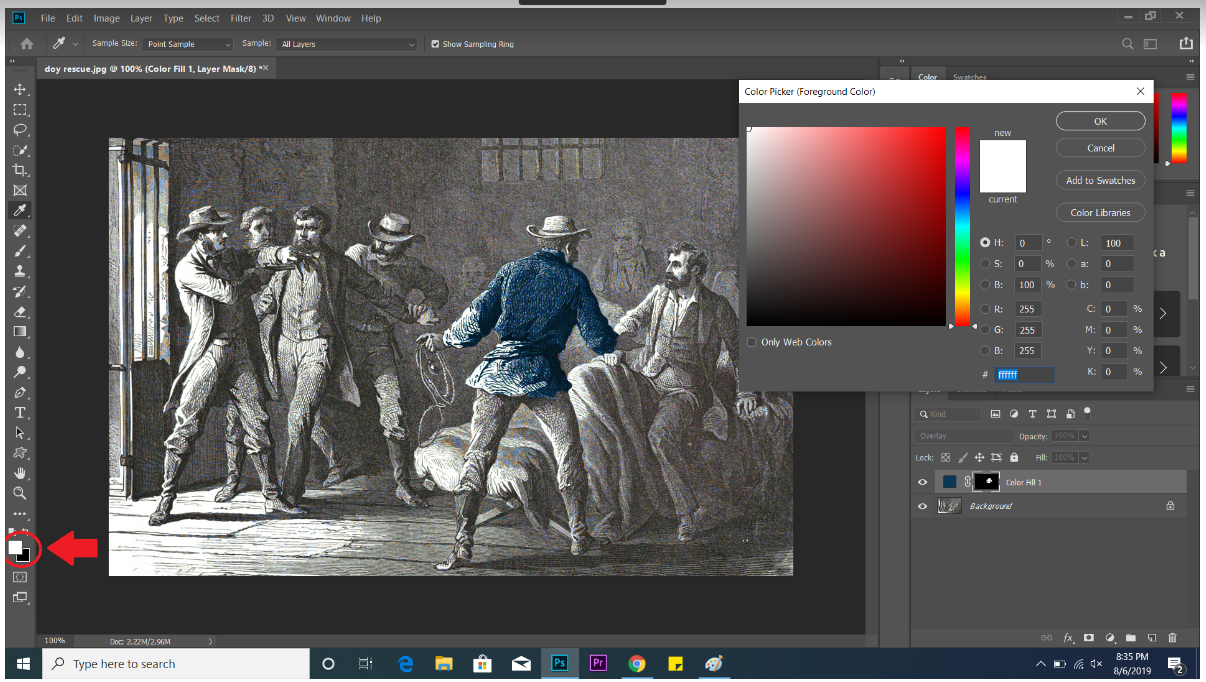
 2. Choose your color by selecting “set foreground color” at the bottom-right hand corner of your screen.
4. When you are ready, click and drag to brush color onto your image. This allows you more precision and detail than the layers method, but will take more time if you are coloring a large area.
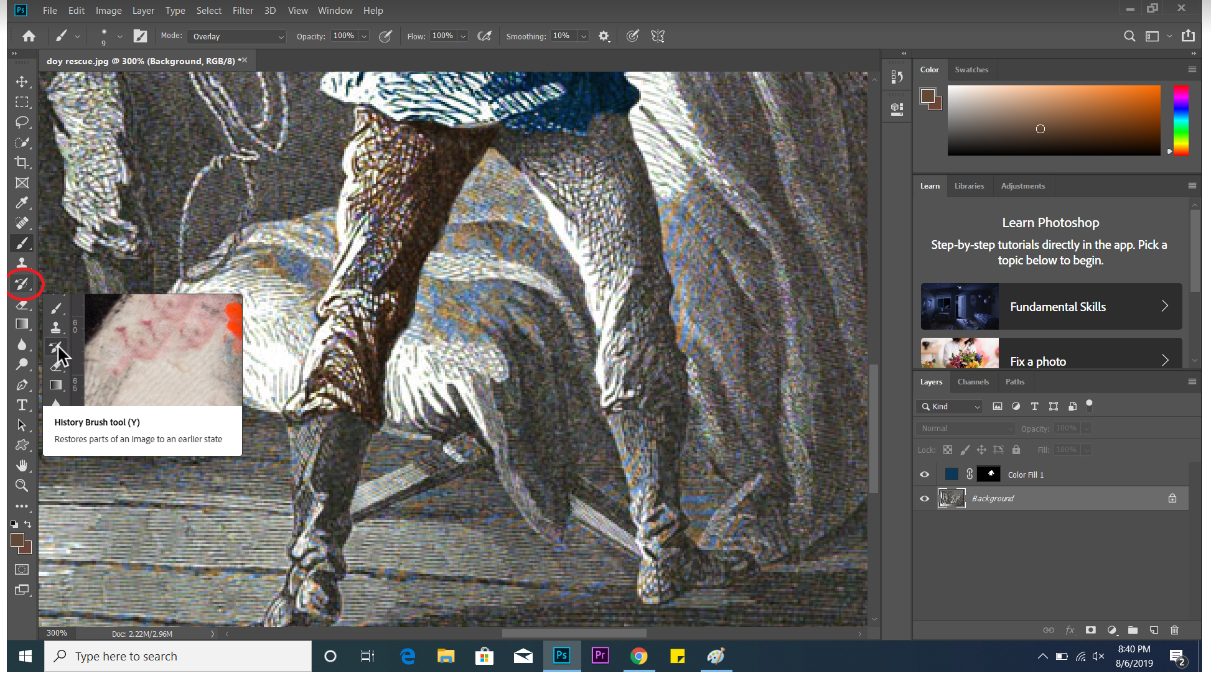
5. If you make a mistake, use the history tool to remove any alterations you made. This tool works the same as the brush tool; just click and drag over the area you want to correct, and it will be reverted to its original state.